
|
Grain Free. Gluten Free. Anti-Inflammatory. Low Carb. Vegan. Amazing. 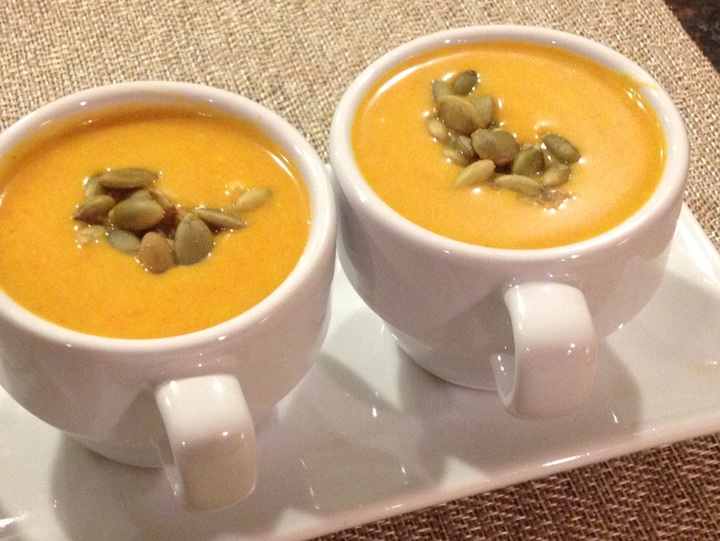 This soup is my new fall food addiction!! Seriously...I'm not kidding, I've made it three times in four weeks if that tells you anything:) With ingredients like ginger, garlic, curry, and carrots this soup boasts some highly anti-inflammatory properites and super soothing and calming to the tummy. Not to mention it really warms you up on a cold fall or winter day. I highly recommend adding some raw or roasted peptias on top for some extra protein, healthy fats, and energy boosting properties to keep you feeling fuller longer.
You can pair this soup with a nice raw salad for lunch or try it with our Kale with Caramelized Shallots for dinner. This would also make an awesome appetizer or starter course for your upcoming holiday meal or dinner party. I like to serve soups like this in small tea or espresso cups when I'm having a fun, festive dinner party. Whether you consume this soup straight out of the pot or from a cute espresso cup, I know you will love it! Curried Sweet Potato & Carrot Soup (PRINT RECIPE) Serves 4 Ingredients: 1 tablespoon coconut oil 1 onion, peeled and roughly chopped 1 clove garlic, minced 4 large carrots, unpeeled, roughly chopped (about ½ inch pieces) 1 small-medium sweet potato, peeled and roughly chopped (about ½ inch cubes) 3 cups vegetable broth 1 (15-ounce) can full-fat coconut milk 1 tablespoon freshly chopped ginger root 2 teaspoons mild curry powder (optional) (Substitute ground turmeric for an anti-inflammatory boost) ½ teaspoon salt ½ teaspoon pepper Garnish: Fresh herbs, pepitas, sunflower seeds, and/or chili flakes Directions:
Enjoy Friends! ~Billie
0 Comments
Grain free. Dairy free. Soy free. Low carb. Anti-Inflammatory. Full of flavor. 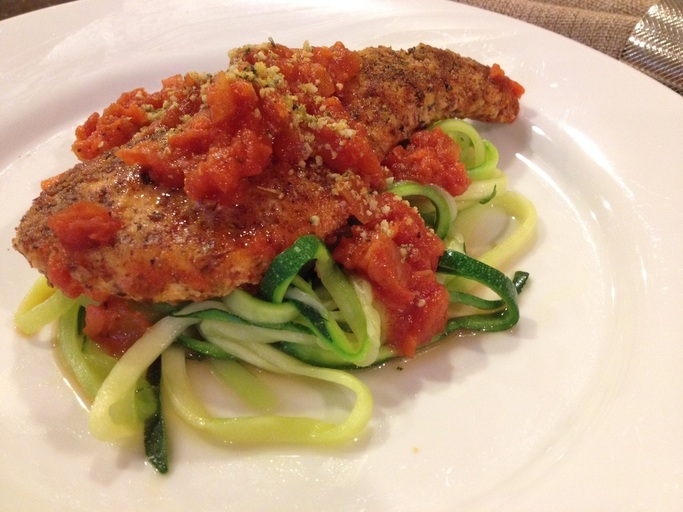 I always say that healthy eating is easy as long as the food tastes good and is easy to make. Right?! Don't you agree?
In fact, when I first started changing the way I ate, moving toward a cleaner, healthier diet, I would take dishes I was familiar with and make them into healthier versions while still keeping true to all the traditional flavors. This helped my pallet slowly crave these healthier dishes rather than the traditional versions. One of my favorite dishes has always been Chicken Parmesan and so I developed this recipe to enjoy this meal without grains, dairy, or soy! I use zucchini noodles instead of pasta and a combination of dried herbs and almond meal as the breading. Then I top it off with some Hemp Parmesan, a topping that brings out that cheesy taste and texture and really makes this dish come together. The chicken comes out so tender and full of flavor, I just know you will love it. Check it out... Easy Chicken Parmesan (PRINT RECIPE - ANTI-INFLAMMATORY VERSION) Serves 4 Ingredients: 4 (6-ounce) organic, free range chicken breast 1 cup almond meal* ¾ teaspoon dried basil ¾ teaspoon dried oregano ½ teaspoon paprika ½ teaspoon garlic powder/garlic granules ½ teaspoon salt ½ teaspoon pepper 2 organic, pastured eggs, lightly beaten 2 cups organic jarred marinara** 2 tablespoons grapeseed oil Cooking spray ¼ cup Hemp Parmesan (PRINT RECIPE) 1 recipe Simple Sautéed Zucchini Noodles (PRINT RECIPE) Directions:
*If you are not sensitive to dairy or grains but like to eat clean and healthy, check out our other versions of this recipe that include some dairy and grains: Easy Chicken Parmesan - Clean Plate Easy Chicken Parmesan - Gluten Free **Make sure to choose organic sauce with all natural ingredients and no added sugar. Or make your own:) Let me know what you think...and as always, enjoy! ~Billie Grain Free. Vegan. Mostly Raw. Bursting with Flavor. 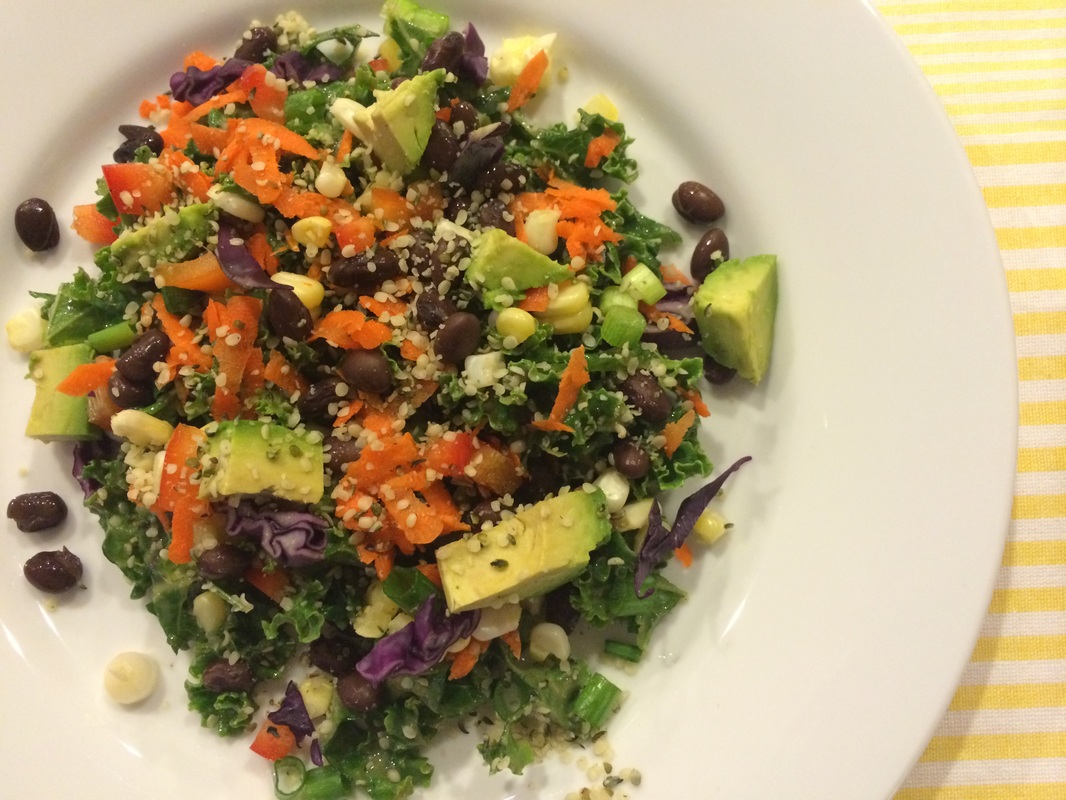 Jen and I made up this recipe for the first time last summer and it has been a favorite in both our households ever since. This salad is delicious and you can make it almost year round for a nutrient dense meal that fills you up without slowing you down. This salad is packed with 15.4 grams of protein and superfoods like kale, hemp seeds, cabbage, and avocado to replenish your antioxidants, nourish your immune system, and give you more energy.
If you've never tried a raw kale salad before then this is great recipe to get started with. I know what some of you are thinking...raw kale tastes really bitter, right?! Actually, the secret to a good raw kale salad is letting the chopped kale leaves marinate in the dressing for 15-20 minutes (or more) while you prepare the rest of your meal or sit down and enjoy a cocktail. The vinegar in the dressing will work to break down the tough, fibrous leaves of the kale, leaving you with a surprisingly amazing combination of flavors to enjoy! Just trust us on this one. My husband doesn't like to have salad as meals, but this is one he asks for regularly. Once you get it all mixed together and take your first bite, you will be hooked! This salad also keeps really well (won't get soggy like most leftover salads) for a great lunch the next day. If you are following our Anti-Inflammatory Eating Plan, we've designed a version for you as well that eliminates the soy and the beans and reduces net carbohydrates, PRINT ANTI-INFLAMMATORY VERSION HERE. Kale Refresh Salad with Tahini Dressing (PRINT RECIPE) Serves 4 Salad Ingredients: 1 bunch kale, stems removed, washed and finely chopped 2 ears fresh sweet corn or 1 cup thawed, frozen corn 1 (15-ounce) can black beans, drained and rinsed 1 red bell pepper, chopped ½ carrot, grated 1 small white or yellow onion, chopped ½ cup shredded cabbage 1/3 cup raw sunflower or hemp seeds 1 avocado, chopped Dressing Ingredients: ¼ cup white miso paste 3 tablespoons low sodium tamari or soy sauce/or gluten free soy sauce or tamari 3 tablespoons maple syrup 2 tablespoons olive oil 3 tablespoons tahini 2 tablespoons apple cider vinegar 2 tablespoons seasoned rice vinegar Pinch black pepper ½ teaspoon coriander Pinch of cayenne Directions:
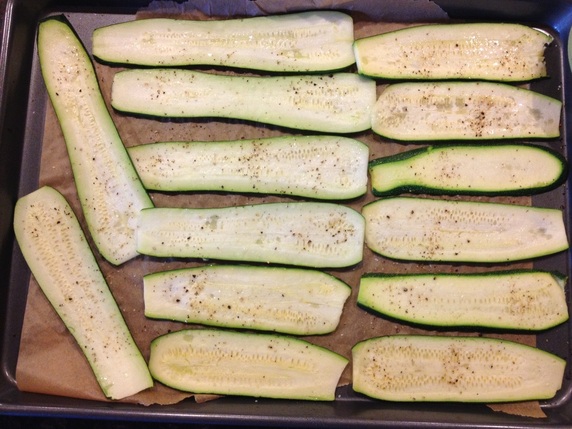
We hope you enjoy this recipe as much as our families do! Happy eating! ~Billie & Jennifer Grain Free. Vegan & Vegetarian Versions. Anti-Inflammatory. Delicious. 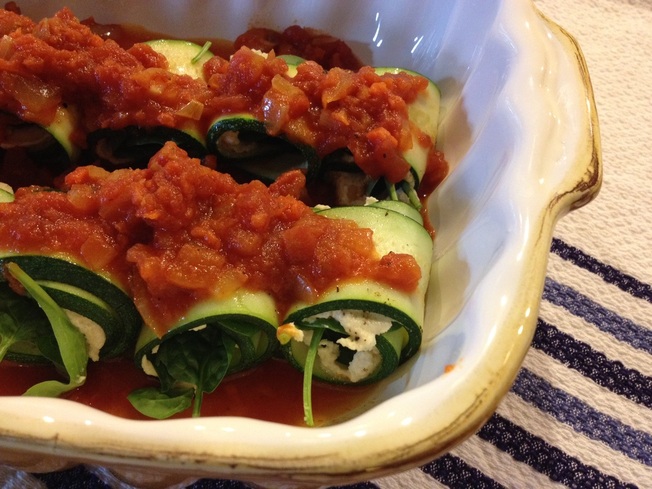 So... I still have lots of zucchini coming out of my garden...and I love it...there is just something so wonderful and fulfilling about walking outside your house and picking food straight off the vine from your yard! This year I especially love zucchini since it makes such a great low carb substitute for pasta and noodles! It inspired me to create this recipe with super simple and fresh ingredients. It is sure to be a hit on any dinner table and we have a dairy free/vegan version for those of you who are not friends with dairy. Easy Zucchini & Spinach 'Lasagna' Rolls Print Vegetarian Version Print Vegan & Anti-Inflammatory Version Serves 4 Ingredients: 3 medium zucchinis, sliced in half lengthwise Cooking spray (grapeseed or olive oil) Salt & Pepper ½ yellow onion, diced ½ red bell pepper, diced 2 cloves garlic, minced 5 ounces baby spinach 1 cup ricotta (OR for vegan and anti-inflammatory version substitute 1/2 Recipe Cashew Cheese) 2 cups jarred, organic marinara sauce** **If you are sensitive to nightshade vegetables, you could substitute marinara for pesto or mushroom sauce. If using pesto, just wait to put the sauce on until the last 5 minutes of cooking time. Directions:
 4. While the zucchini cooks, spray the bottom of a medium saucepan with cooking spray and place it over medium heat. Then add the garlic, onion, and bell pepper and sauté until onions are translucent, about 4 minutes. 5. Pour the marinara sauce into the saucepan and mix well to combine. Let simmer over medium-low heat until zucchini comes out of the oven. 6. Spread ¼ cup of marinara over the bottom of a 9 x 13 casserole dish. 7. Smear a scant tablespoon of ricotta or cashew cheese on one end of each zucchini roll slice, drop a small handful of spinach leaves on top of the cheese and then roll up, starting with the cheese side first. 8. Place rolls seam side down in the casserole dish. 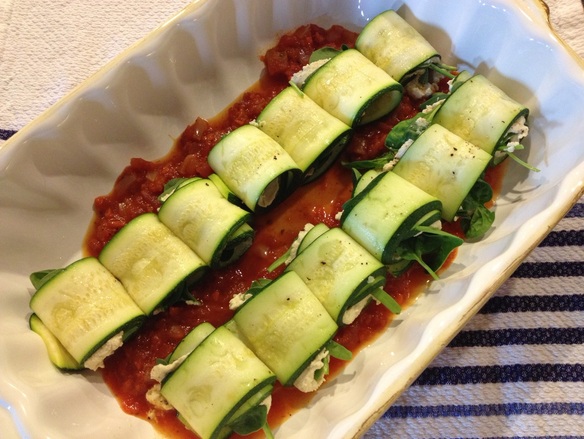 9. Smother with remaining marinara sauce and bake for 15-20 minutes.
10. Serve hot and enjoy! Happy Eating! ~Billie Gluten Free. Dairy Free Version. Soy Free Version. Delicious. 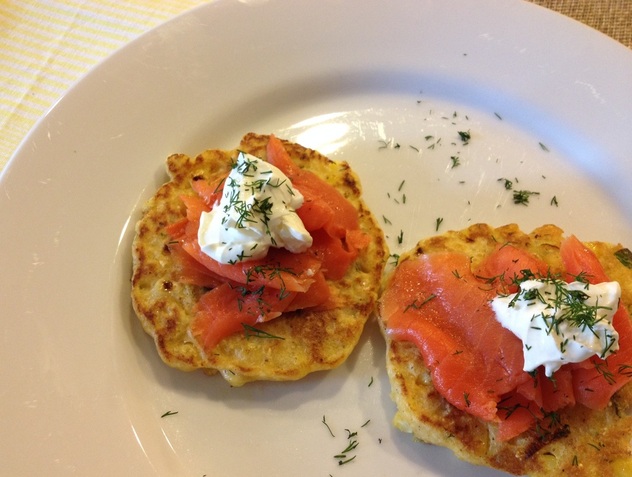 This simple recipe highlights the flavors and crunch of fresh raw corn from the cob and gives you a high dose of anti-inflammatory Omega-3 fats from the wild caught salmon, all at the same time. The fritters are mostly fresh corn with only a small amount of organic corn meal and brown rice or quinoa flour added. This makes them pretty low in carbs and high on the crunch and freshness scale.
These beauties also come together in around 30 minutes and make a great light meal paired with fresh greens or even roasted asparagus. This is hands down one of my husbands' favorite recipes and I thought is was about time that I share it with you as well. Check it out... Summer Corn Fritters with Wild Smoked Salmon (PRINT RECIPE) Serves 4 Ingredients: 2 ears corn (corn cut off the cob raw) or 1 1/2 cups frozen ¼ cup finely ground cornmeal ¼ cup whole wheat, brown rice flour, or quinoa flour 1 tablespoon arrowroot powder or cornstarch 1 teaspoon baking powder ¼ teaspoon salt ¼ teaspoon chili powder ¼ teaspoon freshly ground black pepper ½ jalapeño, seeded and finely chopped (1 diced green onion works well here too) 1 tablespoon fresh dill, chopped 1 egg, lightly beaten ½ cup milk of choice (whole, coconut, almond, soy, rice, hemp, etc) 1 tablespoon coconut or grapeseed oil 16 small slices smoked salmon or lox (about 8 ounces) ½ cup crème fraîche or sour cream* *Dairy free use our Non-Dairy Sour Cream recipe or substitute a freshly sliced avocado for a dairy and soy free meal. Directions:
Mmmm....delicious! Take advantage of the fresh corn while you still can...I hope you enjoy these! ~Billie Raw. Vegan. Grain Free. Gluten Free. Soy Free Version. Incredible. 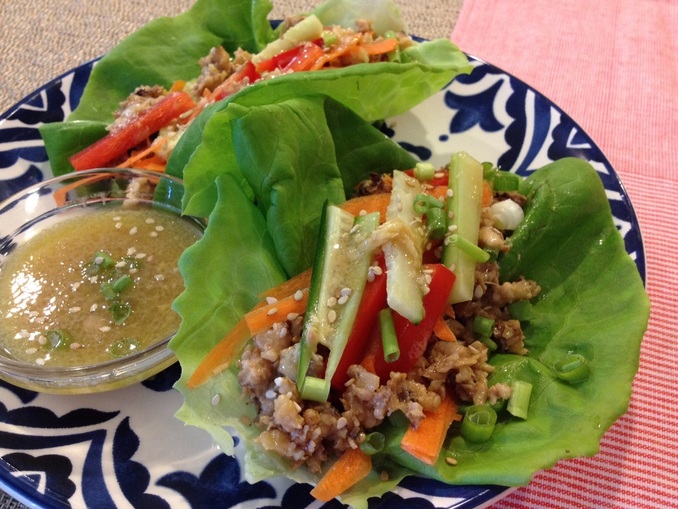 To me these lettuce wraps are reminiscent of the infamous PF Chang's chicken lettuce wraps...seriously...they surprisingly carry most of the same delicious flavors and textures and really hit the spot! I had tried walnut-lentil tacos before and LOVED them, but I was skeptical about just using walnut meat alone...enter this delicious recipe introduced to me by my lovely business partner and co-author, Jennifer Brown. Another plus, they come together in under 30 minutes with no oven necessary and the leftovers taste great for a few days to follow.
I made this batch with carrots, bell peppers, and cucumbers as my veggies, but you could add or substitute celery, bean sprouts, zucchini, or avocado here just as easily. We've also added our Miso-Ginger Dressing that is a must have pairing to this satisfying dish. While this meal might look light, it is packed with nutrient dense foods rich in healthy fats that will keep you feeling fuller longer. You can learn all about the health benefits of walnuts on our blog, Health Benefits of Walnuts. Asian Walnut Lettuce Wraps with Miso-Ginger Dressing (PRINT RECIPE) Serves 4; Serving Size 2-3 lettuce wraps Ingredients: 2 cups raw walnuts 4 teaspoons soy sauce or tamari (gluten free soy sauce or tamari if needed)* 1 inch fresh ginger root, peeled and minced or grated 2 tablespoons olive oil 2 cloves garlic, minced 1 tablespoon sriracha or chili garlic sauce 2 tablespoons maple syrup ½ teaspoon sesame seeds 1 head Boston or Bibb lettuce (sub iceberg/chard if you can’t find) 3 carrots, shredded ½ red bell pepper, thinly sliced 2 scallions, chopped Sesame seeds for garnish Directions:
We hope you enjoy these as much as we do! Happy eating! ~Billie & Jen *For soy-free version substitute coconut aminos for soy sauce or tamari and use Sesame-Ginger Dressing (Click here for recipe). Raw. Vegan. Grain Free. Low Carb. Amazing. 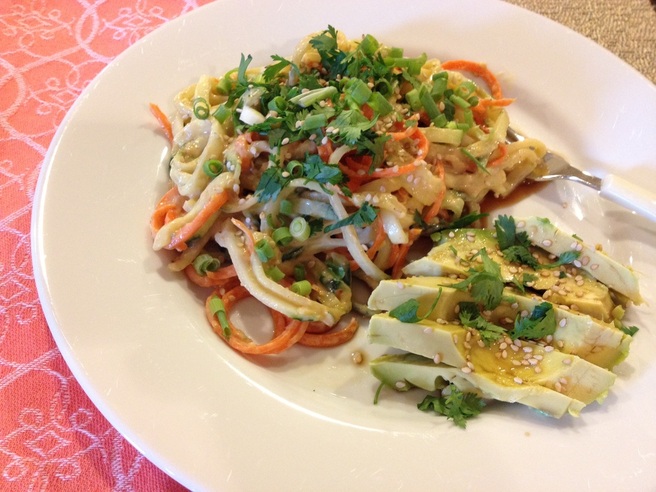 This has been one of my favorite go-to recipes for the last few weeks since cucumbers are so abundant right now. In fact, this recipe is so good, today is the fourth time I've made this in the last 2 weeks. And so...I'm inspired to share it with you...and I hope you will share it with others!
With ingredients like ginger, garlic, cucumbers, carrots, cilantro, lime, and green onions - this meal will help to alkalize and detoxify your body, leaving you feeling refreshed and renewed! It's also filled with healthy fats like sesame oil, peanuts, and avocados to nourish your immune system and support good cardiovascular health. Plus cucumbers are packed with antioxidants, B vitamins and phytonutrients to boost nutrition- head on over to our blog, Health Benefits of Cucumbers , to learn more. Cucumber & Carrot Noodle Salad with Peanut or Almond Dressing (PRINT RECIPE) (PRINT ANTI-INFLAMMATORY RECIPE) Serves 4 Salad Ingredients: 3 large cucumbers, peeled 1 large carrot, peeled ¼ cup fresh cilantro, chopped 4 green onions, diced ¼ cup peanuts, chopped Peanut or Almond Dressing: ¼ cup peanut butter (almond butter for anti-inflammatory version) 2 tablespoons water 1 tablespoon rice vinegar 1 tablespoon soy sauce or tamari (coconut aminos for anti-inflammatory version) 1 inch ginger, grated 1 clove garlic, minced Zest & juice of one lime 2 teaspoons maple syrup 1 teaspoon sesame oil Directions:
If you can't do nuts or want a lighter dressing, try our Sesame-Ginger Dressing with this salad instead. Sesame Ginger Dressing: 2 1/2 tablespoons olive or flax oil 1/2 tablespoon sesame oil 2 tablespoons rice wine vinegar 1 tablespoon sesame seeds 1 teaspoon coconut aminos 1 teaspoon honey 1/2 teaspoon grated ginger Jen and I like to serve this salad with our Avocado Boats (PRINT RECIPE) on the side - it makes for a perfect combination of flavors and textures, and of course adds a great serving of healthy fats. Seriously...a MUST TRY RECIPE this summer! Please post back and let me know how you like it! Happy eating! ~Billie **If you need a good spiral slicer, they are super handy when you want to eat low carb and gluten free. I use a product called Gefu (click here to see details) that I really like, it's easy to use. Or there is a product called Veggetti (this is an 'as seen on tv product)- I've not used it, but know a few people who have and say it works just the same as the Gefu. Hope this is helpful. Gluten Free. Vegan & Soy Free Versions. Anti-Inflammatory. 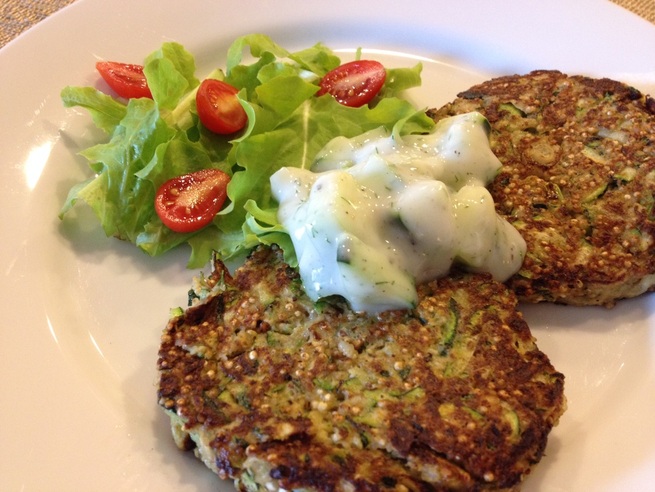 These patties may just become one of your favorite summer go to meals. We've used finely ground raw quinoa and walnuts in place of breadcrumbs here to give you a low carb meal that is high in protein as well. We like to soak the quinoa while we prepare the rest of the meal - this can make it a little easier for the tummy to digest. This is what your quinoa-walnut meal should look like after processed. 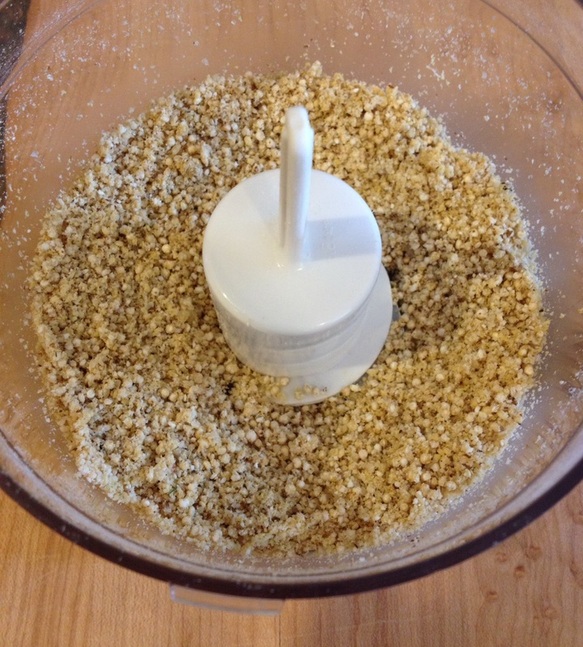 These patties are actually pretty filling on their own, so we recommend pairing them with something light like mixed greens or crispy kale. You will grate the zucchini and then let it sit in a colander to sweat out its extra moisture. The batter will be wet and you will not be able to form patties with it easily. We recommend placing the batter in the fridge for 10-20 minutes if you have time prior to cooking to help it stick together. To make your patties, simply, use a 1/3 cup measuring cup and scoop out the batter, then place the mound in a hot skillet and smoosh into a pattie using a spatula. Check out the rest of the ingredients and directions below...
Zucchini-Quinoa Patties with Tzatziki Sauce (PRINT RECIPE) Serves 4 (PRINT VEGAN RECIPE) (PRINT DAIRY FREE RECIPE) (PRINT ANTI-INFLAMMATORY RECIPE) (gluten free, dairy free, soy free) Directions: 1/2 cup uncooked quinoa 1/2 cup raw walnuts, chopped 3 medium zucchini, grated (about 4 ½ cups) 1/2 teaspoon salt, divided 3 green onions, thinly sliced 3 tablespoons fresh dill 1/2 teaspoon pepper 1 egg, lightly beaten 1-3 tablespoons ground flax seed or almond meal 2 tablespoons grapeseed oil, divided Tzatziki Sauce: 1 cup plain Greek yogurt or non-dairy yogurt for our vegan friends 1 tablespoon fresh dill or 1 teaspoon dried 1/2 medium cucumber, peeled and diced 1 ounce feta cheese, crumbled (optional) 1 garlic clove, minced Juice of half a lemon 2 teaspoons apple cider vinegar (vegan version only) Salt and pepper to taste Directions:
Enjoy! ~Billie & Jennifer Gluten & Dairy Free as well as Grain Free & Soy Free Variations 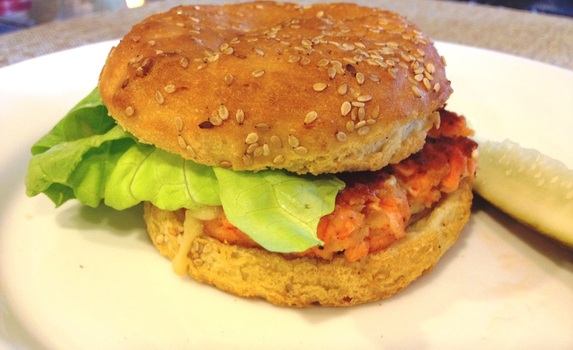 Yesterday I made this dish for my mama for Mother's Day and I was reminded just how lovely this meal is, so I wanted to share it with each of you as well.
This recipe is one of my favorites because it uses the Cook Once, Eat Twice approach - it will ensure you get two healthy meals while only putting forth the time and effort of cooking one meal. These burgers start with our basic Lemon Pepper Salmon Recipe linked below. This is a oven baked salmon that packs a flavorful punch and comes together in only 10-15 minutes of hands on time. I recommend doubling this recipe when you make it. You can eat it the first night as a regular salmon filet with a nice side or steamed or roasted veggies. The recipe also contains a Horseradish-Chive Sauce you can have on the side for some extra fancy in your meal. Then take your leftover salmon, break it apart into small pieces while it's still slightly warm and toss it in a airtight container in the fridge for up to 3 days--whenever you are ready to make your Lemon Pepper Salmon Burgers. Alternatively you could freeze the cooked, flaked salmon in freezer safe container for up to 3 months, and then defrost completely in the refrigerator before making the burgers. These burgers are rich and juicy on the inside but have a nice crunchy outer layer you will love to bite into! If you've already pre-cooked your salmon, then these burgers come together in under 30 minutes the night of your meal. I've also added a Miso-Sesame Dressing to smear on top of the burger for a nice accompanying taste. All you have to do is pile on lots of crisp lettuce and whatever additional garnishes sound delicious to you and enjoy! If you are following a low carb diet, do what I do and wrap your burger in a butter lettuce wrap instead...I promise it is just as wonderful! Lemon Pepper Salmon Burgers with Sesame-Miso Dressing or Sesame Ginger Dressing (PRINT RECIPE) (PRINT ANTI-INFLAMMATORY - GRAIN & SOY FREE) Serves 4-6 Ingredients: For the Salmon Cakes: 1 recipe lemon pepper salmon cooked* (PRINT LEMON PEPPER SALMON RECIPE) 3 green onions, thinly sliced 2/3 cup to 1 1/3 cup panko; more as needed (can substitute gluten free breadcrumbs or almond meal) 1-3 tablespoons mayo 1 large egg, beaten 1 tablespoon soy sauce, gluten free soy sauce, or coconut aminos ¼ teaspoon salt ¼ teaspoon pepper 2 tablespoons grapeseed oil Burger Fixings - avocado, buns/gluten free buns, romaine or other greens For the Sesame-Miso Dressing: 1 2-in piece fresh ginger, peeled and grated 4 tablespoons white miso 2 tablespoons rice vinegar 1 ½ tablespoons sesame oil 1 tablespoon honey or agave For the Sesame-Ginger Dressing (Soy Free): 1 2-in piece fresh ginger, peeled and grated 1 tablespoon sesame seeds 1 ½ tablespoons rice vinegar 1 ½ tablespoons sesame oil 1 ½ tablespoons olive oil 2 teaspoons honey or agave Directions:
TIME SAVING TIPS: *This recipe calls for you to make the Lemon Pepper Salmon Recipe (PRINT RECIPE) first before assembling the salmon burgers. I recommend making a double or even triple batch of this recipe (depending on the size of your family). Your first meal can be the night you make the salmon - Broiled Lemon Pepper Salmon and steamed green vegetables of choice for a quick, easy meal. Then save the leftovers in an airtight container in the fridge for up to 3 days to make your burgers for another meal(s). You can also make the recipe the same night and immediately use it for the salmon burger recipe or place pre-made salmon burger patties between parchment and into an airtight container in the fridge. Your second meal comes together quickly by frying up the burger patties on your stove-top, tossing them into a lettuce wrap or bun and adding some green vegetables of choice on the side. One batch of salmon will make 4-6 burgers, so if you've tripled the recipe, you can use cooked salmon burger patties over mixed salad greens for an easy lunch as a third meal from this recipe. Or place uncooked patties between parchment and into a freezer safe container. Freeze for up to 3 months. Defrost in the fridge the night prior to your meal. These will fry up beautifully again and you will have a fourth meal from this one recipe! Love that!! Please let me know what you think after you've tried the recipe. Feel free to also share creative ways you found to use these salmon patties! Happy Eating! ~Billie Vegan & Gluten Free 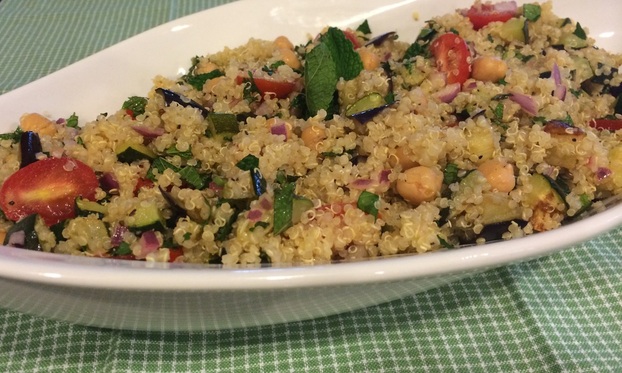 This lovely dish comes comes together in 45 minutes and is loaded with protein and lots of amazing veggies, making it a filling main course or an excellent side dish to any summer meal or celebration. It is also a beautiful presentation with lots of color for your table setting.
We've used roasted eggplant and zucchini here, but feel free to change up the veggies to suit your own taste. Asparagus, roasted tomatoes, or artichokes would all work well in this recipe. You could also skip the roasted veggies and do diced cucumbers instead for an even lighter taste. Roasted Vegetable Tabbouleh We hope you enjoy! ~Jennifer & Billie Grain Free. Soy Free. Vegetarian. Vegan. Anti-Inflammatory 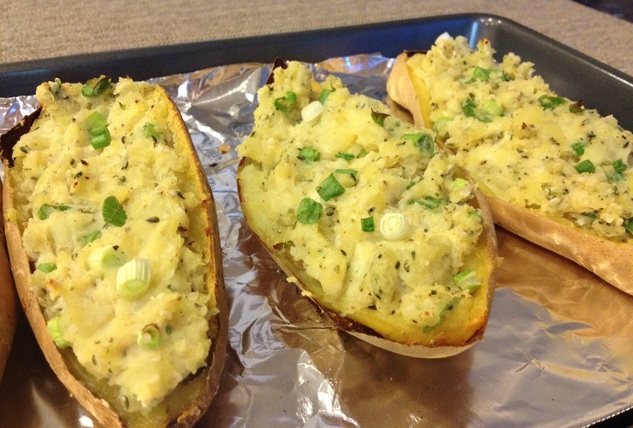 This is a new spin on twice baked potatoes that packs a flavorful punch! I prefer to use white skinned sweet potatoes in this recipe, but if you can't find them then russets will work just as well.
These stuffed potatoes can easily stand alone as a main dish because they are packed with protein (7 grams) and fiber (8 grams) as well as a nice dose of healthy Omega 3 and 6 fats. Many of these health benefits mostly come from the hemp seeds. In fact hemp seeds are 33% protein and contain all 9 essential amino acids- you can check our blog, Health Benefits of Hemp Seeds, to learn more about one of natures best and most versatile seeds. Herb & Hemp Stuffed Potatoes: (PRINT RECIPE) Serves 4 Ingredients: 4 medium white skinned sweet potatoes* 1-2 tablespoons organic miso paste (leave out if you are soy free and increase salt to 1 teaspoon) 1/4 cup raw cashews 3 tablespoons nutritional yeast 2 tablespoons lemon juice 1 tablespoons olive oil ½ teaspoon salt ¼ teaspoon pepper ½ cup chives or green onions, finely diced ¼ cup parsley, finely diced ½ cup raw hemp seeds Directions:
***To cut out 15-20 minutes cook time and get this meal on the table quicker, you can pre-cook your potatoes in the microwave for 5-7 minutes before putting them in the oven (if you are ok with using the microwave...if you are not, I totally get it). Just pierce with a fork and wrap in a tea towel or paper towel first. Enjoy! ~Billie Gluten Free. Vegan. Soy Free and Low Carb Version Available. 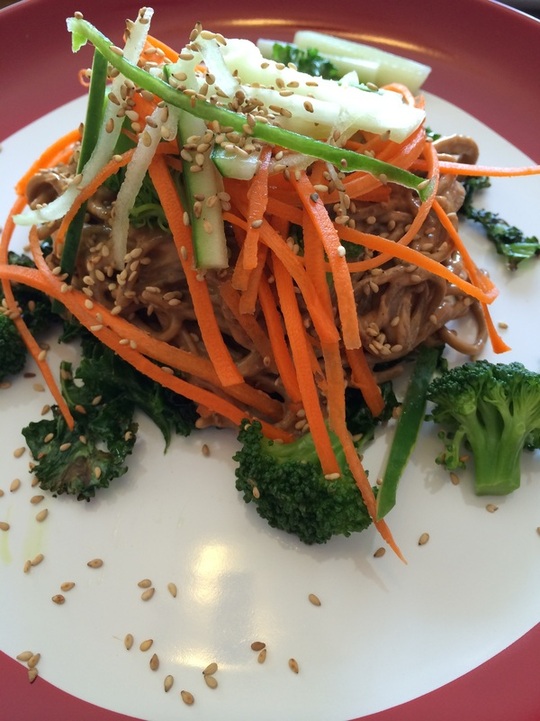 This past weekend Billie and I were lucky enough to be able to get our families together for lunch, which doesn't happen very often right now. I needed something fast but fun, so in celebration of some better weather (finally!) I broke out this tried and true recipe that never disappoints. I served it with avocado slices drizzled with sesame oil and tamari, and everyone went away satisfied!
This is a super versatile dish full of flavor that the whole family can enjoy. My kids (the pickiest eaters EVER) even eat these noodles with smiles on their faces and steamed broccoli on the side which makes me super happy! As a bonus, it also makes for a lovely table presentation if you are hosting a dinner or lunch - everyone will think you spent hours on it when it really only involves about 30 minutes in the kitchen. I love to serve this dish over a bed of greens - here I used our Crispy Kale recipe. You can make the noodles ahead of time if you want- they taste just as good at room temperature or even cold as they do hot. I used 100% buckwheat soba noodles since our guests were gluten free, but you can also use lo mein or even brown rice spaghetti noodles instead and it will still be fabulous! Feel free to change up the veggies to match your taste and with the seasons. Bell peppers, snow peas, or zucchini would all be nice choices here as well. Peanut Sesame Noodles (PRINT RECIPE) (PRINT GLUTEN FREE) (PRINT ANTI-INFLAMMATORY) Serves 4 Ingredients: 8 ounces lo mein noodles** Small head broccoli, cut into florets 1 large carrot, cut into matchsticks ½ cucumber, cut into matchsticks 1/3 cup peanut butter 3 tablespoons water 3 tablespoons maple syrup 1 tablespoon seasoned rice vinegar 1 tablespoon soy sauce or tamari/gluten free soy sauce/coconut aminos 1 tablespoon hoisin sauce 1 tablespoon tomato paste 1 teaspoon sesame oil 1 tablespoon sesame seeds Directions:
**If you are gluten, dairy, soy free and low carb, try out Ant-Inflammatory Version - we substitute shiritaki noodles or zucchini noodles instead of soba noodles or lo mein. Enjoy and let us know what you think! ~Jennifer Vegan & Gluten Free 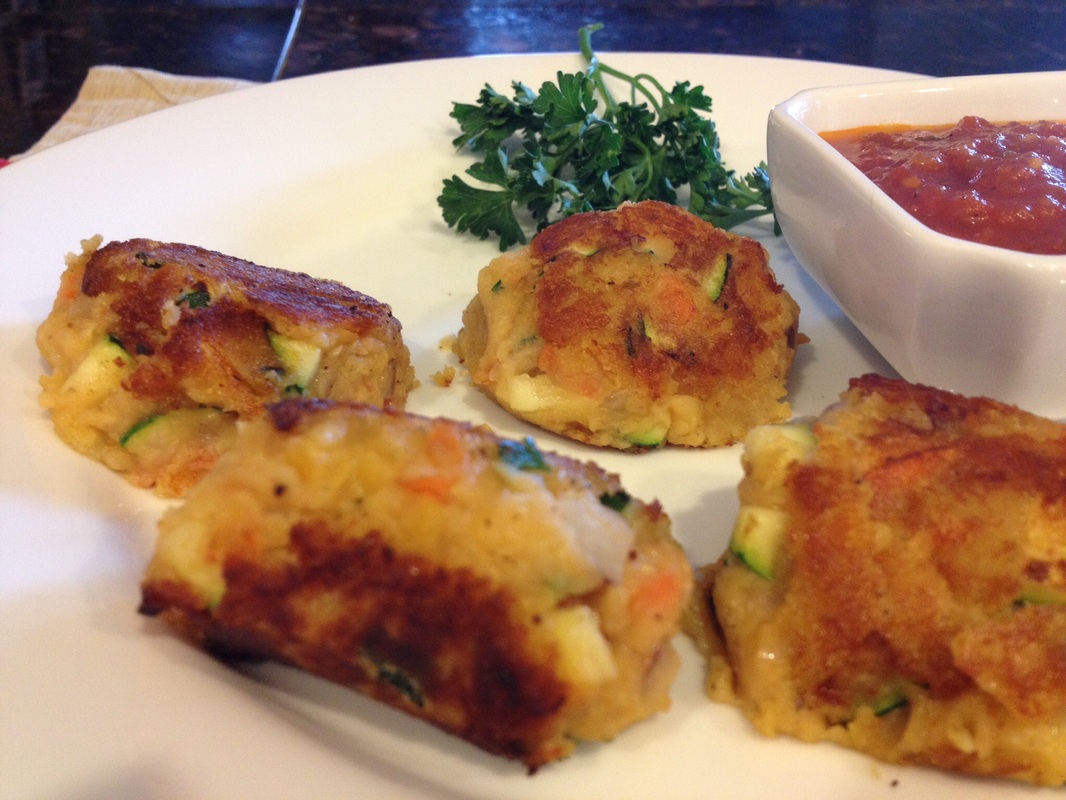  Golf ball sized lentil meatball dough on parchment lined cookie sheet. 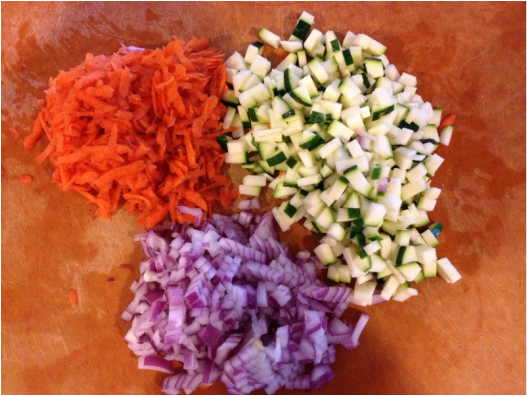 Dice veggies really small for the best consistency. These hit the spot for that savory, comfort food craving we all have once in awhile! They have a crispy, fried texture on the outside and soft, almost creamy flavor on the inside with chunks of fresh veggies all mixed in.
You have to just trust us on this one - these are AMAZING! Both of our husbands looked at us like we were crazy when we made these and now both are requesting this dish weekly. They come together in under 45 minutes and you can easily double your batches and freeze them for another quick meal down the line. You can have about 5 of these guys for just over 300 calories and only 3.2 grams of fat. The lentil base means they are packed with protein (18 grams) and offer MORE THAN your daily allowance for fiber! These are naturally vegan and can be gluten free as well (see recipe). We like to pair these with warmed marinara sauce and braised garlic greens or roasted broccoli on the side. As you mix the cooked lentils with the other ingredients, the lentils sort of 'cream' or 'mush' a bit and a sticky 'batter' will be formed. You can cook these right away by following the directions on the recipe and/or double and freeze a batch or two for later. To do this simply line a cookie sheet with parchment paper and drop golf ball sized dough pieces 1/2 inch apart, then freeze overnight. Remove cookie sheet from the freezer in the morning and place meatballs in a freezer safe bag or container for up to 3 months. When you need a quick meal on a busy weeknight, simply allow them to defrost on the counter-top for about 15 minutes (or until soft) and then cook as directed. They may need to cook a little longer than a fresh batch. Lentil Meatballs (PRINT RECIPE) (PRINT GLUTEN FREE RECIPE) (PRINT ANTI-INFLAMMATORY RECIPE) 4+ servings (Makes 4-5 meatballs per person with a few left over) Ingredients: 1 cup dry red or yellow lentils 2 cups water ½ tablespoon grapeseed oil 1 small red onion 1 medium zucchini 1 medium carrot 1 clove garlic 1 handful fresh parsley ½ cup breadcrumbs/gluten free breadcrumbs or download the Anti-Inflammatory recipe above that is grain free 1 tablespoon flour (All purpose or chickpea) 1 tablespoon soy sauce or tamari/gluten free soy sauce or tamari or coconut aminos Salt and pepper to taste Grapeseed oil for frying—about 2 tablespoons Directions:
~Jennifer & Billie Grain Free. Vegan. Amazing. 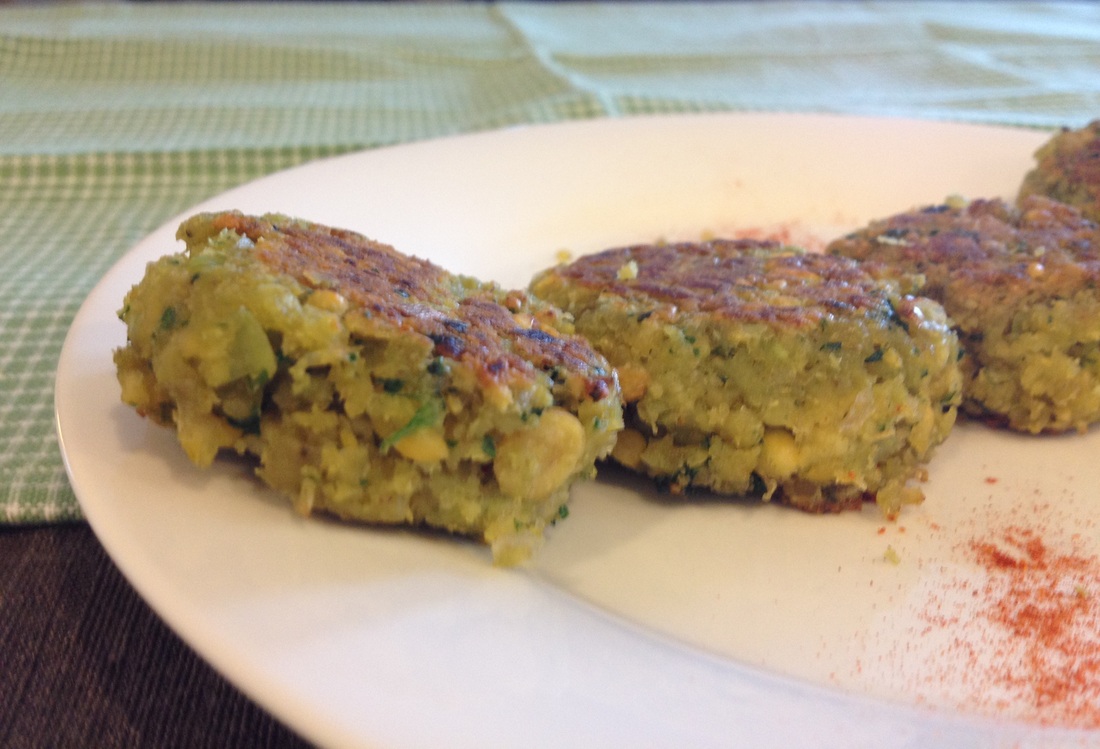 This is one of our favorite recipes! These falafels come out tasting just like the traditional restaurant quality version but with half the fat and calories. They are also naturally grain-free and vegan, so they are paleo friendly as well. But don't let the words (Grain Free and Vegan) fool you because you will feel like you are eating the real deal here - I promise! Every time I've passed along this recipe or made it for guests they are blown away.
This recipe comes together in under 40 minutes the night of your meal. You will soak 1 cup dried chickpeas and 1/2 teaspoon baking soda in 3-4 cups cold filtered water overnight. You can get dried chickpeas in the bulk section of most grocery stores. Do not use canned beans as the consistency will not work out at all if you do. You can serve everything over your favorite mixed greens or inside a pita or wrap with Tzaziki Sauce. Or, try drizzling our Creamy Cucumber Ranch Dressing instead of Tzaziki for a dairy free and soy free option...this dressing is great for those on our Anti-Inflammatory Eating Plan. See details and the get recipe below: Traditional Falafels (PRINT RECIPE) Serves 4 Ingredients: 1 cup dried (not canned) chickpeas (garbanzo beans), rinsed ½ teaspoon plus ¾ teaspoon baking soda, divided 1 small leek, white and light green parts, chopped 1 cup fresh parsley, chopped 3 cloves garlic, chopped 2 tablespoons lemon juice 2 teaspoons cumin ½ teaspoon salt ¼ teaspoon paprika ½ teaspoon pepper 3-4 drops hot sauce (optional) 2-4 tablespoons coconut oil or grapeseed oil Garnish: Lettuce or mixed greens of choice Veggies of choice Pitas or wraps of choice Tzaziki Sauce (PRINT RECIPE) (PRINT DAIRY FREE Tzaziki RECIPE) or our Creamy Cucumber Ranch Dressing Directions:
Enjoy and let us know what you think... ~Billie P.S. - EXTRA COOL TIME SAVING TIP! Cook once, eat twice...If you find yourself liking this recipe as much as I do, then you will want to double it! I ALWAYS double or even triple this recipe and then place uncooked falafels on a parchment paper lined cookie sheet and freeze overnight. Remove the cookie sheet from the freezer and place frozen falafels in freezer safe bag or container and freeze for up to 3 months. These make super quick meals down the road when you need to throw something together fast. Just place frozen falafels on the counter top for 10 minutes prior to cooking them in hot oil and increase cooking time by 3-6 minutes, or until golden browned. Vegan. Gluten Free. Anti-Inflammatory. 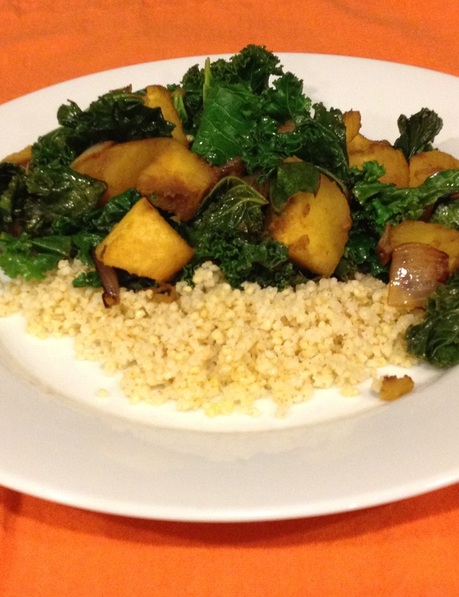 I know what you're thinking...millet?! Huh?! Millet is a lesser know grain that has a slightly sweet and fairly nutty flavor. It is similar to quinoa in appearance but slightly 'chewier' in texture. This gluten free grain is one of only a few grains that is considered to be alkalizing for the gut. I like to dry roast my millet in a pan before I cook it to bring out the nutty flavor. You can also season it as you dry roast it with cumin, salt, and pepper - YUM!
Now, let's discuss the rest of this colorful, alkalizing meal including roasted Kabocha squash, kale, pumpkin seeds and caramelized shallots...These three delicious ingredients all work to alkalize your body, decrease inflammation, regulate insulin levels, and improve digestion. This dish is loaded with enzyme promoting vitamins A & C to promote healthy digestion and filled with omega 3 fatty acids for heart health! At Meal Plans for Health, we consider Kabocha, butternut, acorn, and spaghetti squashes 'friendly carbohydrates' as their unique antioxidant properties actually work to help stabilize blood sugar. The kale and squash are both nutrient dense foods. In fact, this dish gives you: 785% of your daily recommended Vitamin A 196% of your daily recommended Vitamin C 20% of your daily recommended calcium (A little know fact that kale packs a ton of calcium.) 65.2% of your daily recommended Manganese (Key in assisting to stabilize blood sugars.) If you've never picked a Kabocha before, they look similar to an acorn squash in size but are mostly green with some white running through their skin. So, what are you waiting for? Get cooking! Here is the recipe: Balsamic Roasted Kabocha Squash & Kale with Pan Roasted Millet (PRINT RECIPE) Serves 4 Ingredients: 1 small kabocha squash* 4 shallots, quartered** 3 tablespoons balsamic vinegar 3 tablespoons coconut oil, melted 1 teaspoon salt 2 cloves garlic, minced 2 bunches kale, chopped ¼ cup pumpkin seeds/pepitas Water as needed For the millet: 1 cup millet 1 cup water 1 cup vegetable stock Pinch of salt 1 tablespoon extra virgin olive oil ½ teaspoon balsamic vinegar Directions:
Enjoy! ~Billie & Jen  There are two secrets to roasting the most amazing turkey that will have your friends and family begging you for the recipe and asking to you host again next year! Before I share those with you, I'd like to thank my step-mom, Debra Keuper, for sharing these with me - for more years than I can remember, she hosted Thanksgiving for 20-40 people and every year the turkey was perfectly amazing! Actually, everything was amazing and no one else in the family wanted to take over hosting Thanksgiving because she left such big shoes to fill....
SECRET #1 - BRINE YOUR BIRD! If you have never done this, this is the easiest and most important step to a perfectly juicy turkey. Brining is similar to marinating, you let the turkey soak in saltwater for 24 hours prior to cooking it. It increases the moisture holding capacity of the meat and results in a juicier product when cooked. Here is my brine recipe: Ingredients: 10 cups water 3 cups coarse salt 3 cups sugar 2 medium onions, coarsely chopped 2 medium leeks, white and pale-green parts only, rinsed and coarsely chopped 2 carrots, peeled and coarsely chopped 2 stalks celery, coarsely chopped 2 dried bay leaves 2 teaspoons whole black peppercorns (Optional - add 6 sprigs of your favorite fresh herbs - thyme, parsley, and rosemary are my favorite) **This is for a 15-20 lb turkey, if you have a larger bird, increase the sugar and salt by one cup each and add 2 more cups water. Directions: 1. Put all ingredients in a large stockpot and bring to a boil, stirring until salt and sugar dissolve. 2. Remove from heat and let brine cool completely. 3. If your stockpot is big enough, you can place your turkey directly into the pot of brine (BREAST FIRST), cover, and refrigerate for 24 hours. 4. Remove turkey from brine; pat dry with towels and let stand at room temperate for 30 minutes to 1 hour before roasting. NOTES: If your turkey is too big (most are) then you can use a BRINING BAG - sold in most kitchen stores (Bed Bath Beyond, Sur La Tab, Crate and Barrel, etc) and some grocery stores. If cannot find a bag or your turkey is too big for the bag, then you can do what I did last year and use a cooler. Yes, a camping cooler! If you live in a cool climate, you only need bit of ice to keep this bird cool enough, if you live in a warmer climate, then add more ice and store in a cooler place. SECRET #2 - USE A CHEESECLOTH DURING ROASTING! You can buy cheesecloths at most grocery stores. There are two ways to do this - one using no dairy or oils and only using broth and one slightly more indulgent version using butter and wine. The preference is yours. Either way, this comes out great. Here are the ingredients and steps to take: Ingredients: 5 cloves garlic. minced 2 teaspoons salt, divided 2 teaspoons pepper, divided 1 quart organic chicken broth Optional - 2 cups dry white wine plus 1-2 sticks organic, grass-fed unsalted butter (use this combination instead of broth) Directions: 1. Preheat your oven to 325. (You can look up the recommended cooking time based on the size of your bird here.) 2. Fold your cheesecloth into 4 quarters so that it is large enough to cover the breast. 3. Heat broth (or butter-wine mixture) in a small pot over medium heat. When hot and melted, add folded cheesecloth and immerse to soak completely. 4. Place the turkey, breast side up, in the roasting pan, fold wing tips under, sprinkle 1 teaspoon salt and pepper in the cavity and then loosely fill with stuffing (if using). Tie legs together with kitchen twine and fold the neck flap under; secure with toothpicks. Rub your turkey all over with minced garlic, salt, and pepper. 5. Remove cheesecloth from broth or butter-wine mixture and squeeze ever so gently. Lay dripping cheesecloth over turkey breasts and place turkey, legs first, into the oven. 6. Reserve broth or butter-wine mixture on stovetop and baste (or brush) onto turkey (soaking cheesecloth) every 30 minutes for the first 2 1/2 to 3 1/2 hours of roasting. Remove cheesecloth for the last hour to hour and half of cooking time. Once turkey juices start collecting in the bottom of the roasting pan, you can use those to re-baste and soak the cheesecloth and the turkey. Cover the turkey with tin foil if outside is browning too quickly. 7. Remove the turkey from the oven and let stand for 30 minutes before carving it. NOTES: I also rotate the roasting pan once during the middle of the cooking time. You want to cook the turkey until a meat thermometer inserted into the thickest part of the thigh registers 180 degrees (this is the U.S. Department of Agriculture's recommendation) and stuffing reaches 165 degrees. For an even moister turkey, I cook it until it reaches 170 as it will continue to cook a bit when you remove it from the oven and let it stand before carving. Jennifer and I both would like to wish each of you a Healthy and Happy Thanksgiving Celebration with your friends and family! Enjoy... ~Billie |

Billie Shellist, FDN-P
I practice functional nutrition, an approach that allows me to look at your entire health history and help you find the "root causes" of your chronic health complaints. This cuts out the trial and error process and helps you get real symptom relief and resolution! Food is medicine and knowledge is power -I hope you enjoy my anti-inflammatory recipes which are gluten, dairy, and soy free as well as very low grain and sugar. If you'd like to heal from the root cause(s) of your chronic symptoms, try starting with a complimentary 15-minute consultation. Click here to request your free session. |
|
Copyright 2018 Functional Diagnostic Healing. All rights reserved. Professional photography by Priscilla Durkin- www.priscilladurkin.com Privacy Policy - Legal Notice |