Functional Diagnostic Healing
  • Home
  • About
    • Testimonials
  • Work with Me
    • Contact Us
    • MCAS Webinars
    • SCHEDULE AN APPOINTMENT
    • Supplements
  • Blog
  • Meal Plans & Cookbooks
  • Home
  • About
    • Testimonials
  • Work with Me
    • Contact Us
    • MCAS Webinars
    • SCHEDULE AN APPOINTMENT
    • Supplements
  • Blog
  • Meal Plans & Cookbooks

Estrogen Dominance: Signs of this Common Hormonal Imbalance & How to Correct It

7/17/2016

0 Comments

 
Picture
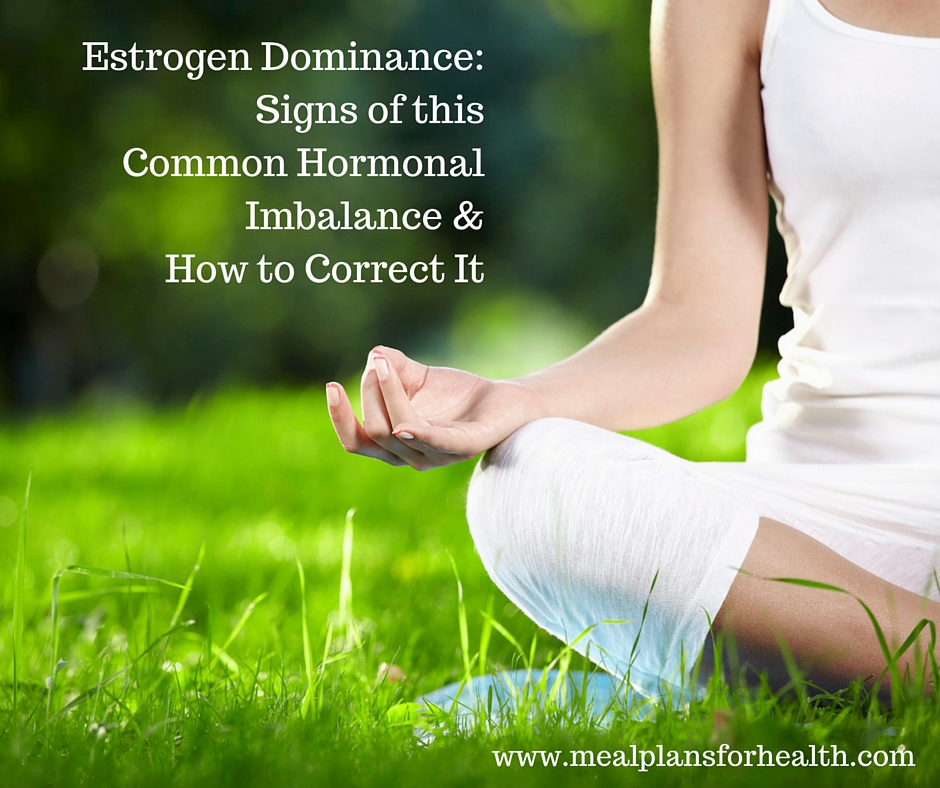
This common hormonal imbalance affects both women and men and can leave you feeling blue, overweight, and unable to sleep. Estrogen dominance occurs when estrogen levels are too high relative to other hormones, especially progesterone.  This can occur in the presence of excess estrogen or when there are deficient progesterone levels to counterbalance estrogen.

These two hormones need the presence of each other in order to correctly perform their individual roles and act like a system of checks and balances to one and another. In general progesterone calms the effects of estrogen and keeps it in check.  But when their delicate balance becomes skewed, estrogen can overstimulate the brain and body and you can experience a wide variety of mild to serious symptoms including...

Signs of Estrogen Dominance:
  • Weight gain and/or weight loss resistance  -  the inability to lose weight despite doing the right things
  • Extra weight around the hips, butt, and thighs specifically
  • Fibrocystic breasts
  • Uterine fibroids
  • Irregular cycles
  • Infertility, endometriosis, and/or PCOS
  • Mood swings and irritability
  • Water retention/edema,  and bloating
  • Tender breasts
  • Anxiety and/or depression
  • Hypothyroidism
  • Chronic dry eyes
  • Brittle, dry nails
  • Hair loss or hair thinning
  • Low libido
  • Insomnia
As someone who experienced most of these symptoms throughout my teens and twenties, I can tell you this can happen to anyone at anytime in life.  While it is often the result of chronic stress and/or hidden chronic infections or imbalances, many people will experience this just from the effects of the excess estrogens we are all exposed to in our modern diet, environment, and lifestyle.  Check it out...

Causes of Estrogen Dominance:
  1. Obesity -  Fat cells contain an enzyme that converts adrenal steroids to estrogen increasing estrogen levels in the body and causing havoc.  NOT COOL!  Estrogen slows metabolism and boosts insulin production, which causes the body to store more calories as fat rather than use them for energy. In a nutshell, the more fat you have, the higher your levels of estrogen will be. This is just one more reason to maintain a healthy weight.

  2. Chronic stress or Chronic illness - When our body experiences stress of any kind (internal or external), it responds by pumping out cortisol, a steroid hormone produced in the adrenals that helps "prepare" the body for stress in a variety of ways. When stress becomes chronic and the demand for cortisol is high over a longer period of time, our bodies use progesterone to make the additional cortisol needed.  This happen in those with adrenal fatigue and this is why we often see depleted or imbalanced sex hormones along with adrenal fatigue. This is because progesterone is a parent or master hormone that can make cortisol, estrogen, and testosterone. When the body "steals" progesterone and another hormone called pregnenalone to make cortisol, progesterone levels will often become depleted, leaving estrogen unopposed.  

  3. Phytoestrogens - These are estrogen like compounds found in plant based foods that many of us have in our diet. The biggest source are soy products but foods like flaxseed , sweet potatoes, and red clover are also contenders.  When consumed regularly over long periods of time, they increase the risk of estrogen dominance significantly.  Phytoestrogens have also been shown to inhibit the conversion of T4 (thyroid hormone) to T3, the active or available form of thyroid, which contributes to hypothyroidism and additional metabolic imbalances. 

  4. Xenoestrogens - These environmental chemicals are proven carcinogens and well known for their ability to damage the immune system and disrupt hormonal balance.  They look similar to our body's natural estrogen and our body cannot often distinguish between the two.  

    Sources of xenoestrogens include:  pesticides, conventionally raised meats, poultry, and seafoods, canned goods, plastics and plastic wraps, industrial wastes, personal care products, home cleaning products, styrofoam, and air-fresheners. 

  5. Poor diet - A diet consisting of conventional meats and seafood, non-organic foods, and processed and canned foods is loaded the xenoestrogens mentioned above and the body gets too much estrogen on board. Additionally a diet low in healthy fats can stress your metabolism! Healthy sources of saturated and omega fats are actually needed to manufacture hormones in your body. When you don't eat enough healthy fats, hormones like progesterone suffer and can become depleted leaving your more susceptible to estrogen dominance. 

  6. Poor hormone metabolism/impaired liver function - The liver is our master detoxification organ that is responsible for cleansing our body from the harmful effects of chemicals, elements in food, environmental toxins and even natural products of our metabolism, including excess estrogen.  Anything that impairs liver function or ties up the detoxifying function, like a hidden or underlying chronic infection,  can result in excess estrogen levels and contributes to estrogen dominance in a significant way.  

Conventional medicine uses a narrow minded approach to correct estrogen dominance, typically using Hormone Replacement Therapy, birth control, or IUD's to tame estrogen levels.  The problem with this approach is that it only treats the test results - low or imbalanced hormones, by replacing them. BUT it doesn't actually address the causes of estrogen dominance at all!  Particularly if the person cannot metabolize excess estrogens, this type of treatment approach is like adding fuel to the fire. 

I was someone who experienced this personally - I spent my teens in and out of several endocrinologists and gynecologists office suffering from endometriosis, PCOS, depression and difficulty losing weight.  And then spent my twenties in fertility clinics trying without success to get pregnant.  Now that I understand what was really going on with my body chemistry and metabolism at that time, I also understand why none of the hormone replacement or fertility treatments were effective. My body was suffering from a chronic illness that was taxing my adrenals and throwing my metabolism out of balance, leaving my progesterone levels significantly depleted. Plus my liver detoxification pathways were overloaded because of my hidden, chronic infections and I was not metabolizing all the excess estrogens I was being exposed to in my diet and lifestyle.  Using the hormone shots and tablets never worked because they just made the imbalances worse! (Wish I could have discovered this information 8 years,  4 doctors, and thousands of dollars ago!!)

It wasn't until I got off the synthetic hormones, addressed my chronic candida infection,  and made big changes in my diet and lifestyle that I started to lose the extra 20 pounds I had carried my whole life.   And after being diagnosed with Chronic Lyme Disease and early onset menopause in 2013, I've made it my personal mission to become an expert on balancing hormones naturally and I practice what I preach everyday!

As a Functional Nutritionist, my goal is to help my clients identify the specific metabolic and chemical imbalances that are unique to them using  functional nutrition labs. This allows me to develop a customized diet and lifestyle protocol to correct their specific imbalances and help them meet their health goals.  Here are some of my basic tips to correct estrogen dominance naturally...

How to Correct Estrogen Dominance:
  1. Get a quality hormone panel done - Information is power and understanding what your specific metabolic imbalances are will allow you to implement a protocol that is personalized to your body.  A hormone panel that looks at your daily cortisol patterns, DHEA, progesterone, testosterone, and estrogen is what I recommend.  Take a peek at my Metabolic Recovery Program that includes a complete hormone panel test as well as a 90-day personalized protocol to re-set your hormones. 

  2. Switch to organic, grass-fed, free-range, antibiotic and hormone free meats and dairy products - to avoid xenoestrogens that increase your risk of estrogen dominance enormously . 

  3. Increase leafy greens and fiber  - which helps to attract and bind excess estrogens and pull them out of your body via stool. If you are not getting enough fiber or are constipated regularly, stool remains in the bowel and estrogen gets reabsorbed.  Include 3-6 cups of fibrous vegetables each day into your diet, some with each meal is ideal. Shoot for a variety of cooked and raw. Choose items like broccoli, arugula, kale, asparagus, cabbage, and Brussels sprouts.  Try our Simple Detox Salad. 

  4. Get enough quality fat in your diet - Fats are an essential building blocks of hormones! Your body needs some healthy cholesterol in order to be able to make hormones, which is why low-fat diets can plummet your metabolism and make it more difficult to lose weight. Ditch the old school, low-fat trend and opt for a diet with 25-35% of your calories coming from healthy fats.  Check out our blogs: 4 Sources of Healthy Saturated Fat, Health Benefits of Monosaturated Fats, and Omega Fats for an Anti-Inflammatory Diet to learn more about how to incorporate healthy fats into your diet and which are the best choices. 

  5. Reduce stress - Invest some time and energy into yourself and learn to say no more often! Get rid of negative people or things from your life that bring you down rather than build you up.  Our blog, 10 Self-Care Practices to Promote Healing & Relaxation have some great tips for how to unwind and remove stress from your life. 

  6. Swap your home cleaning and personal care products for all natural, organic brands! Cut down on your exposure to environmental estrogens called xenoestrogens and switch to all natural products. 

  7. Reduce use of plastics, Styrofoam, and canned goods - Ditch those styrofoam cups and plastic tupperware for some glass tupperware pieces, and mason jars of various sizes. NEVER heat food in a plastic container in the microwave and try to choose fresh or frozen vegetables over canned to avoid excess estrogens.

  8. Assess liver function - If your liver is having trouble "keeping up with the toxic load" this can increase the occurrence of estrogen dominance since the liver is unable to filter it from the blood effectively.   I offer a basic Metabolic Lab Panel that looks at your liver's function inside  my Metabolic Recovery Program. If your liver could use some extra support, there are many natural products available to help that I can recommend.  

If this blog has resonated with you, I offer a FREE 20-MINUTE PHONE CONSULTATION, where I will review your health history and give you some recommendations on how to balance your hormones naturally.  You can also learn more about how you can work with me by viewing our programs page.

~Billie

DISCLAIMER: MEAL PLANS FOR HEALTH DOES NOT PROVIDE MEDICAL ADVICE. Meal Plans for Health is designed and intended for educational and informational use only. Always seek the advice of your physician or other health care provider with any questions or concerns you may have regarding your health.
0 Comments

4 Hidden Causes of Weight Loss Resistance

7/6/2016

0 Comments

 
Picture
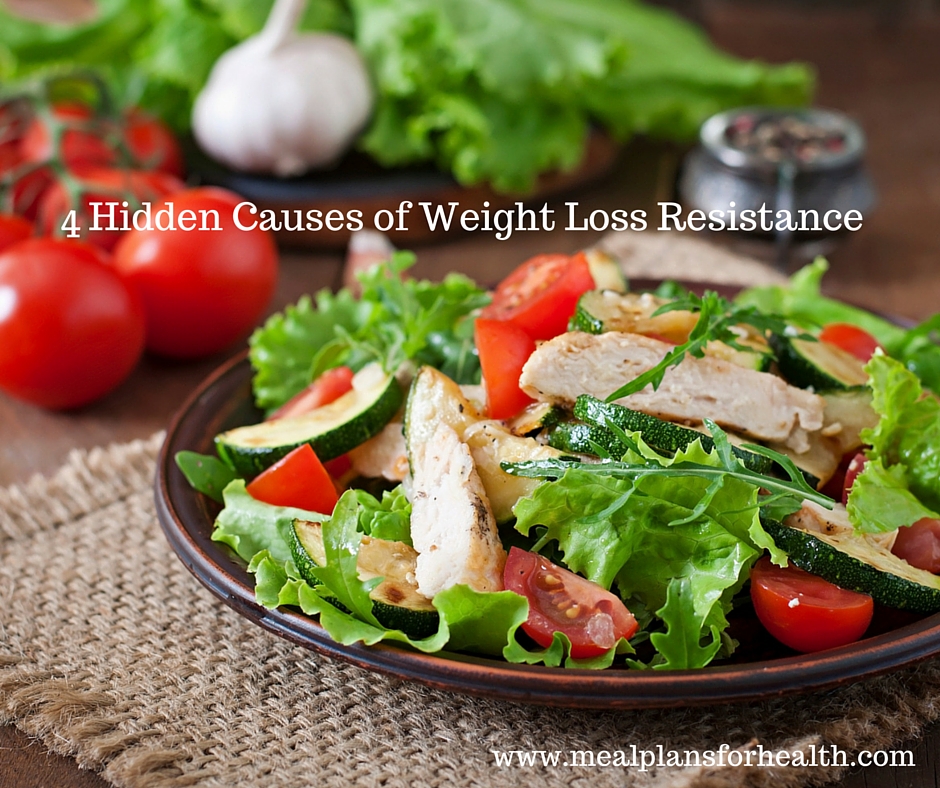
Weight loss resistance is the inability to lose weight despite eating healthy and exercising regularly.  Are you someone who lives at the gym and counts your calories only to feel defeated on the scale and deprived in the kitchen? You are not alone and its not your fault. Weight loss is much more than just calories in vs. calories out - there are a number of variables that can affect weight loss. 

Try to think of your metabolism not as a calculator, but rather like a balancing scale or see-saw - everything has to be in balance in order for the see-saw to work properly, right?!   This is why a caloric deficit is not enough, your body ALSO has to be in a metabolic balance or proper hormonal balance in order to drop those extra pounds as well.  And if its not in proper balance, there is no amount of gym time that will make that scale budge. Plus the bad news is that hormones get out of balance very easily, especially under chronic stress of any type,  since they are affected by and respond to every other system in body. 

When there is a stressor or small change in the digestive or nervous system for example, this sends a message to our endocrine system and our metabolism makes an adjustment in hormone secretion in order to communicate to the other body systems to compensate for this change or stressor.  All of these communications effect the way we feel especially in the area of energy, cravings, and the ability to burn fat instead of store it. 

As a Functional Diagnostic Nutrition® Practitioner, I'm always looking for the root cause of my clients health complaints.  So when someone comes to me who is struggling to lose weight despite doing all the right things, my goal is to help them identify the hidden, underlying causes that are keeping them from meeting their goals.   

What I see in my practice is that when we work to identify and resolve these hidden imbalances, the pounds start to come off with ease.  This is information everyone should understand, so in today's What's That?! Wednesday post I'm sharing the top 4 most common hidden causes of weight loss resistance I see and what to do about them. 

4 Hidden Causes of Weight Loss Resistance:
  1. Food Sensitivities - Inflammatory reactions from the foods we eat are very different from food allergies. Food sensitivities are low grade food reactions that produce an inflammatory or immune response in our body.  The affects of foods sensitivities can shift, change, and be delayed making them very difficult to identify. However left unchecked, these inflammatory reactions damage our gut lining leading to gut hyper-permeability or leaky gut.  When the gut lining is comprised in this way,  food particles are now able to cross into the bloodstream where they do not belong and are subject to systemic immune or inflammatory reactions.  

    Systemic, chronic inflammation leads to hormonal dysregulation and metabolic imbalances including insulin resistance.  And since insulin is a fat storeage hormone, you store fat like a champ and losing weight becomes very difficult. The good news is that you can turn this around by simply identifying your specific food sensitivities and removing them from your diet.  You can do this through an elimination diet where you remove the most common food sensitivities like gluten, wheat, corn, dairy, soy, and citrus but I find this is often not enough since it doesn't test enough foods and can be difficult to manage for some people. 

    What I typically recommend is that you do a blood test called the MRT or Mediator Release Test.  I use this  test in my practice because it is a very effective tool and I consistently see significant clinical improvement in my clients by implementing a diet based on their personal MRT results.  You can learn more on my blog about : Hidden Food Sensitivities & Testing. If you are someone who cannot lose weight despite your best efforts and/or if you suffer from an autoimmune disease and you have never had a food sensitivity test run,  I highly recommend you consider it. I've seen many of my clients autoimmune symptoms decrease or clear completely and their extra weight drop off with ease within weeks of removing their food sensitivities during our Personalized Elimination Diet Program that pairs food sensitivity testing with personalized meal planning.  

  2. Dysbiois & Gut Pathogens - Dysbiosis  is an imbalance in the gut flora or gut bacteria that line the small intestine  - or some pathogenic overgrowth of good or bad bacteria.  This imbalance can occur due to chronic inflammation from food sensitivities, antibiotic use, other medications, and much more.  Gut infections and overgrowth like candida/yeast, small intestinal bacterial overgrowth (SIBO), h. pylori, and parasites all contribute to chronic inflammation in the body and contribute to leaky gut.  When the gut lining gets damaged, you not only experience immune reactions that increase inflammation but digestion and absorption get severely compromised. And when you can't properly digest and absorb your nutrients, you cannot fuel your body and end up feeling hungry, fatigued and craving sugar.  This leads to over-eating, insulin resistance, fat storeage, and weight gain that can be difficult to overcome until proper balance is restored.

    If you have symptoms like: bloating, constipation, abdominal pain, gas, diarrhea, heartburn, sugar cravings, chronic yeast or sinus infections, thrush, skin rashes, or athletes foot, you may want to consider working with a qualified practitioner to test for gut pathogens and leaky gut.  Then implement a protocol to eradicate the bugs and restore balance.  Check out my  Complete Gut Cleanse & Revive Program. 

  3. Chronic Stress -  Remember that your metabolism reacts and responds to stress of any kind which can create a hormonal imbalance that tells your body to store fat rather than burn it, making it difficult to lose weight.  When you think of stress, think of it in terms of the stress you feel emotionally and physically as well as hidden, internal stressors that you may not know exist.  I've discussed three very common hidden, internal stressors above: food sensitivities, leaky gut, and gut pathogens.  

    The external stressors are things that are in your control like your work and home life, the quality of your sleep, and how well you are taking care of yourself.  If you are surrounded by negative people, work in a stressful environment, work excessive hours, exercise too much, or don't get enough sleep (8-10 hours/night) it can really impact your ability to drop the extra pounds. When your body is in a "stress response" constantly, the switches for both cortisol and insulin get turned to "ON" and your body is signaled to store fat and not burn it making it very difficult to lose weight despite your devotion to your diet and the gym.   If you could use more balance and less stress in your life, check out my blog: 10 Self Care Practices to Promote Healing & Relaxation to learn some ways you can take care of yourself, reduce stress, and help you lose weight.

  4. Metabolic/Hormonal Imbalances  - As I've said a few times, chronic stressors lead to metabolic compensation and hormonal imbalances that impact your ability to drop extra weight and maintain it.  Some of the common hormonal imbalances that increase weight loss resistance are: insulin resistance, adrenal fatigue, hypothyroid, Hashimottos, and estrogen dominance. These metabolic imbalances will keep you from being able maintain a healthy weight, but when properly identified and corrected, the pounds will start to drop off with ease. 

    I recently worked with one client who could not lose the extra 25-30 pounds she had on since having her kids 5 years prior.  She had tried everything, worked out religiously 5 days/week and  watched what she ate closely, counting every calorie.  Once we ran her initial tests, we were able to identify a chronic candida and parasitic infection along with food sensitivities, adrenal fatigue, and estrogen dominance.   I worked with her to implemented a 90 day protocol to remove food sensitivities, evict the gut bugs, and re-set her steroid hormone pathways. Just three weeks into the protocol, her chronic headaches disappeared, she was sleeping better, and had already dropped 10 pounds even-though I asked her to exercise less.  I'm elated to say that she was able to get down to her goal weight and  has maintained it for almost a year now. 

    You can learn more about my Metabolic Recovery Program as well as our approach or request a
    free 20-minute consultation
    . I'll do a health history over the phone and give you personalized recommendations on how to combat your weight loss resistance.

    As someone who spent most of my life being overweight and suffering from food sensitivities and gut pathogens, I understand what you are going through and would be honored to speak with you!

    ~Billie


DISCLAIMER: MEAL PLANS FOR HEALTH DOES NOT PROVIDE MEDICAL ADVICE. Meal Plans for Health is designed and intended for educational and informational use only. Always seek the advice of your physician or other health care provider with any questions or concerns you may have regarding your health.

0 Comments

Simple Coleslaw

7/1/2016

0 Comments

 
Gluten free. Dairy free. Soy free. Low carb. 
Picture
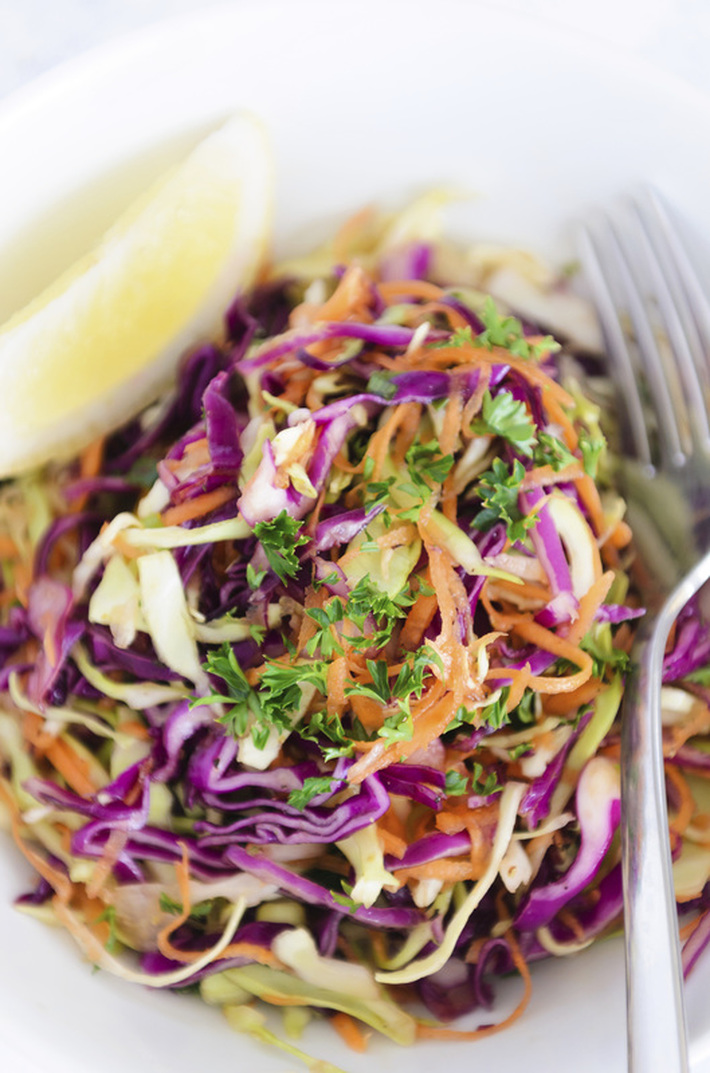
Coleslaw is such a versatile side dish - it goes well with tacos and other Hispanic and Asian  inspired dishes and works well with BBQ'ed or braised meats and even seafood.  

We like to keep our coleslaw simple and clean and this recipe is a perfect balance of crunchy, creamy, and zesty. We are giving you three versions here to work with as well to please your palette and compliment a variety of meals. 

Simple Coleslaw: (PRINT RECIPE)
Serves 4

Ingredients:
Base

4-6 cups shredded coleslaw mix or 1/2  small cabbage shredded and 2 carrots, shredded
¼ cup organic mayo made from cage free eggs and olive oil or avocado oil***
2 tablespoons non-dairy milk of choice

Original Slaw:
2 tablespoons fresh lemon juice
1/4 teaspoon mustard powder
2-4 tablespoons chopped parsley

Cumin-Lime Slaw:
2-3 tablespoons lime juice
1 teaspoon ground cumin
4 tablespoons chopped cilantro

Asian-Sesame Slaw:
Use 3 tablespoons extra virgin olive or avocado oil INSTEAD of mayo and milk
2 tablespoons sesame oil
2 tablespoons lime juice
2 tablespoons sesame seeds
2 tablespoons coconut aminos or gluten free soy sauce
4 tablespoons chopped cilantro
1/2 a small red bell pepper, sliced
 
***If you are sensitive to eggs, drop the mayo and use 1/4 cup olive oil or avocado oil instead.***

Directions:
  1. Add the mayo or oil, milk, lemon or lime juice, spices and herbs to a large bowl, whisk well to combine.
  2. Add the coleslaw mix or cabbage and carrot and toss until well coated. 
  3. Add the cilantro or parsley and stir to combine.
  4. Cover and refrigerate for 15 minutes or until ready to serve.
  5. Stir and enjoy!

Let us know what you think and share any other versions you come up with!
~Billie & Jen
0 Comments

BBQ Chicken

7/1/2016

0 Comments

 
Gluten Free. Low Sugar. Dairy Free. Soy Free. 
Picture
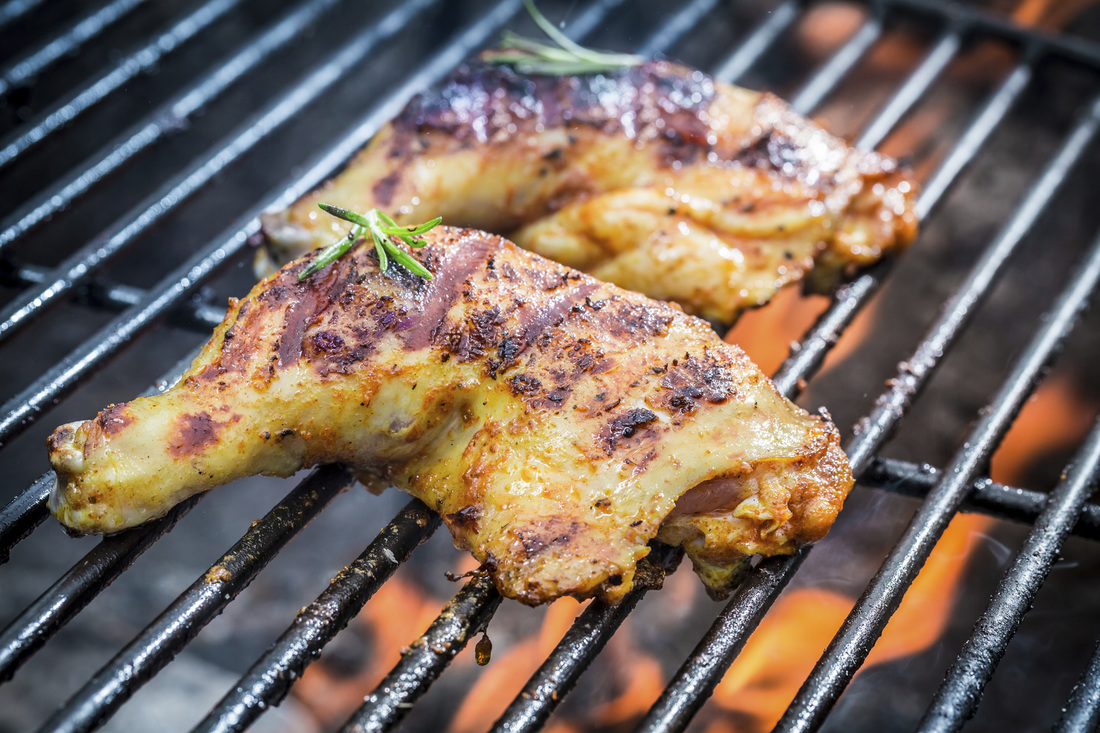
BBQ chicken seems like an essential component to a fabulous 4th of July celebration. Paired with some baked beans and coleslaw or a seasonal garden salad and baked or grilled sweet potato wedges...perfection!

This simple BBQ marinade is low in sugar compared to most BBQ sauces so that you can enjoy some without feeling too guilty. Just be sure to use organic, no sugar added ketchup or a can or organic tomato sauce. 

Try this with our Simple Coleslaw and Baked Black-Strap Beans and let me know what you think.

BBQ Chicken: (PRINT RECIPE)
Serves 4

Ingredients:
1/2 cup organic ketchup or organic tomato sauce
2 tablespoons apple cider vinegar
3 tablespoons Dijon mustard
3 cloves garlic, minced
2 tablespoons coconut sugar or raw honey
1/4 cup blackstrap molasses
1 teaspoon lemon juice
1 ½ pounds organic, free range chicken (breast, drumstick, etc, your choice)
½ teaspoon chili powder
¼ teaspoon cayenne (optional)
½ teaspoon garlic granules
¼ teaspoon salt
½ teaspoon pepper
Cooking spray

Directions:
  1. Combine all ingredients except chicken in a bowl and mix until thoroughly combined. Divide mixture into two equal parts; reserve half in an airtight container for later.
  2. Place chicken in a zip lock bag and pour remaining sauce over it, seal and turn to coat well. Then place in the refrigerator for at least 1 hour and up to 12 hours (if you want to marinade it during the day).
  3. To cook chicken in oven: preheat oven to 350 degrees. Then heat a skillet over medium-high heat and spray thoroughly with cooking spray. Remove chicken from marinade and place in skillet, cook 2-3 minutes each side, just to sear the meat.
  4. Coat a 9 x 13 baking disk well with cooking spray, place the seared chicken and ½ of reserved sauce mixture and toss to coat. Bake for 35 to 45 minutes, basting with the sauce every 15 minutes until chicken is done (meat thermometer should read 165 degrees).
  5. To cook chicken on the grill:  Heat grill to medium. Lightly oil grates; place chicken on grill. Cover grill; cook, turning frequently, until chicken registers 165 degrees on an instant-read thermometer, about 10 to 15 minutes. Uncover grill; continue cooking, basting frequently with reserved sauce, until chicken is glazed thoroughly, 3 to 4 minutes more. 

LEFTOVER IDEA: use your leftover chicken to make BBQ chicken chopped salad, BBQ chicken lettuce wraps, or BBQ chicken & hummus quesadillas (hummus replaces the cheese).   YUM!

Enjoy your holiday weekend with friends and family!
~Billie

0 Comments

Simple Berry Sorbet

6/29/2016

0 Comments

 
Gluten free. Dairy free. Soy free. Nut free. Low sugar. 
Picture
This is a perfect treat on a hot summer day! We use antioxidant loaded berries and touch of honey to make this super simple sorbet we know you will love! This is a great way to satisfy your sweet tooth or an ice cream craving without all the extra sugar and calories.  I love using berries not only because they are packed with antioxidants but also because they are one of the few low glycemic fruits. 

You do not need an ice cream machine for this recipe, all you need is a blender and 5 minutes of time, check it out...

Simple Berry Sorbet (PRINT RECIPE):
Makes 6 servings

Ingredients:
2 cups frozen strawberries
1 cup frozen blueberries
2-4 tablespoons honey or agave
1 teaspoon lemon juice
Pinch of salt

Directions:
  1. Place berries into high powdered blender.
  2. Add the honey, lemon juice, ½ cup water, and a pinch of salt
  3. Blend until smooth. Add more water 1 tablespoon at a time if needed.
  4. Eat immediately for a “soft-serve” sorbet or freeze and eat for up to 1 week from freezer. 
  5. Enjoy!!

Feel free to get creative here and use your favorite fruit and fruit combinations. Some other flavor combinations I really like are: Mango-Mint, Peach, and Pineapple-Banana.  Let me know what you think of this recipe and please share your creative versions!

~Billie
0 Comments

9 Sources of Hidden Sugar in Your Diet

6/1/2016

0 Comments

 
Picture
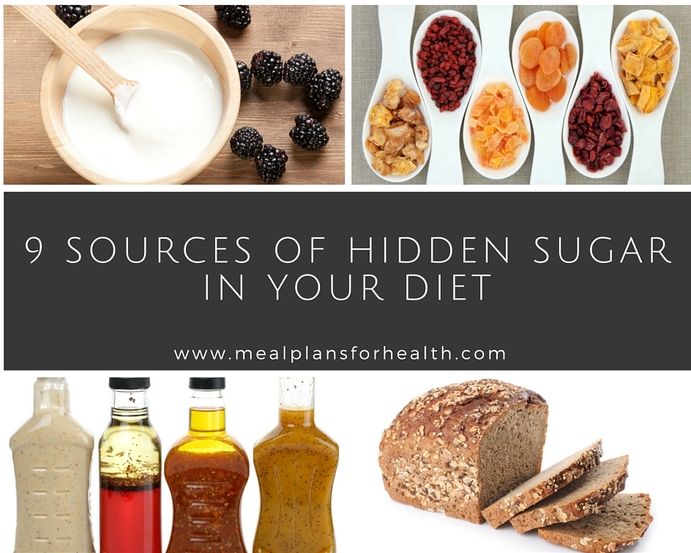
On this week's What's That Wednesday post,  we discuss foods that may still be in your diet; foods you think are "healthy" but actually sabotaging your health and slowing down your metabolism and weight loss goals.

Many of my clients tell me, "Ok Billie, so I eat fairy healthy already - I don't eat a lot of sugar, I avoid baked goods, candy, and soda. I eat whole grains and I also try to limit processed snack foods, but I still am not losing weight. What's the deal?!"

I can relate to this because this was me most of my life until about 6 years ago. While I didn't exercise the best of eating habits in my childhood or teens, I did start to change my diet and "eat healthy" or so I thought in my 20's, but I still really, always struggled to lose weight and keep it off.

Then I learned one simple nutritional rule - all simple carbs turn into glucose. Our bodies have a limited storage capacity for glucose so when you over-consume simple carbs and your blood sugar rises, one way your body compensates is to convert those glucose molecules to fat.  That fat gets stored in your liver and adipose tissues (fatty tissues).  This not only keeps you from losing weight but also puts you at risk for cardiovascular disease and diabetes. 

So, to switch your body out of the "fat storage" mode and into "fat burning" mode, its important to avoid sugar and simple carbs as much as possible in your diet. The food industry makes this difficult on us since sugar has so many names and gets slipped into just about everything these days, so you have to read every label carefully. Just because it says low sugar, sugar-free, organic, whole grain, or natural on the front of the box, it doesn't mean it's healthy.  

Check out my list to help you avoid some common culprits...

9 Sources of Hidden Sugar in Your Diet:
  1. Bottled Salad Dressing - Don't sabotage your healthy salad by adding sugar loaded salad dressings. Most pre-packaged, bottled dressings have added sugar, a couple good examples of this are: Balsamic or Raspberry Vinaigrette. This is a seemingly healthy dressing choice compared to a high fat ranch or Caesar we are always told to stay away from. However these dressings are loaded with 9-15 grams of sugar per 2 tablespoon serving size.  

    Ketchup based dressings like Thousand Island or French are also loaded with sugar and best to avoid.  "Diet" dressings that are low in sugar or low in fat aren't a healthy choice either since they replace the fat with fake sugars that can also drive up your blood sugar and put your body into fat storage mode. Read our blog, 6 Reasons to Avoid Artificial Sweeteners to learn more about this topic. 

    We recommend making your own dressings from extra virgin olive oil, unsweetened vinegar or citrus, and some spices.  If you need to add a little sweetener, try a touch of honey, agave, maple syrup, or stevia. Check out our Apple Cider Vinaigrette or our blog: Fast Homemade Salad Dressings.

  2. Condiments like BBQ Sauce & Ketchup - These flavor enhancers are loaded with sugar- up to 2 teaspoons per serving or 16 grams of sugar! Both products are usually sweetened with high fructose corn syrup which is a toxic form of sugar that increases inflammation and your chances of metabolic disease. If you have to use ketchup, choose an organic brand with no added sugar and use it sparingly.  Opt for marinating your chicken or meat in fresh herbs, citrus, spices, and garlic or use a dry rub to add flavor instead of BBQ sauce.  Or try some avocado slices on your burgers instead of ketchup. 

  3. Nut butters  - Many nut butters, especially peanut and almond butter have sugar added to them. Read your labels carefully to identify added sugars -  even within the same brand and even with organic products. Choose a raw, organic, no sugar added nut butter like raw almond butter. 

  4. Yogurt - One of my old favorites, Fage yogurt, has a whopping 29 grams of sugar in one little serving! Wowza, yes it's honey (which is a better source than high fructose corn syrup) but its still sugar and that amount will skyrocket your blood sugar, turning on insulin, a fat storage hormone. Add some fruit and granola and you have a sugar loaded bomb for breakfast that you think is a "healthy parfait".

    The truth is that the majority of yogurts on the shelf have added sugar in many forms including the "low sugar" or "low fat" ones that use either more lactose (milk sugar) and/or add artificial sweeteners or fruit concentrates. When choosing a yogurt, choose an organic, no sugar added, full fat, Greek yogurt or swap yogurt for a homemade Chia Pudding instead.

  5. Smoothies - The "healthy green smoothie" you are getting from Jamba Juice is often loaded with more fruit than veggies and generally with 20-40 grams of sugar.  This kind of sugar load can spike your blood sugar, making insulin turn on. When this happens your body actually feels more sluggish and your metabolism slows down since insulin tells the body to store fat. Green smoothies can actually be a great way to get a well rounded meal, but we recommend making your own so that you can control the ingredients.  We like to include light and dark greens, a small amount of fruit, protein, healthy fats, and a little fiber. Check out how to create a smoothie that will boost your metabolism and not sink it on our blog: How to Make the Perfect Green Smoothie. 

  6. Dried fruits - Unfortunately dried fruits contain much more sugar than their fresh fruit counterparts, in fact 1/4 cup of raisins is a whopping 29 grams of sugar -WOW! I recommend staying clear of dried fruits if you are trying to lose weight. Instead, choose a nut and seed only trail mix , avoid protein bars like Lara bars that are made mostly from dried fruits, or opt for a small serving of real fruit paired with some raw almonds. Restaurants love to add dried fruits to their "healthy salad" menu, but adding dried fruit is like putting candy on your salad, so make sure to read the ingredient list, avoid the sugar bombs, and opt for dressing on the side. 

  7. Fruit juices - Fruit juices these days are more than just fruit- they are loaded with added sugars and preservatives than can spike blood sugar. Many are even loaded with the toxic sugar, high fructose corn syrup. When choosing fruit juices, choose organic and no sugar added.  If you are trying to lose weight, stay away from fruit juice all together. For kiddos, I recommend watering down your fruit juices for them -like 1/2 water and 1/2 juice and limiting this beverage to once a day. 

  8. Wheat - Did you know that the slice of whole wheat toast you eat every morning or the two slices you use in your sandwich for lunch raise your blood sugar more than two tablespoons of sugar. While "whole grains" have been hailed as a health food, the whole wheat products we get in store these days have been extremely refined and processed to the point that the benefit enzymes and fiber found in whole grains are gone. What you are left with is a very simple carb that immediately turns to glucose in your bloodstream, raising your blood sugar and putting your body into fat storage mode.  Opt for steel cut oats in the morning and a salad with some protein, fat, and healthy carbs like quinoa or black beans for lunch. 

  9. Corn- Corn is not a vegetable, its a grain, and while I think a little bit of fresh, organic corn when it is in season is ok, I do not recommend that processed corn be a staple in your diet. As a simple grain, it also turns to glucose in your bloodstream, not to mention most corn these days is processed, GMO corn that not only raises blood sugar but also increases chronic inflammation.  So opt to dip some veggie sticks or seed crackers into your hummus or guacamole next time instead of corn to avoid this hidden sugar.

If you liked this blog, you may also like our eBook, 10 Day Sugar Detox Diet- a 10 day real food eating plan that helps you avoid added sugars and processed foods, boosts your metabolism, and kick starts your wellness goals.  

This eating plan includes over 30 delicious recipes, a 10-day eating plan,  and grocery shopping lists.  So what are you waiting for?! To preview the first few pages of this eBook as well as the recipe list and pick up a copy, simply click here. 

​~Billie

0 Comments

Wild Salmon with Cilantro-Basil Pesto

5/25/2016

0 Comments

 
Anti-Inflammatory. Grain Free. Dairy Free. Gluten Free. Soy Free. Low Carb.
Picture
 In the Spring and Summer there is an abundance of fresh herbs like basil, cilantro, and mint. I love to make homemade pesto's out of these herbs and experiment with new combinations of flavors. This recipe has a balance of spicy and sweet that you will love paired with fresh seafood or  organic chicken, turkey, or pork. This pesto also tastes fabulous on grilled, roasted, or steamed vegetables like zucchini, peppers, mushrooms, squashes, or carrots. 

This simple wild caught salmon dish is perfect for grilling, pan-searing, or baking. Cook to your preference then add the flavorful pesto and you have a fabulous meal loaded with healthy fats and anti-inflammatory herbs. 

Salmon with Cilantro-Basil Pesto (PRINT RECIPE)

Serves 4

Ingredients:
4 (6-ounce) wild caught salmon filets
½ teaspoon salt
¼ teaspoon pepper
½ teaspoon garlic granules
1 tablespoon extra virgin olive oil

Cilantro-Basil Pesto:
2 cups fresh cilantro
1 cup fresh basil
1/3 cup pine nuts, cashews, or pumpkin seeds
2 cloves garlic, peeled
½ teaspoon salt
¼ cup extra virgin olive oil + 1 tablespoon (if needed)

Directions:
  1. Start by making your pesto. Place nuts or seeds in your food processor and processing until fine.
  2. Then add garlic,  salt, cilantro and basil and process again while slowly drizzling in the olive oil while your machine is running until you reach your desired consistency. You may not use all the olive oil and you may need a little more – just use your judgment.
  3. Pour pesto into a large bowl and set aside. 
  4. Sprinkle salmon filets evenly with salt, pepper, and garlic powder.
  5. Heat a large skillet over medium high-heat and add the olive oil. Tilt to coat and once hot, add your salmon filets skin side up. (Alternatively you can grill or bake your salmon)
  6. Sear salmon for 4 minutes, then flip over, turn heat down to medium and place lid on pan but leave a tilt so that the air can escape a bit. Allow to cook for an additional 6-8 minutes.
  7. Remove from pan and serve with 1 tablespoon pesto per serving.

This recipes makes extra pesto which you can store in an airtight container in the fridge for up to 2 weeks or in the freezer for up to 3 months.  

Happy Eating!
~Billie
0 Comments

12 Ways to Relieve Constipation

5/18/2016

0 Comments

 
Picture
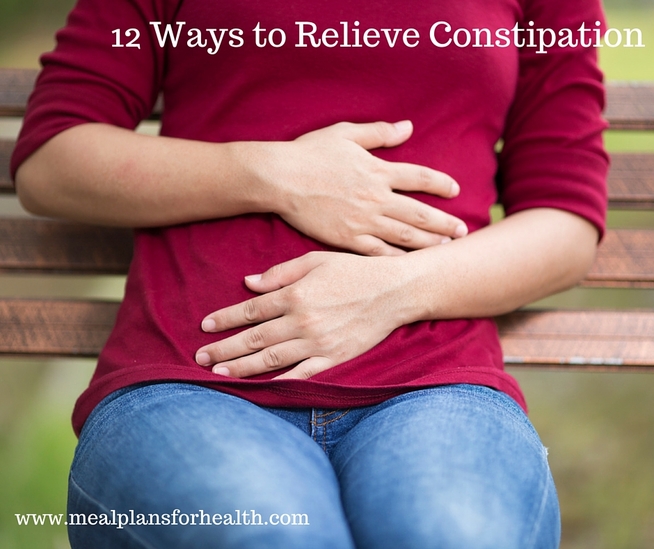
As much as 1/3 of the U.S. population suffers from chronic constipation, or the inability to have at least one bowel movement everyday.  Do you eliminate everyday or 5-6 days a week at the very least? If you answered, "No" to this question, you are gonna want to continue reading. 

Warning...personal disclosure ahead...I've suffered from chronic constipation my entire life. I constantly felt bloated and had a painful, swollen belly almost everyday. I remember suffering through classes, meetings, flights, exercise and sporting events, and even social engagements with horrible stomach pain dying for the moment I could go home, get in my p.j's and curl up in the fetal position in bed! Constipation prevented me from feeling good about my body, prevented me from losing weight, and left me feeling constantly tired,  sluggish, and depressed.  Can you relate?

I worked with and was evaluated by several doctors over several years including a gastroenterologist, endocrinologist, gynocologist, and an internal medicine doctor.  I was given an IBS diagnosis and was told it was likely I would have this problem most of my life and that laxatives, fiber in the form of Metamucil, and pharmaceutical medications were my best "treatment" options.  I used some of these remedies on and off for several years but was never able to overcome my constipation.

Around the time I turned 30 I  decided to do a 30 day detox with a friend which required eating only whole, unprocessed foods and juicing daily. I noticed that after a couple weeks on this diet, I had not only dropped 10 pounds but was also FINALLY eliminating EVERYDAY! By the end of the 30 days, I had said goodbye to chronic constipation, bloating, pain, and embarrassment and was determined to stick to a whole-foods based, anti-inflammatory diet. 

I was so inspired by my experience that a couple years later I  changed my career, went to back to school, and become a Functional Nutrition Health Coach so that I could help others rid themselves of this and other chronic symptoms that keep them from enjoying  their daily life. You don't have to live with constipation and you don't have to take pharmaceutical medications or daily Metamucil to have regular bowel movements! Check out this week's What's That?! Wednesday post where I share my top tips and home remedies for relieving chronic constipation. 

12 Tips for Relieving Constipation:
  1. Ditch processed foods and infuse your body with whole, anti-inflammatory foods! Just eat real food and avoid any boxed, pre-packaged, and processed foods and oils. These foods can damage your intestinal track, signal your body to store fat instead of burn it, and slow down your digestion. Healthy fats, clean proteins, leafy greens and fiber based carbohydrates make up a well balanced anti-inflammatory diet that will balance your gut, boost your metabolism and improve your digestion and motility.  Check out my specific macro nutrient recommendations on my post, What is an Anti-Inflammatory Diet? and grab a copy of my eBook, 10 Day Sugar Detox, to help you ditch sugar and processed foods and incorporate a variety of delicious, real anti-inflammatory foods into your daily routine!

  2. Get evaluated for gut bugs like candida, h.pylori, and SIBO. These bugs wreck havoc in your tummy by putting off gases and waste that increase inflammation, bloating, indigestion, and constipation.  If you've had chronic constipation your whole life and have converted to a whole foods diet and are not seeing enough good results, I suggest being evaluated by a qualified healthcare practitioner for gut bugs. A blood, breath, or stool test can be done to help detect these pathogens and once you get rid of them your constipation will  go away too!  

  3. Consider being evaluated for food sensitivities. When you have hidden food sensitivities,  the foods you are eating are actually increasing inflammation and dysfunction in your gut. These types of inflammatory reactions slow down your gut motility, decrease nutrient absorption, and increase constipation.  When you identify and remove the foods you are sensitive to, you will notice that your constipation will subside. Check out my blog, Are Hidden Food Sensitivities Derailing Your Heath Goals to learn more.

  4. Increase leafy green intake.  Getting more leafy green vegetables into your diet will not only boost your fiber intake which can help to ease constipation but it also boosts your antioxidant intake enormously. Antioxidants are things that help to reduce free-radicals caused by excessive inflammation in the body. If you have chronic constipation, you have inflammation, and some antioxidant support should be a staple in your healing plan in order to reduce inflammation, alkalize your gut, and boost your immune system.  

    I recommend a minimum of 3-4 cups leafy greens/non-starchy vegetables each day to start and increase to 6-8 cups daily. For example, you could try a green protein smoothie or green juice to start the day with 1-2 cups light and dark greens mixed - like spinach or kale and romaine.  Then for lunch have 2 cups of mixed green salad with some clean protein like organic chicken or wild salmon, and a bit of healthy carbs like nuts, seeds, quinoa, or black beans.  For dinner include 1-2 cups cooked vegetables like broccoli, cauliflower, Brussels sprouts, or asparagus with your meal. This should add up to plenty of veggies and fiber for the day:) Always get your fiber from your foods and  be sure to stay away from non-food fiber products like Metamucil which is contains several toxic, inflammatory ingredients like Yellow #6, aspartame, and maltodextrin. 

  5. Rock the squat! Getting into a squatting position where your feet are elevated a bit off the bathroom floor while you are on the toilet brings your body into the elimination position nature intended. A squatting position fully relaxes the puborectalis muscle and reduced straining which can makes your poops easier to pass. 

  6. Gentle yogic twists can help to get things moving in the gut. Body movement in general is good to increase gut movement and ease constipation - walking, rebounding, yoga or pilates are all good choices that help reduce stress and increase gut motility. I highly suggest doing some gentle yogic twists, 1-3 times daily which can help to naturally massage your colon and get things moving. Just lay on your back on the floor or on your bed; pull your knees towards your chest, then twist your knees to the right and turn your head to the left...then reverse and repeat 3-6 times. At night and first thing in the morning are great times to do this. 

  7. Try using a castor oil pack on your colon.  While this is not advised for pregnant or nursing women, for most people, castor oil packs are a great at home remedy and are very safe and effective. The heat and detoxifying effects of the oil can help to move your lymphatic system, increase circulation in the gut,  and improve motility, helping to push stool along and ease constipation. You can learn how to do a castor oil pack here. 

  8. Water and electrolytes are your friends! Dehydration is one of the most common causes of constipation. When you are not properly hydrated, your large intestine soaks up water from your food waste and your stools become hard and difficult to pass. In general you should make it a goal to get in eight, 8-ounce glasses of filtered, clean water a day.  If you exercise or sweat alot or you weigh more than 200 pounds, you may need to drink more. If you consume alcoholic beverages, you should also drink more since alcohol is a diuretic and will dehydrate you. You should drink enough water so that your urine is clear or light yellow...if it is dark yellow, you are under-hydrated.  

    An extra boost of electrolytes can also be often be helpful for softening stool and getting things moving. Organic, raw coconut water is a great source - try 1/2 cup in your morning smoothie or after a workout, long day, or cocktail hour:) Concentrated electrolytes are often needed for those with chronic illness and gut imbalances, I like Lyte Balance Electrolytes, I cap once or twice daily or as recommended by your healthcare practitioner. 

  9. Consider adding digestive enzymes and probiotics.  A healthy gut microbiome lays the groundwork for a healthy immune and digestive system.  Fermented foods may be helpful to some people to help replenish good gut flora. Probiotics may be necessary for those who are on or have been on antibiotic therapy or those who have major gastrointestinal issues.  They help to restore order and balance of good bacteria in the gut and crowd out the bad bacteria.  Taking a multi-strain probiotic, and not just acidophilus, is important. I like Renew Life Ultimate Flora Blend which you find in healthfood stores in the refrigerated section, Orthomolecular's  Orthobiotic, or Prescript-Assist Probiotic. 

  10. Try magnesium & vitamin C to loosen and soften stool to make it easier to pass.  Magnesium  glycinate and magnesium citrate are both good choices. Start with 400-500mg magnesium per day away from food. Vitamin C is also a powerful antioxidant that can help to mobilize and soften stool to ease constipation. You can start with 300-400mg per day with your food. For those with more severe constipation, you may need more magnesium or vitamin C initially to get things moving. I'd advise working with a qualified practitioner to find the product and dosage that work best for you. 

  11. Sip on some aloe vera juice.  Just like aloe vera can soothe and heal the skin on the outside of the body, 100% pure aloe vera juice  can reduce internal inflammation and assist to heal the lining of the gut, repair mucus membranes,  and improve digestion and motility. I like Lakewood Organic Brand - it is 99% organic aloe and 1% real organic lemon juice. Many brands use citric acid as a preservative but this really spoils the medicinal effects of aloe vera since citric acid can increase inflammation and many people are very sensitive to it. I typically recommend 4 ounces once or twice daily away from food. You can also find aloe vera in capsules and other GI supplements. 

  12. Water, saline, or coffee enemas are a great way to increase motility and cleanse the colon of waste. Using enemas regularly can be an effective home remedy for those who are suffering from chronic illnesses. You can learn more about how to do an enema on my blog, 3 Types of Enemas to Boost Detoxification & Improve Gut Health. 
​
What other home remedies work for you? I'd love to hear your constipation remedies as well as any questions or feedback below. Thanks for tuning in and catch ya next week friends!
~Billie

 DISCLAIMER: Please be sure to inquire about all nutritional supplements and home remedies with your physician or healthcare practitioner to make certain there are no contraindications with medications, etc. The information shared here should not be seen as medical or nursing advice and is certainly not meant to take the place of your doctor's recommendations. If you are pregnant or breastfeeding, please check with your doctor before adjusting any of your medications or supplements. DO NOT do enemas or castor oil packs if you are pregnant or breastfeeding. Always consult with your physician before making any changes. 
0 Comments

3 Types of Enemas to Boost Detoxification & Improve Gut Health

5/11/2016

13 Comments

 
Picture
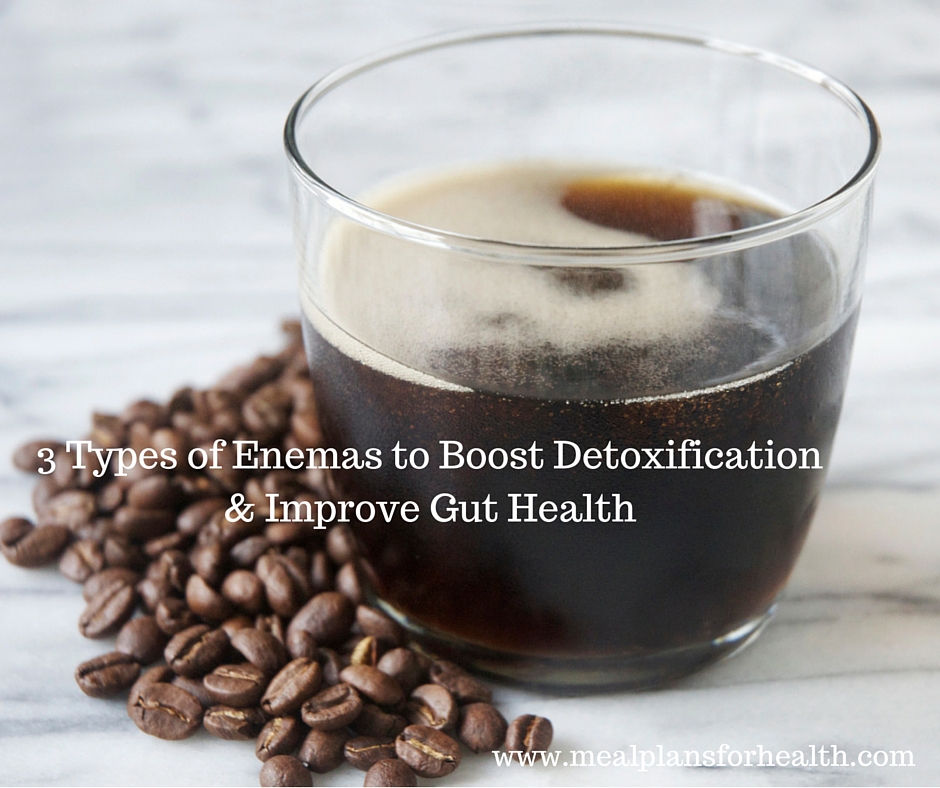
I've shared some of my personal health battle against Late Stage Chronic Lyme Disease on and off on this blog.  And since May is Lyme Disease Awareness Month, you will be hearing  a bit more about my journey and how I'm slowly healing from this devastating illness. Along the way, I hope to provide some insight into some of the daily at home, self-care, and detoxification remedies that I use to keep myself healing physically, emotionally, and spiritually.

I strongly believe that you cannot heal from this disease or any chronic illness with just medications alone. You've got to dig down deep, make some sacrifices, implement changes, and make commitments to yourself to really heal from chronic illness.  When your body has been chronically ill, it is toxic and supporting your body to appropriately eradicate those toxins is a must do or you simply will not get well.

While your doctor or other practitioners may suggest or prescribe medications, supplements, or herbal remedies that will be helpful in this area - this is simply not enough for someone who has been ill for a very long time. This is where the expert help ends and you are the one with the responsibility to treat and support your body in a healing way.  It's a choice you have to make everyday. 

But...a daily practice of detoxification and relaxation strategies can very hard for someone who is ill to implement. I totally get it! This is a learned practice, especially for those who are used to putting others needs before their own.  I have to continually motivate myself and "keep myself in check" to stay on track and make sure I have dedicated the time to focus on my self care.  

One way I do this is by making my daily self care strategies my first priority. For example, I often start my day with some yoga stretches, followed by doing a castor oil pack while listening to a guided meditation.  I also block off time to take a detox bath about 5-7 days a week in the afternoon or early evening to help my body unwind from my day.  I usually incorporate my EFT and positive affirmations during bath time as well. Yes, I'm still a "multi-tasker" at heart:)

Then some days I will also do a coffee enema or an ionic foot bath. These are my weekly self-care rituals I try to stick to...am I perfect? Absolutely not! But if I miss a day or don't do all of it one day I try not to beat myself up.  Tomorrow is a new day to chose healing, choose positivity,  and choose putting myself first! The longer I've been dedicated to these types of practices, the easier they are and the more I look forward to doing them rather than having to make myself do them. This has taken me almost 3 years to slowly incorporate these practices regularly, but if I can do it, so can you!

Last week, I shared my 10 Self-Care Practices to Promote Healing & Relaxation and this week's post is dedicated to one of the at home detoxification practices I use weekly: enemas! 

To be very honest, getting started with this practice was very hard for me  - doing ENEMAS, sounded a bit scary and overwhelming to me. This may be something many of you are thinking right now as well! But I did it  and cannot say enough how much this practice has helped me to decrease my toxic load and reduce my die-off symptoms and flares from treatment.  Big shout out to my fellow Lyme warrior's and friends - Christie & Shelly for inspiring me to start these about a year ago! Love you ladies! So....in this week's What's That?! Wednesday post, I share my top three favorite home enema remedies, the benefits of each and how to do them! Check it out...

First, Here is What You Will  Need to Do an Enema at Home:
  1. Enema kit with a stainless-steel enema bucket or clear enema bag and medical, grade, silicone enema tubing:  I prefer the bucket method, but some folks really like the bags. I like the PureLife enema kit which you can  purchase online via the link or another online retailer like Amazon.
  2. 2-4 cups filtered water. Chlorinated water kills gut flora, so choose filtered.
  3. Small-medium pot and a stove-top
  4. Fine mesh strainer
  5. Cheesecloth (only needed for coffee enemas)
  6. Glass mason jar(s) or glass Tupperware (if making a double or triple batch - see below for details)
  7. Yoga mat, towels, blanket, etc: whatever you can lay on the ground to make yourself comfortable. I use a yoga mat with a few old towels laid on top. Another option is laying in your clean bathtub. 
  8. Lubricant: I like organic, unrefined, raw coconut oil but Vaseline also works well. 
  9. For coffee enema's only: Organic, enema-grade, purified coffee: I recommend Purelife Brand coffee which you can purchase on Amazon or other online retailers. Regular coffee is not suitable for enemas because even organic coffee can contain high amounts of mold or fungus. I recommend the medium roast, which is best for beginners and those with a large toxic burden. 
  10. For probiotic enemas only:  Quality probiotic pills or powders. Something with a good selection of bifidobacteria since these are the dominate flora in the colon, whereas acidophilus prefer the small intestine. I follow an Anti-Inflammatory - GAPS sort of diet and the two of the products I like and that meet my dietary restrictions are the Seeking Health Probiotics and the RenewLife Ultimate Flora.  Seeking Health brand is available online and the RenewLife brand can be found online and in stores. Each come in different strengths, for someone whose never tried probiotics orally, you will want to do this first and start with a smaller dose, maybe 10-20 billion vs. the 50-100 billion to see how you tolerate it. If you get gas and bloating after taking probiotics, you should work with a qualified healthcare practitioner to access your gut health and help you choose a product that might be right for you. 
  11. Privacy & Time - I use my bathroom which is the most logical space and choose a time where I wont be interrupted or rushed.  I've been doing these several times a week for so long now, I can do an enema and finish the clean up within about 30-40 minutes.  But the first time you do this, make sure you dedicate a few hours before you have to be anywhere or do anything active. You will be learning and moving slower!

    Plus if you are someone who is chronically constipated, the first elimination or two will usually be a bit tougher in that you may eliminate on and off again for a couple hours following your enema and you may feel flu like. Once you start to do these regularly and you are not constipated any longer, it is much faster and you start to feel energized afterwards instead of tired and fatigued.  Everyone will be different, I recommend checking with your healthcare practitioner before you start to see what they recommend for you as far as frequency and duration and learn if you have any contraindications.

3 Types of Enemas to Boost Detoxification & Improve Gut Health:
  1. Water enema - This is a great place to start if doing an enema is new to you.  If you have chronic constipation, I strongly recommend doing 3-5 water enemas within a 1-2 week time frame before moving onto trying the coffee or probiotic enemas. Water is a simple way to clean the colon, soften your stools, and flush out some toxic waste. In fact the average person carries 10 pounds of toxic waste on them - what?! gross?! If you are someone who is chronically constipated, this practice can help you have more regular bowel movements and eliminate the excess toxic weight. Water enemas will also help to increase your energy and decrease your pain and edema. 

  2. Coffee enema - The way a coffee enema works is the caffeine travels via the hemorrhoid vein and the portal system to the liver where it opens up bile ducts and allows the liver to release bile. This is a really good thing, since bile is where toxins are stored in the liver. A few of the compounds in the coffee, including caffeine dilate blood vessels and bile ducts, relax smooth muscle, and increase bile flow.

    While these compounds do not have the same effect when consumed orally, when given rectallly, they stimulate the release of an enzyme called glutathione S-transferase.  Studies show this can increase your body’s level of glutathione production by as much as 600-700%. The reason this enzyme is so special is that is reacts with free radicals in the blood stream that cause damage to our cell walls and make them inert.
     
    These toxic substances dissolve in the bile and are then released from the liver and gallbladder through the intestinal track. Another very cool thing is that the body’s entire blood supply passes through the liver in just 3 minutes. So while your coffee enema is being retained for 12-15 minutes, your blood passes through and is “cleaned” 3-4 times.  This makes coffee enemas a great way to cleanse  your liver and your blood of toxins. I find that regular coffee enemas help to relieve my "herx" reactions, decrease my brain fog, ease depression and anxiety, and increase my energy.  I also find that coffee enemas help relieve my  headaches very effectively.
    ​
  3. Probiotic enemas - These enemas can be a very beneficial for those who have done antibiotic therapy since antibiotics really harm the beneficial bacteria that make up your gut microbiome. The billions of bacteria  that make up your gut microbiome actually comprise over 60% of your entire immune system. Keeping your gut healthy and populated with these beneficial bacteria is imperative in healing from any long term illness, chronic infection, dysbiosis, leaky gut, or autoimmune condition.  The enema allows the bacteria from your probiotics to be dropped off right in their "home" in the colon to start repopulating and crowding out the bad bacteria. My personal experience is that doing these 2-3 times per week for a few weeks improved my digestion, decreased my sugar and carb cravings, and helped to improve my brain fog.  Remember to always start with some cleansing enemas like water or coffee before incorporating the probiotic enemas.  I also recommend consulting with your healthcare practitioner before starting any enema routine. They can help you determine the appropriate frequency, duration, and timing of your enema therapy as well as if it is safe for you.
​
How to do an Enema:
  1. Always do enemas in the morning on an empty stomach and after you’ve had a bowel movement. If you are constipated and have not had a bowel movement, do a water enema prior to doing any other type of enema.  
  2. Place 2-4 cups filtered water in a pot and bring to a boil. If doing a water enema, stop here. For a coffee enema, add 1-3 tablespoons of enema-grade coffee into the boiling water. Boil for 5 minutes, then reduce heat, put the lid on and allow to simmer slowly for an additional 15 minutes. If you are new to coffee enemas or are sensitive to detox therapies, I’d recommend starting with just 1 tablespoon of coffee grinds. You can also start with 2 cups water before moving up to 4. 
  3. Remove from the stovetop and allow to cool down to barley warm. While it cools, put your enema bucket and tubing together by following the instructions that come with your kit. NOTE: it is best to use the 3-4” enema nozzle, 16” or longer nozzles are for a deeper colon cleanse and will not have the same “liver detox” effect as using the shorter nozzle.
  4. For water enemas, pour water into enema bucket, making sure your clamp is tight. Then you can skip straight to step 5.

    For probiotic enemas, use only 1 1/2 - 2 cups of water. Once your water has cooled, you will want to add  in your probiotic powder. Break open the capsules, depending on their size you will need 2-4 capsules. Always start with just 1 cap, no more than 1/8 of a teaspoon.  Then mix it around until it dissolves and pour the probiotic solution into your enema bucket with a tight clamp on. 

    For coffee enemas, place the fine mesh strainer over the bucket and then line it with a double layer of cheesecloth to prevent the grinds from going through. Make sure the clamp on the tubing is locked, then pour the coffee solution through the strainer and into the empty bucket.

  5. Remove the strainer (for coffee enemas only) and set aside, then take your bucket and tubing to the bathroom and place the bucket on the counter-top close to where you will be laying. If you are using a bag, you can hang it above you. You want it to be 20-45 inches above where you will be laying so that it flows easily.
  6. Double check the temperature to make sure the water is lukewarm. Hold your finger inside the liquid for 10 seconds, if it feels too hot to your finger, it will be too hot for your intestines. Make sure you have cooled the liquid  enough to be just lukewarm.
  7. Lay your towels, etc on the floor and then lay down on your right side in the fetal position.
  8. Unlock your enema clamp for only a second or two to slowly allow the liquid to fill the tubing up until the clamp. DO this gently:) Then clamp back down tight while you get comfortable.
  9.  Lubricate the tip of your nozzle using coconut oil or vasoline and gently insert it about 2-4 inches into the rectum. Then unlock your clamp and allow the enema solution to flow into your gut. You can use a pinching motion on your tube with your fingers to slow it down if you feel any amount of discomfort.
    NOTE: If your enema solution doesn’t flow when you release the clamp it could be a sign that your tubing is being pinched or kinked, your bucket is not high enough, or you are clenching your rectum. If the equipment is ok, relax your rectum, take some deep breaths into your gut and try adjusting the nozzle, maybe pull it out or in ½ inch or so to see if that helps the flow.
  10. Lock the clamp when you start seeing the “air bubbles” go through the tubing. You can keep the nozzle inside you or remove it once your enema solution is done. Most people find keeping the nozzle in helps them to hold the enema longer- this is what I do.
  11. Lay in this position for 5-8 minutes for water enemas, 12-15 minutes for coffee enemas, and 20-30 minutes for probiotic enemas. 

    NOTE: You may hear or even feel a gurgling/squirting noise(s) – this is your gallbladder and colon emptying toxins; a good sign!  Try to avoid the urge to eliminate and hold the enema the full amount of time. You should not force yourself, so if you feel like you can’t or if the urges get too strong, go ahead and eliminate. This may especially be the case for beginners or those who have or have had chronic constipation.  

Each time you do these they will get easier and easier and you will feel better and better. Remember, you are the one that gets to make the choice everyday to support your body to heal or prevent your body from healing. Choose yourself, choose positivity, choose healing!

Are enemas something you do regularly? What benefits have you seen? What types are your favorite? I'd love to hear your experiences and stories in the comments below! Happy healing friends!

~Billie

DISCLAIMER: Please be sure to inquire about all home remedies including enemas with your physician or healthcare practitioner to make certain there are no contraindications for you. The information shared here should not be seen as medical or nursing advice and is certainly not meant to take the place of your doctor's recommendations. If you are pregnant or breastfeeding,  I highly advise not doing enemas of any kind. Always consult with your physician before making any changes. 
13 Comments

10 Self Care Practices to Promote Healing & Relaxation

5/4/2016

3 Comments

 
Picture
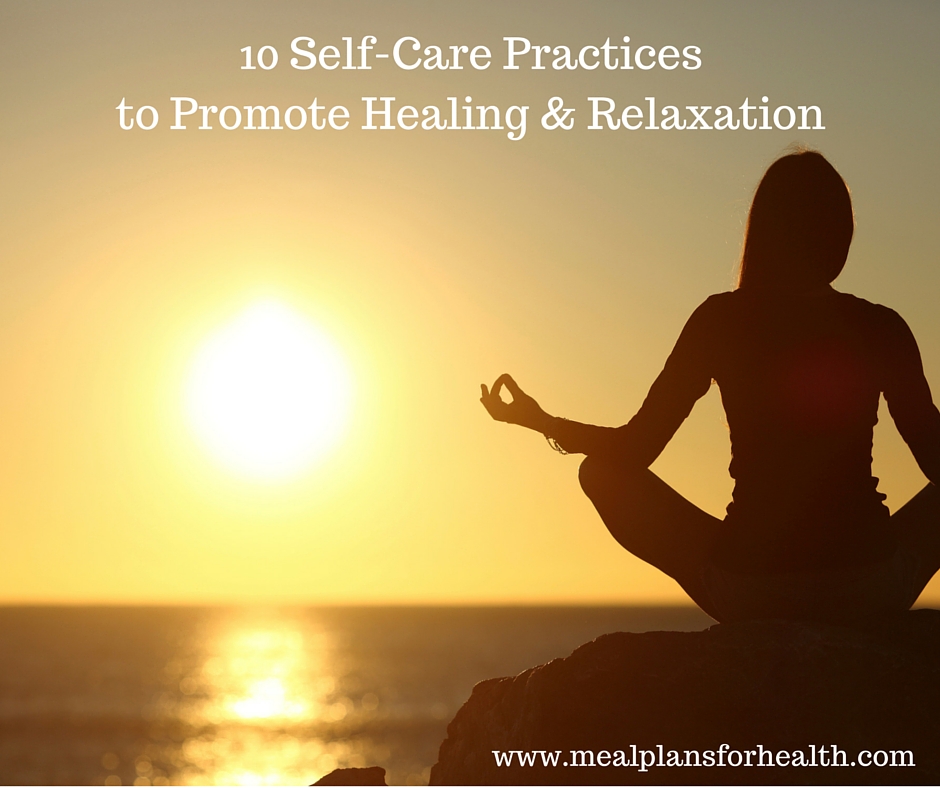
Are you someone that forgets to take care of yourself? Is your life in constant "go-mode"? Are you suffering from a chronic illness or chronic stress? Most of us these days have busy, go-go lifestyles and we tend to save self care for very last on our "to-do" lists.  I get it! Your busy and you don't think you have time to take care of yourself.

In fact, I used to be the same exact way, until that lifestyle caught up with me and then I slowly became sicker and sicker and about 4 years ago I was finally forced to resign from my job at the time. I had built my life around my work, my work schedule which included frequent travel, and the unreasonably high expectations I had set for myself in terms of life and career goals.  I was at my computer very early every morning and sometimes late into the evening. 

I was also very much a "people pleaser" and when I wasn't working, I would devote my energy to attending social events, hosting dinner parties, helping friends or family, and I even took on a second job. I was always running late or behind on everything I did because I ALWAYS over-committed myself.  Sound familiar?!

BUT....I had a high tolerance for the pain and fatigue that I felt everyday and was driven to "power through" and "meet my life goals". I rarely had any downtime or quiet-time and if I did, I would sleep since my body was desperately screaming "REST WOMAN".  I got sick easily and much more often than any of my friends in their early 30's.

Then about 6 years ago my lifetime of mild depression turned into severe depression, I suddenly had high anxiety about the smallest of things, and I noticed that my brain just wasn't able to focus and process things like it used to. I realized I couldn't do basic math in my head or remember my phone number any longer. I even got lost driving home from the grocery store one day in my own neighborhood!

I worked from home so in terms of flexibility, I had a lot, but it wasn't enough and my boss at the time urged me to take some time off for myself and figure out why I was sick and couldn't get well. At this point, I was in so much pain and so run down that could barley even walk around my house.  My very stubborn self finally gave in and realized that my boss my indeed right - thank you Regi! I needed to take some time for MYSELF and figure out how to get well again!

About 6 months after I left work I was finally correctly diagnosed with the disease that had been plaguing me for the last 20 years - Late Stage Chronic Lyme Disease.  I was also diagnosed with an "army" of other pathogens that had made their home in my body besides the Lyme. I was so sick I didn't leave my bed or couch most days and found it difficult to do basic things like take a shower.  I was completely non-functional physically, mentally, and emotionally!

I often see this same commonality among those who are chronically ill, like my fellow Lyme Disease warriors. We are those who give the most to others and save no time or energy for ourselves.  But if you don't slow down, self-access, re-prioritize, and make time for self-care, it won't be long before the constant stress continues to deplete your health and symptoms start to appear. Symptoms like insomnia, fatigue, pain, depression, and anxiety are all small "signs from our body" that something is out of balance or not working optimally.  I IGNORED the signs and "powered through".

Don't be like me! Don't wait until you have a chronic, deadly illness to make time for self care in your life - trust me- not a fun way to go!  These days my everyday life revolves around my self-care, it comes FIRST! I COME FIRST! Treatment for Lyme Disease the last 3 years has been very rigorous and the self-care portion is just as important, or MORE IMPORTANT, than the medications that I use to treat my illness.  When I don't focus on self care, I find that treatment is more difficult, I don't make much progress, and  my symptoms escalate quickly!

The truth is that our bodies need time to heal and rest EVERYDAY no matter if you are sick or not.  And it's YOUR RESPONSIBILITY, not your doctor's, to make self-care a priority in your life.  You are in charge of whether or not your body, mind, and spirit are in a "healing place" or a place or stress, pain, and fatigue!

So what do I mean by self-care? Focusing on self care means implementing small habits into your life EVERYDAY to give yourself the attention and care you need in order to lead a truly healthy and  balanced life physically, emotionally, and spiritually.  

The self-care practices below are simple to implement into your life and don't require a lot of time or money.  Start by picking 1-2 things on this list and make them a priority in your day, EVERYDAY.  Block off self-care time on your schedule if you have to - seriously!! Repeating these practices everyday will slowly make them habits in your life and that's when change, wellness, and more balance and peace starts to happen friends! 

Even though everyday is still an uphill battle for me and treatment is very difficult,  I have a much more balanced, present, and healthy mind and spirit than I ever have. I've found my place in the world and have purpose, reason, and hope to continue to fight my illness with courage everyday and make my life my own! I did this by focusing on self care and you can to. Check out this week's What's That?! Wednesday post below...

10 Self-Care Practices that Promote Healing & Relaxation:
  1. Diaphragmatic Breathing/Deep Breathing - Taking a few times during your day to do even 30 seconds of this in the peace and quiet will boost your oxygen, relax your mind, and improve your brain function. Breathe in through your nose and fill your belly up with air, then breath out through your mouth and pull your tummy in. Repeat slowly for 30-60 seconds  a few times a day or when you are feeling overwhelmed or anxious. 

  2. Yoga or Tai Chi - Both of these exercises increase your body's circulation and detoxification ability and help to calm and balance your mind and ease anxiety. Even just 10-15 minutes a day is beneficial. Keep it simple and do it at home so it's easy to implement into your life.  If you are sick and limited with energy, start with Restorative Yoga which doesn't require hardly any movement or strength at all. 

  3. Meditation - This is also a very easy thing to implement for even just 5-10 minutes, once or twice day can be effective and work up to doing longer sessions if it resonates with you. I found this particular practice very difficult and still do honestly, but I've found that guided meditations and binaural beats can help me get into a meditative state.  I download both of these items from iTunes  to make it simple. You can also try walking meditation, or mediation while you walk outside,  if sitting still and quiet is difficult for you. 

  4. Positive Affirmations - I repeat these everyday several times a day to help continue to foster self-love, acceptance, and healing.  A small example would be: "I completely and totally love and approve of myself." or "I completely and totally forgive myself." or "I'm responsible for creating balance in my own life." You can start by spending 1-2 minutes once or twice a day aloud, in your head, and/or in front of a mirror. I also like to post my current affirmations on sticky notes on my desk, my nightstand, and my bathroom mirror to remind myself and keep myself focused and on track! I highly recommend books, audio, or anything from Louise Hay. I have two of her books and several audio tracks and still re-read and listen to them regularly. 

  5. Emotional Freedom Techniques (EFT)/Tapping - EFT is a form of psychological acupressure  based on the same energy meridians used in Chinese acupuncture, but instead of needles, you use a simple "tapping" motion with your fingertips on certain body parts. Plus you can do it yourself, at home and it doesn't cost anything. The mind and body are tightly connected and your body cannot physically heal if you don't spend time on emotional healing as well. EFT can help get rid of negative energy or thoughts, help with food addiction, and can reduce pain, anxiety and depression. I started using EFT a few months ago and have found it super helpful to do on a daily basis. I also often combine my tapping with my positive affirmations. 

  6. Detox Bath- This is a way to unwind not only your body, but your mind as well. A warm bath boosts detoxification, eases stress, and reduces pain.  If you are chronically ill, daily baths are recommended, but if not even a once or twice weekly designated bath time can be very effective. Check out our blog, Detox Baths: 4 Natural Recipes to Promote Healing and Relaxation to learn how to do a detox bath. 

  7. Get In Some Outside Time - Real sunshine helps to boost your metabolism, increase our vitamin D which supports a healthy immune system, and improves your mood. Even just 10 minutes a day of sunshine and outside time can be helpful. 

  8. Get Rid of Toxic People & Activities - This is a big one! You cannot make time for yourself or any of these self-care activities if you don't re-evaluate your priorities and start saying, "NO", sometimes.  Surround yourself with positive, uplifting people that build you up and make you feel better about yourself and your life. Surround yourself with people who smile and laugh a lot and get rid of things that make you angry, stressed, or sad. 

  9. Make Quality Sleep a Priority - Sleep is the time your body needs to heal - end of story! Focus on getting a solid 7-8 hours every night. Go to sleep and wake up at the same times each day to help re-set your natural circadian rhythm and some quality sleep.  Avoid TV and personal electronics for 60 minutes prior to your bedtime. The EMF's emitted by these devices actually up-regulate your body's cortisol production, which is your "waking and energy hormone" and down-regulate melatonin which is a hormone that helps you get a sounds night's sleep. If this is a habit of yours, try reading a book, taking a bath, or doing a guided mediation or some EFT with positive affirmations instead to help you develop a new habit. 

  10. Focus on your Passions! Spending your time doing things you love and that build you up will increase your energy, improve brain function, and help you to lead a balanced life of purpose. One of the biggest gifts that Lyme Disease has given to me is the gift of purpose- I know what my place in this world is and how I'm supposed to be spending my time. That is why I'm writing you this blog today and most Wednesday's and why I started my own practice alongside my partner, Jen.  

​Because I center my energy around self care first and my passions second, I'm leading a much more fulfilling present life than I was before and I'm helping others do the same which brings me enormous joy and motivates me to continue to focus on my own healing as well!

I hope you've found this long (sorry) blog helpful:) What are your daily self-care practices?  I'd love to hear your feedback!

​~Billie
3 Comments

Are Hidden Food Sensitivities Derailing Your Health Goals?

4/27/2016

0 Comments

 
Picture
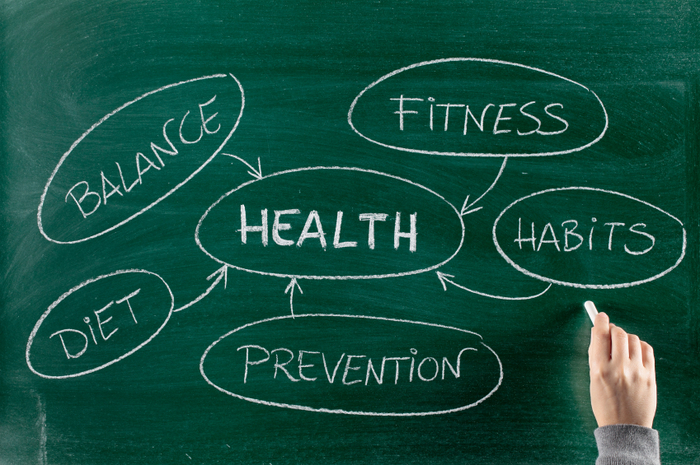
Are you suffering from stubborn health problems that won't go away no matter what you try? Things like constipation, diarrhea, acid reflux, migraine headaches, chronic joint pain, fibromyalgia, chronic fatigue, inability to lose weight, eczema or skin rashes, or chronic brain fog are some of the most common symptoms related to specific immune reactions to the foods we eat.  

In fact, the evidence continues to grow that sensitivities to food are what's behind many of our ongoing health problems. Experts believe that as many as 50% of us may be experiencing adverse symptoms that can make it difficult to maintain a healthy weight and may keep us from reaching our health and wellness goals.  In this week's edition of What's That Wednesday?! we will talk about the most common symptoms and give you some action steps to find out if food sensitivities are affecting your health. 

Food Allergies vs. Food Sensitivities:
It's common to use the words allergy and sensitivity interchangeably, but its important to understand that they mean slightly different things.  A food allergy is FIXED and when triggered causes an immediate immune response; release of antibodies into the bloodstream to combat inflammation and potential organ dysfunction. Once you have a food allergy, for example to shellfish or nuts, you are generally allergic forever and must completely avoid that food. 

A food sensitivity is VARIABLE, meaning that the immune response might be slower and more subtle and your symptoms may change or shift overtime.  Food sensitivity reactions can be delayed for hours or even days after ingestion. And often, food sensitives are dose related. This means that a small amount of a certain food may not cause noticeable symptoms, but a larger amount does.  This makes them a little harder to understand and identify. 

Testing for Food Sensitivities:
The truth is that many MD's do not recognize food sensitivities because standard food allergy testing may not be precise enough to detect low levels of food substances that could cause symptoms.  For example, an allergist will give you an ELISA IgG blood test, but often times these result in a false negative because this test only detects one type of food reaction, type 3, which only covers about 25% of all food sensitivity reactions.  

For my clients, I recommend and order a MRT (Mediator Release Test) Food Sensitivity Test since this test has been shown to be the most comprehensive on the market  because it is able to test for the one thing that all food sensitivities have in common - an inflammatory reaction! All diet-induced inflammatory reactions release proinflammatory and proalgesic "mediators" from white blood cells. "Mediators" include cytokines, histamine, leukotrienes, prostaglandins, etc., from neutrophils, monocytes, eosinophils, and lymphocytes that lead to all the negative clinical effects a food sensitivity sufferer endures.  The MRT test measures these  "mediators" or inflammatory responses to 150 different foods and food chemicals and gives you a list of RED (avoid), YELLOW (eat in small amounts), and GREEN (non-reactive foods that are safest and best).  This test is a very effective tool and I consistently see significant clinical improvement in my clients by implementing a diet based on the MRT results.  If you'd like to understand if the MRT test is right for you or if you are interested in having an MRT test ordered for you, I offer a free 15 minute phone consultation.  Just contact me to set up a time - I'd be honored to speak with you!

Top 5 Most Common Food Sensitivities:
  • Wheat
  • Gluten
  • Dairy
  • Soy
  • Corn

Other common foods that cause sensitives include: eggs, citrus, beans, nuts, yeast, fish/shellfish, and nightshade vegetables (tomatoes, potatoes, eggplant, and peppers). 

Most Common Food Sensitivity Symptoms:
  • Gastrointestinal - bloating, gas, constipation, and diarrhea
  • Weight gain or inability to maintain a healthy weight
  • Inability to lose weight or get rid of those last 10-15 stubborn pounds despite having healthy eating habits and a consistent work out regime. (Weight loss resistance)
  • "Puffiness" - face, eyes, swollen hands/feet
  • Adult acne or skin rashes
  • Joint pain and/or swelling
  • Moodiness/Mood Swings
  • Irregular menstrual cycles and/or severe cramps or low back pain
  • Congestion - nasal/sinus/ear
  • Fatigue and low energy despite adequate sleep

If you have any of these symptoms on a regular basis - daily or even weekly, your body is telling you that something or somethings are out of balance. And it could be as easy as changing some of the food you eat! Foods that our body is sensitive can initiate an immune response reaction that can lead to certain hormones like insulin and cortisol to be released in larger than desired amounts- these are both "fat storage hormones" and will signal your body to store fat in those hard to get rid of places like your belly, hips. thighs and the back of the arms. 

Properly identifying and removing foods that you are sensitive to can make a HUGE difference in your quality of life - and this is something I can attest to personally.   A few years ago, after going through an elimination diet myself, I learned that I in fact had sensitives to gluten, dairy, citric acid, yeast, and nightshade vegetables. When I eliminated these from my diet, I dropped the 15 extra pounds I'd been carrying around all my life and could never get rid of, saw my lifelong IBS symptoms completely disappear, my energy increase, and my menstrual cycle completely balance out.

Then earlier this year, I suddenly had some rashes appearing regularly on my torso , so I decided to do another MRT test to learn what may be affecting me in addition to the sensitives I had already cut out.  After adjusting my diet to incorporate the tests results, my rashes cleared within a couple weeks. This was a reminder to me that food sensitivities can change over time, especially for those who are chronically ill with infection or autoimmune conditions.


So what are you waiting for?! Follow these simple steps below to find out if food sensitivities are derailing your health goals. 

Steps to Take For Finding Food Sensitivities:
  1. Take an MRT Food Sensitivity Test - This is the best place to start as it will save you time and money, give you lots of answers, and allow you to jump right into a specific dietary plan that is safe for you.  You can learn more about this test here.  I'm also a preferred provider and can order the test for you, so if you are interested in learning more, contact me to set up a free 15 minute consultation.
  2. Try an Elimination Diet - Eliminate the reactive foods as shown on your MRT test or if you decide not to do the test, remove the common food allergens  (wheat, gluten, dairy, soy, and corn). If you think you could be sensitive to the others (eggs, citrus, etc) then exclude those as well. Exclude all processed foods and sugars as (even natural sweeteners) as well and follow this protocol for 2-4 weeks. 
  3. Re-introduce & Track Symptoms Using a Food Journal -  Slowly re-introduce each food, one new  one every 5-7 days, and track your symptoms using a food journal. Eliminating all these foods for a 2-4 week time frame will help 're-set' and clean your gut and will allow you to be immediately sensitive to the foods you eat. This will make it VERY CLEAR which foods your body is having adverse reactions to. Again, you are watching for the common symptoms listed above. 
  4. Keep a Food Journal - Write down what you eat and how you feel in the hours and days following. Watch and track the symptoms listed above and anything else you feel. Include EVERYTHING you eat and drink. 
    (PRINT OUR FOOD JOURNAL HERE)

Once you've identified the foods that make your body feel sick, you can get rid of them from your diet permanently and enjoy a healthier you without the extra chronic symptoms of pain, fatigue, and digestive distress! If you find that you have many foods you are sensitive to or if this process seems overwhelming to do on your own - we've got your back! Our nutritional coaching services provide expertise, support, and most importantly, DELICIOUS and EASY RECIPES, as you go through the elimination diet. Our goal is to help you feel satisfied and not deprived and make the process as successful and seamless as possible.  Please let us know if we can be of any help to you. 

In good health,
~Billie & Jennifer

0 Comments

Top 8 Anti-Inflammatory Foods

4/12/2016

1 Comment

 
Picture
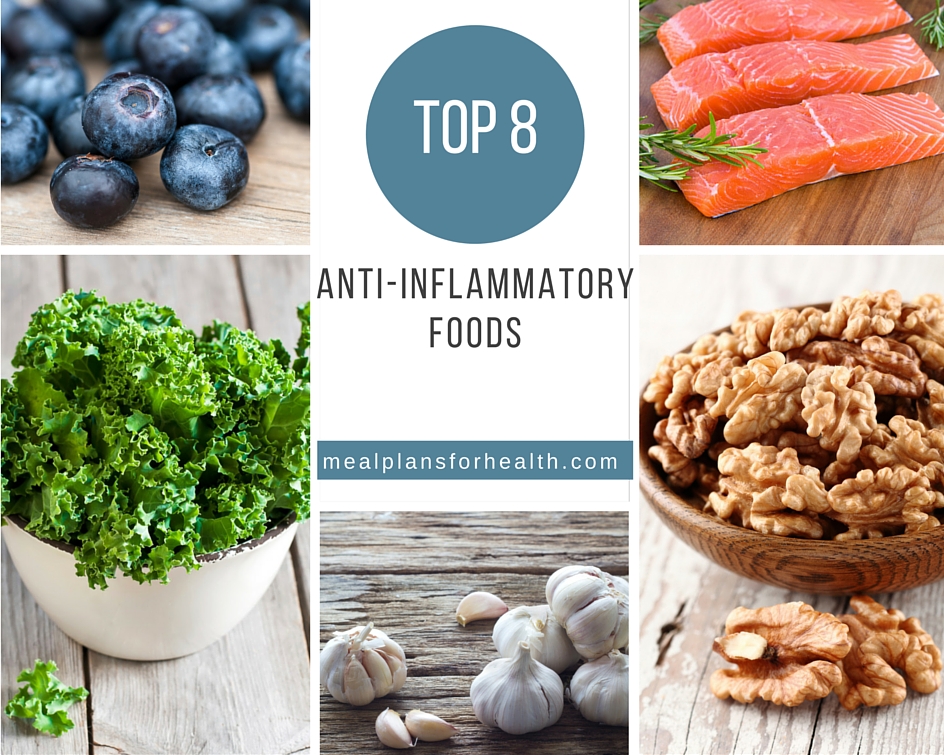
 Most of today's modern diseases like diabetes, heart disease, and the extraordinary amount of autoimmune conditions like: rheumatoid arthritis, fibromyalgia, chronic fatigue syndrome, Lyme disease, multiple sclerosis, Crohn's disease and IBS all have one thing in common - chronic inflammation!

Inflammation is our body's protective and healing response to injury or invasion. The type of inflammation that we all know and can relate to includes pain, swelling, redness, heat, and fever.  But when inflammation persists and/or the immune system becomes 'overactive,' it can damage the body and cause illness not only acutely, but also slowly and silently over time.  

The main causes of inflammation in our bodies are: disease (pathogens, bacteria, virus, fungus, etc), excess adipose/fat tissue, genetics, smoking, stress, environmental toxins, and FOOD! The foods that have been shown to increase inflammatory responses the most include: refined carbohydrates, sugars, most processed and pre-packaged foods, trans fats, non-organic produce, grain fed animal protein, as well as gluten, dairy, and soy.


Avoiding the foods listed above is the most important thing to do, but in order to combat and reverse chronic inflammation, you need to include foods that will nourish your immune system, boost your antioxidant and nutrient intake, and heal your body.  And in this week's What's That?! Wednesday I  give you eight foods to start with plus a few recipes for each of these foods so that you can easily incorporate them into your diet! Check it out...

Top 8 Anti-Inflammatory Foods:
  1. Wild Caught Salmon - This clean protein is loaded with healthy, Omega-3 fats that help to lower inflammation, reduce recovery time from exertion, speed healing, and support the immune system to ward off pathogens.  A diet rich in Omega-3's is "rule #1" when it comes to reducing inflammation and avoiding disease.  Make sure to choose wild caught as farm raised has high levels of  harmful PCB's and antibiotics that increase inflammatory responses and can harm your immune system. You can read our blog, Fish Considerations, to learn more about this.  I recommend wild caught salmon 1-2 times a week as a part of a healthy, anti-inflammatory diet. Some of my favorite salmon dishes include our: Ginger-Sesame Salmon,  Summer Fresh Corn Fritters with Smoked Salmon,  Lemon-Pepper Salmon Burgers, and Quick Salmon-Dill Cakes.

  2. "Super Seeds" (Flaxseed, Chia Seeds, & Hemp Seeds) - These seeds are all fabulous sources of healthy Omega-3 fats as well so we've grouped them together here. Flaxseed has the most Omega-3 content, followed by chia seeds, and then hemp seeds.  Flaxseed can be used medicinally to support good health. Check out my friend, Kate's, article for more information on the specific health benefits of flaxseed at: 9 Fantastic Benefits of Flaxseed. 

    Hemp seeds contain a perfect ratio of Omega-3 to Omega-6 fats and one serving has 10 grams of protein as well! All of these seeds are a good source of fiber that pull toxins from the GI tract and keep you regular - this helps to reduce your body's overall inflammatory response as well. I like to use ground flaxseed in my morning smoothie, chia seeds make a fabulous pudding, and I like sprinkle hemp seeds over my soups, salads, and roasted vegetables.  Check out these recipes to help you get these "super seeds" into your diet: Perfect Green Smoothie, Cinnamon-Spiced Chia Pudding, or our Herb & Hemp Stuffed Potatoes. 

  3. Leafy Greens - In the fight against inflammation, the produce section is your best friend! Fruits and vegetables are rich in antioxidants that restore health and flavonoids that reduce inflammation. Leafy greens are also some of the best sources of fiber, iron, calcium, Vitamin A, C, and K as well as magnesium and manganese. These nutrients can help to reduce your risk of heart disease,  improve vision and eye health, lower stress and anxiety, help you lose unwanted pounds, and help protect your body and brain from oxidative stress that ages us before our time. Some of the best sources are kale, chard, spinach, and broccoli.  Starting your day with some greens in a smoothie or juice is a great way to boost your leafy green intake. I recommend a minimum of 3 cups leafy greens per day, but for those who suffer from an autoimmune or inflammatory condition, your goal should be 5-6 cups/day.  Try our: Kale Refresh Salad, Kale-Apple-Carrot Slaw, Roasted Balsamic Squash with Kale, or my Italian Chicken Sausage & Shrimp Cioppino for some fabulous recipes that include my favorite leafy green - kale!

  4. Blueberries - These dark colored berries are packed with a super special antioxidant called quercetin, which acts as a powerful anti-histamine  as well as an anti-inflammatory agent. Quercetin has been shown to reduce the affects of allergic reactions from food and our environment and can be found in the highest amounts in dark colored berries, olive oil, and citrus. (*) The antioxidants found in  blueberries were also found to slow cognitive decline and improve memory and motor skills making them a super food that helps heal your brain and nourish your immune system.  1/4-1/2 cup a day is an ideal serving for most people; try our Sneaky Green Berry Smoothie,  Colorful Fruit Salad with Citrus-Mint Dressing, or our Butternut Squash-Apple-Blueberry Muffins. 

  5. Garlic - This vegetable has been know  and used for a very long time for its powerful medicinal benefits. It contains special sulfur compounds that stimulate your immune system to fight disease. It is also studied more than any other food for its anti-bacterial, anti-fungal, and anti-microbial properties. Remember, pathogens are one of the main contributors to chronic inflammation so eating foods that help to naturally keep them at bay is one way to fight inflammation at it's source! To get in your daily dose of garlic, try our: Asparagus & Shallot Tossed Quinoa, Apple-Sage Turkey Burgers with Garlic Aioli,  or our Lemony-Quinoa Risotto . Actually, we use garlic in most of our savory recipes since we love it so much:)

  6. Walnuts - These healthy nuts have a good amount of  Omega-3 fats in them and have been found to help reduce blood clots and therefore lower your risk of heart attack or heart disease. Walnuts are also very high in Vitamin E, folate, and melatonin which are neuro-protective nutrients that help to decrease vulnerability to oxidative stress and enhance cognitive and motor function as we age. There are several new studies that show walnut consumption reduced prostate cancer cell growth by 30-40 percent and breast cancer cell growth by 50%.(*)Check out our:  Asian Walnut Lettuce Wraps, Strawberry Green Salad with Walnut-Hemp Clusters,  Rosemary-Walnut Chicken Salad Wraps, or our Walnut Pesto Chicken with Zucchini Noodles. 

  7. Bone Broth - This medicinal broth contains highly absorbable forms of calcium, magnesium, potassium, phosphate, sulfur, and a variety of amino acids, as well as collagen, glucosamine, and condrointin. These nutrients support our immune system, calm and heal digestive distress, and nourish our musculoskeletal system just to name a few.  Check out my blog: How to Make Your Own Bone Broth  to get a regular rotation of this healing food into your diet! If you have an autoimmune disease, food allergies, or leaky gut, this food will nourish your body and help you heal!

  8. Coconut Oil - We've talked ALOT about coconut oil on this blog, so its no surprise we are big fans of including this food into your diet! One thing to know about coconut oil is that it has been shown to help increase and boost the anti-inflammatory agents of other antioxidant loaded foods like turmeric for example.  In fact, because of its lipid fat content, it can help absorption and assimilation of most anti-inflammatory herbs and spices.  Plus coconut oil has anti-fungal and anti-microbial properties that can help you maintain a healthy gut micro-biome, which is where over 60% of your immune system is located! Make sure to choose organic, unrefined coconut oil to get the most benefits. I like to add 1/2 tablespoon to my morning tea or lemon water. It is also perfect for high heat cooking or to use in baking. Try our Raw Coconut Snack Balls or our Chocolate Macadamia-Coconut Smoothie. 
​
I'm sure this gives you plenty of recipes to get started with, but if you need more, we offer Anti-Inflammatory Meal Plans and Cookbooks that are packed with recipes that your whole family will love!

Thanks again for tuning in to this week's What's That?! Wednesday post. Our anti-inflammatory eating guidelines will continue into next week's post, so stay tuned for more information and inspired recipes to come!
~Billie

References:
1. University of Maryland Medical Center
2. Cancer News
1 Comment

Sneaky Green Berry Smoothie

4/12/2016

0 Comments

 
Gluten, Dairy, Soy Free, Low Sugar, Anti-Inflammatory
Picture
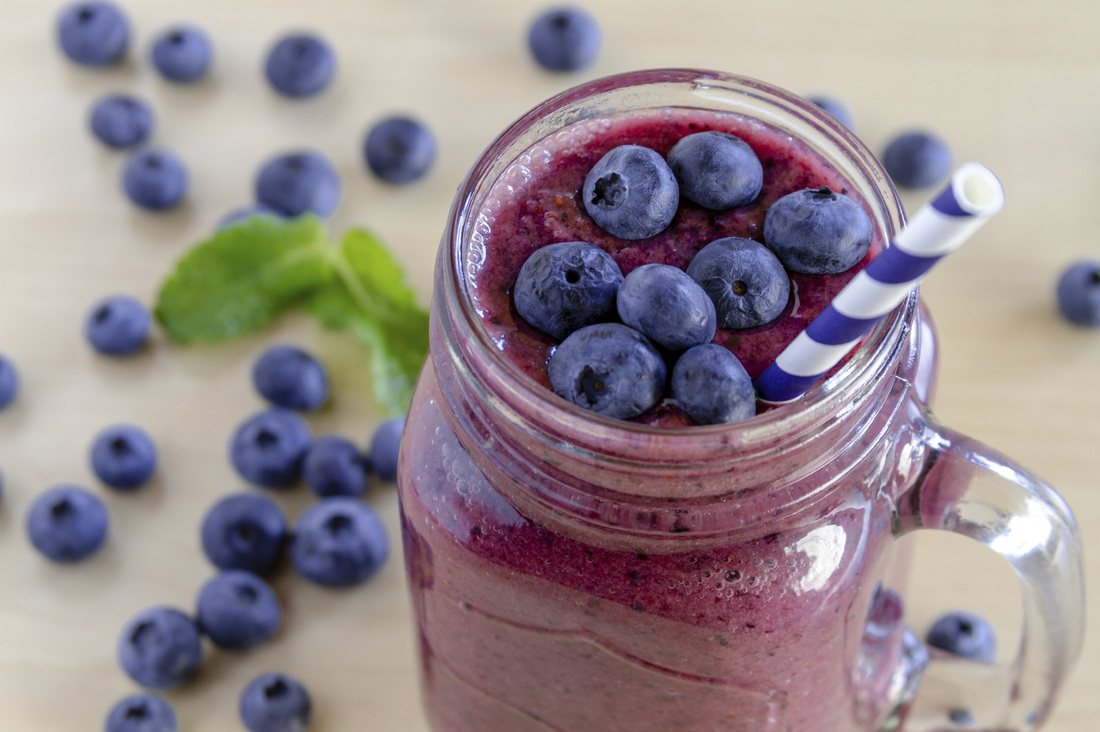
We call this smoothie the "sneaky green smoothie" because the berry flavor is delicious and dominant, making it very easy to hide some healthy leafy green vegetables:) This is a perfect way to get some greens into picky eaters like kids and maybe even your spouse!

In fact starting your day with a green smoothie can help to boost your metabolism and energy for the day, improve digestion, and reduce cravings for sugar and carbs later in the day. Plus berries are loaded with antioxidants that help neutralize free radicals that can lead to disease and early aging in your body -  especially blueberries which are one of the top anti-inflammatory foods on this planet! To learn more, check out our blog, Top 8 Anti-Inflammatory Foods. 

Sneaky Green Berry Smoothie: (PRINT RECIPE)
Serves 2

Ingredients:
1 cup organic spinach
1 -1 ½ cups lighter greens like romaine or cucumber
½ cup frozen organic berries of choice
½ of a ripe avocado, peeled & de-seeded
2 cups unsweetened non-dairy milk of choice (like almond, coconut, or hemp)
2 servings protein powder (2 scoops)
2 tablespoons ground organic flaxseed or chia seeds

Directions:
  1. Place all ingredients into a blender and process on high until smooth.
  2. Pour into two glasses and enjoy!

Enjoy friends!
​~Billie

0 Comments

Quick Salmon Dill Cakes

4/12/2016

0 Comments

 
Gluten Free. Dairy Free. Soy Free. Low Carb. Anti-Inflammatory
Picture
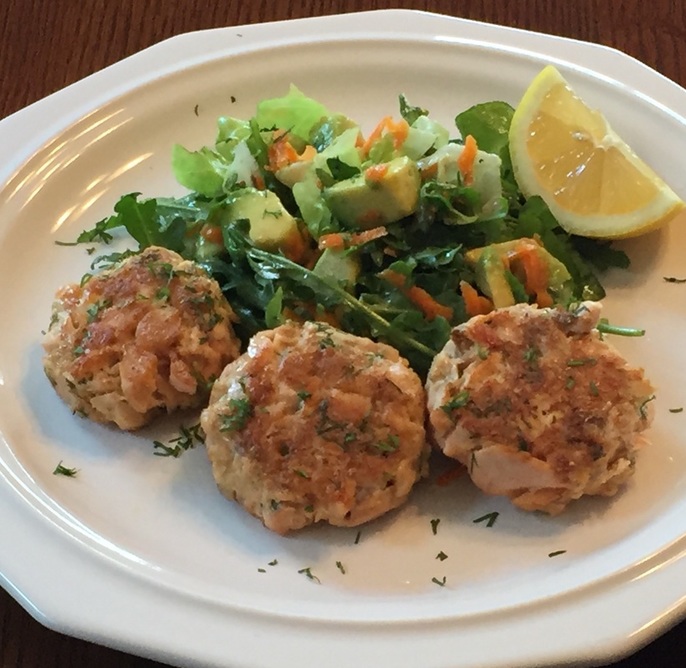
These mini salmon cakes are moist on the inside with a slight crunch on the outside. They are busting with flavors but contain very simple ingredients so they come together easily and keep well for leftovers. Remember to choose wild caught salmon to prevent consuming harmful PCP's and antibiotics.  Wild caught salmon is an excellent source of Omega-3 fatty acids, which are know to be one of the most powerful medicines when it comes to reducing inflammation.  Healthy, versatile, and delicious - I know you will love this recipe! Check it out...

Quick Salmon Dill Cakes: (PRINT RECIPE)
4 Servings

Ingredients:
20 ounces wild caught salmon (canned or pre-cooked)*
2 tablespoons fresh dill
¼ red onion, minced
3 heaping tablespoons ground flaxseed
1 egg, lightly beaten
1 tablespoon Dijon mustard (optional)
½ teaspoon salt
½ teaspoon pepper
1 tablespoon organic ghee or coconut oil
1 lemon, cut into wedges

Directions:
  1. Combine all ingredients, except oil and lemon wedges, in a large bowl and mix well to combine.
  2. Use your hands to form small patties, about 2 inches in width. They will be a bit wet, just form them the best you can. Then place patties into "fridge" for 10-15 minutes to allow them to firm up before you cook them.
  3. Heat ghee or oil in a large skillet (cast-iron if you have one) over medium heat. Tilt to coat the pan, then add patties, working in batches of four if necessary.
  4. Cook patties for about 3-4 minutes per side or until golden brown and slightly crispy.
  5. Serve hot or cold with fresh lemon juice squeezed on top. I like to serve these over mixed greens.

*Trader Joes sells 14.5-ounce cans of wild caught salmon for like $3.49; best price by a long shot I’ve found out there. Or you can buy fresh wild caught salmon filets. Add some salt, pepper, and lemon juice and bake in the oven at 400 degrees for 8-10 minutes. Then shred to make the “cakes”.
 
These also taste great cold – I like to double this recipe so that I can toss the leftover patties onto a salad for a great healthy lunch option. I hope you enjoy these as much I do! Leave me some feedback below if you try them out!

~Billie

0 Comments

Top 8 Anti-Inflammatory Herbs & Spices

4/6/2016

0 Comments

 
Picture
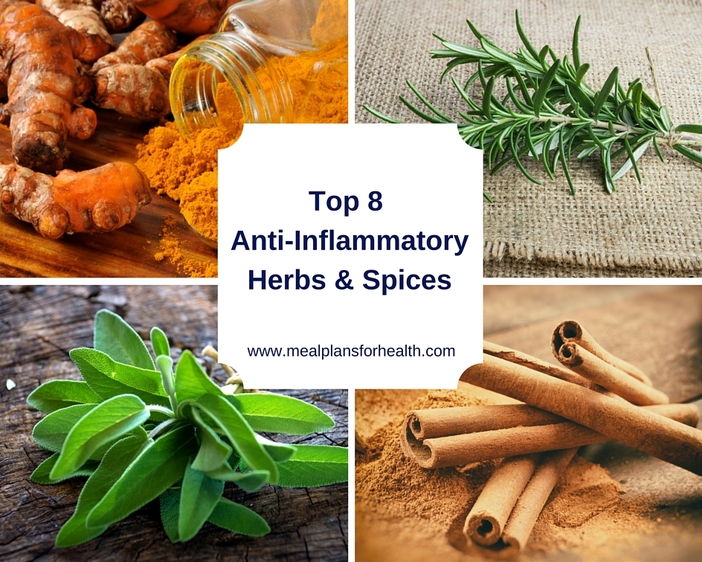
Some of the most potent, anti-inflammatory foods on this earth are in the form of herbs and spices.  They can add loads of antioxidants, minerals, and vitamins to your meals plus they enhance the flavor profile as well:) Including these in your diet regularly can boost detoxification, help to stabilize blood sugar, combat oxidative stress and early aging, and lower inflammatory symptoms that cause pain, fatigue, and brain fog.  Adding herbs and spices to your meals is an instant nutritional and flavor upgrade for your diet without adding any calories!!

In today's What's That?! Wednesday post, I will share the top 8 anti-inflammatory  herbs and spices and  their health benefits, as well as give you several of my favorite recipes so you can easily and deliciously incorporate them into your diet! Eating a diet rich in anti-inflammatory foods is recommended for anyone suffering from a chronic illness, an autoimmune disease, Lyme disease, diabetes, or heart disease.  Inflammation is at the core of all of these illnesses and food can be the best and most potent medicine to bring you back to health! Check it out...

Top 8 Anti-Inflammatory Herbs & Spices:
  1. Turmeric - This root and ground herb has been shown to inhibit the COX-2 enzyme that promotes swelling, stiffness, and pain and is much safer than using NSAID's that can cause damage to your gut lining and increase your risk of heart disease when taken regularly. Several studies also show that turmeric boosts brain-derived neurotrophic factor (BDNF) which can reduce the risk of degenerative brain diseases. BDNF is one of the items that has been found to be low or deficient in diseases like Alzheimer's and chronic depression. BDNF increases the growth of new neurons and helps to slow or prevent these inflammatory conditions.  This is my most favorite anti-inflammatory herb, I use it orally in the form of capsule curcumin for headaches and pain and include it into my diet daily.  Some of my favorite recipes are: Turmeric Spice Latte, Crockpot Turmeric Chicken Stew, and my Anti-Inflammatory Herbal Tea.  

  2. Ginger - This common ingredient in Asian and Indian foods has been used for centuries for holistic healers worldwide. Perhaps what it is know for best is its anti-inflammatory effects on the digestive track. Ginger has been shown to reduce inflammation in your gut, relieve nausea and stomach aches,  and help with morning sickness.  A cup of ginger tea works wonders for this:) Reducing inflammation in your gut can help you become more regular and reduce your risk of colon cancer.  Additionally, a study out of The University of Georgia showed that ginger reduced muscle pain by 25% and helped  87% of participants alleviate pain related to their menstrual cycle. (*) To get ginger into your diet regularly, try my Anti-Inflammatory Herbal Tea,  Ginger Sugar Snap Peas, Sesame-Ginger Salmon, or my Chinese Chicken Salad.

  3. Cinnamon - This lovely spice has been shown to be help stabilize blood sugar and reduce insulin resistance.  For this reason it can help to prevent diabetes and metabolic syndrome. (*)Plus its packed with antioxidants which help to reduce free radicals that break down the body and make you age faster. I love to use cinnamon in both sweet and savory dishes, try my Salty, Cinnamon Sweet Potato Fries or my Cinnamon-Spiced Chia Pudding.

  4. Rosemary - This healing herb is one of my favorites - it's packed with many powerful anti-inflammatory agents, that have been linked to reducing inflammation in the muscles, joints, and blood vessels.  A study published in the International Journal of Neuroscience in 2003 linked rosemary to enhanced cognition and overall memory quality. (*) Very cool! Check out my Rosemary Chicken Salad Wraps for a great recipe that features this medicinal food.

  5. Thyme - A study out of Japan showed that thyme, like turmeric,  inhibits and enzyme called COX-2 that plays a role in the body's inflammation process that produces the common side affect of pain. (*) In fact, most the pharmaceutical NSAID medications (non-steroidal anti-inflammatory drugs) actually work in the exact same way but often come with unwanted side effects like digestive distress. Try my Italian Chicken Sausage & Shrimp Cioppio or  Crockpot Roasted Turmeric Chicken to get in a good dose of thyme. 

  6. Oregano - This herb is used often in Greek, Spanish, and Italian style meals.  Its potent antimicrobial benefits make oregano a great herb to add to your foods, especially if you are feeling like you are fighting off a virus or cold.  Oregano essential oil has been shown to be an extremely potent anti-fungal for killing some forms of candida and other fungus. (*) If you suffer from one of these, you should work with a Functional Nutrition Coach or another holistic, functional practitioner to learn how to take oregano oil safely and effectively and if it may be appropriate for you.  I do not recommend using oregano oil without consulting with a qualified practitioner first. The food version(fresh or dried) is much less potent and can be used safely in moderation with most people.  Check out my Herb Crusted Chicken Breast or my Easy Chicken Parmesan with Zucchini Noodles. 

  7. Sage - This medicinal herb has been used for centuries among herbal healers to ease anxiety, depression, and symptoms of menopause like night sweats. It is also currently being studied for its use in treating Parkinson's Disease, another chronic inflammation driven illness that attacks the nervous system.  Sage has also been shown to help lower blood sugar in diabetics.  Try my favorite Apple-Sage Turkey Burgers or our Sausage & Sage Quiche with Sweet Potato Crust to help you incorporate sage into your diet. 

  8. ​Clove - In one study, published in 2012, clove was shown to significantly reduce harmful oxidized LDL particles that increase your risk of  heart disease. (*)  Cloves also have anti-bacterial and anti-fungal properties which can help to kill bad germs and bugs in the throat, lungs, and gut.  Try my Chai Tea Latte to get in a dose of clove. This delightful, warm beverage is loaded with  medicinal properties and tastes like your favorite, coffee-shop version!

Which recipes sound best to you? Did you find this information helpful? I'd love to hear your comments:) Thanks for tuning into another What's That?! Wednesday post...I've got more Anti-Inflammatory Nutrition coming up on next week's edition. 
~Billie

*References:
  1. Journal of the American College of Nutrition, 2012
  2. Phytomedicine, 2009
  3. Journal of Lipid Research, 2009
  4. International Journal of Neuroscience, 2003 ​
  5. Journal of Diabetes Science & Technology, 2010
  6. Journal of Pain, September 2009
0 Comments

Crockpot Roasted Turmeric Chicken

4/5/2016

0 Comments

 
Gluten, Dairy, & Soy Free. Anti-Inflammatory Meal.
Picture
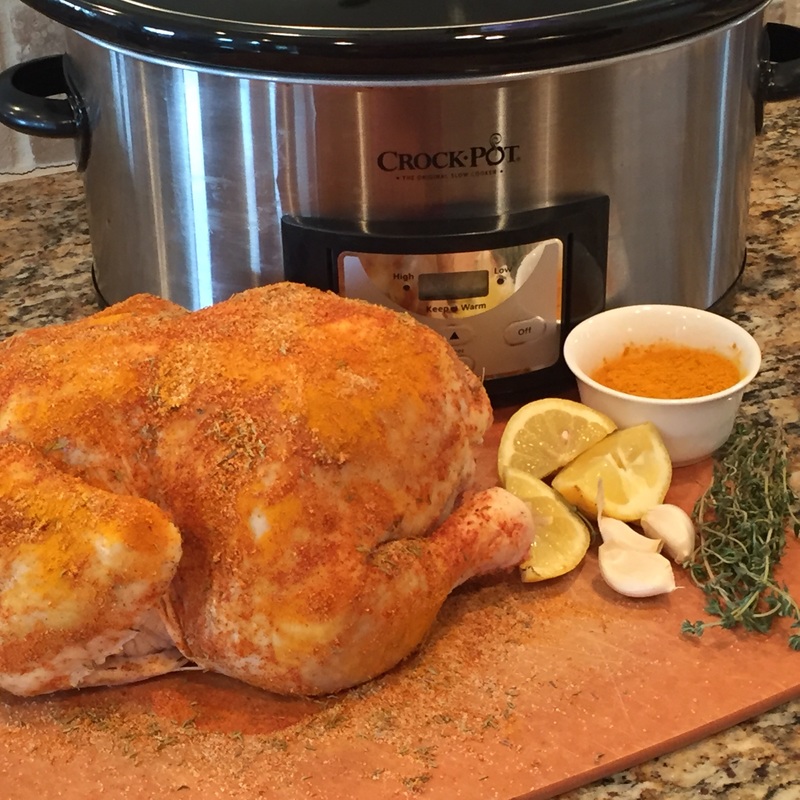
This is an amazing hands-off recipe that will give you enough food for at least a couple meals depending on the size of your family.  Turmeric is one my favorite anti-inflammatory spices and this dish is a perfect way to boost your intake. The chicken comes out moist and delicious and practically falls off the bones.  Plus you can use your bones to make some organic chicken bone broth as well! FYI - Don't worry about the small amount of moisture used in this recipe, the chicken will release a lot more as it cooks so you really don't need to add more than 1/2 cup. 

I like to take the leftover chicken and use it in other meals like over a salad, shredded into a soup or stew, or mixed into my Turmeric Chicken Salad Lettuce Wraps.  This gives you some healthy, quick protein for easy lunches or an evening when you don't have any time to cook! 

Crockpot Roasted Turmeric Chicken: (PRINT RECIPE)
Servings 8-12 (depending on the size of your chicken)

Ingredients:
1 (4-6 pound) whole organic, free-range chicken
½ a large lemon, sliced into wedges
4 cloves garlic, peeled and left whole
1 large onion, peeled and sliced into large half-moon shapes
A few sprigs of fresh herb or herbs of choice (sage, rosemary, thyme, oregano, etc)
1 teaspoon ground turmeric
1 teaspoon dried thyme
1 teaspoon salt
½ teaspoon black pepper (optional)
1 teaspoon garlic powder
½ cup organic chicken or vegetable broth or filtered water

Directions:
  1. Combine dried thyme, turmeric, salt, pepper (if using), and garlic powder in a small bowl and mix well.
  2. Rub and pat spice mixture all over whole chicken, covering it well with the spice rub.
  3. Place lemon wedges and fresh herb sprigs of choice inside the body cavity of the whole chicken.
  4. Arrange your onions on the bottom of your crockpot, so they cover the entire bottom of the crockpot. This will help to “hold up” the chicken away from the bottom of the pot so it gets juicier.
  5. Pour broth or water into the pot, then place the whole chicken on top of the onions.
  6. Cover and cook on high for 4-6 hours.
  7. Remove chicken, slice, and serve! 

If you want to make organic chicken bone broth – this is great opportunity to do so. After you’ve sliced all the meat off the bones, place the carcass and bones back into your crockpot. Keep the onions in there too– and then add 8-12 cups water, depending on how much your crockpot holds, 3 tablespoons raw apple cider vinegar (to help draw minerals out of the bones), & a few more sprigs of herbs of choice (I recommend thyme and parsley). Cover and cook on low for 10-12 more hours. Run through a fine mesh strainer to isolate broth when its done cooking. Store broth in fridge for up to a week or in the freezer for up to 3 months.  Check out our blog, Health Benefits of Bone Broth & How to Make It to learn more. 

I like to serve this dish with some fiber based carbohydrates like roasted squash or my Salty, Cinnamon Sweet Potato Fries and some steamed or sauteed green vegetables. Try my Ginger Snap Peas/Snow Peas -as ginger pairs very well with turmeric:) 

Enjoy friends and let me know what you think!
~Billie

0 Comments

Ginger Sugar Snap Peas

4/5/2016

0 Comments

 
Gluten, Dairy, & Soy Free
Picture
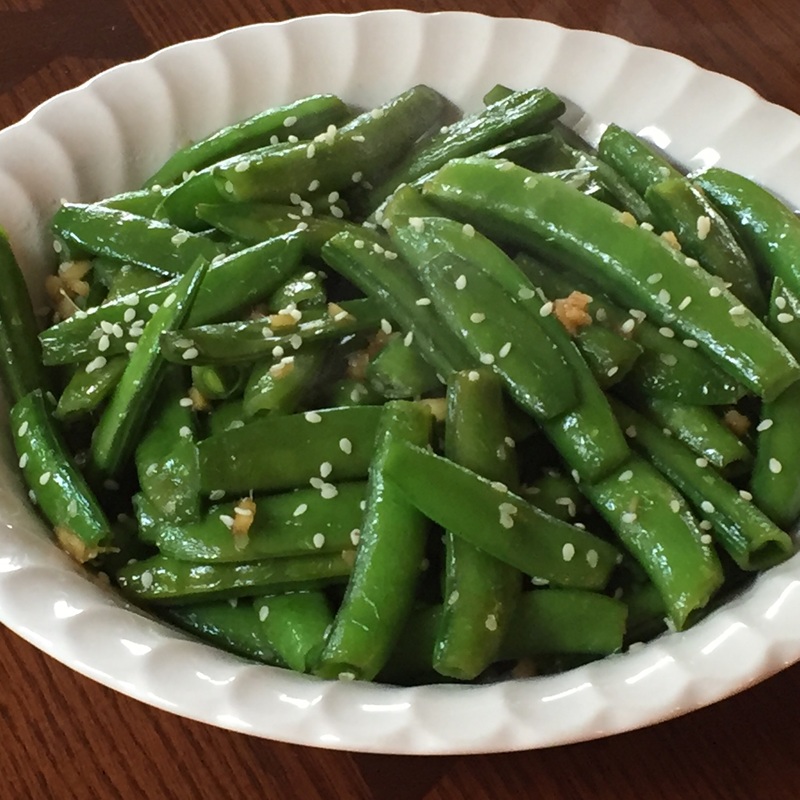
These snap peas are a lovely Spring and Summer side dish to round out your meal. They are super simple, but loaded with flavor and healing foods like ginger which is very helpful for digestion and reducing gut inflammation.  Try this dish paired with my Crockpot Roasted Turmeric Chicken and Salty, Cinnamon Sweet Potato Fries for a perfectly balanced anti-inflammatory meal! You can use sugar snap peas, snow peas or even green beans in this recipe - which ever you prefer:)

Ginger Sugar Snap Peas: (PRINT RECIPE)
Serves 4

Ingredients:
1 teaspoon coconut oil, melted
1 teaspoon sesame oil
4 cups snow peas or sugar snap peas, trimmed (or even green beans)
1-3 teaspoons fresh ginger, minced (depending on how "gingery" you like it)
1 tablespoon coconut aminos (a gluten & soy free soy sauce substitute)
Salt and pepper to taste

Directions:
  1. Heat coconut oil in a skillet over medium-high heat.
  2. Add the snow peas/sugar snap peas and saute 3 minutes. If you are using sugar snap peas, you may need to increase your cooking time to 5 minutes. Green beans will need 7-10 minutes.
  3. Add the ginger, stir well, and continue to saute for another 3 minutes. 
  4. Remove from the heat and stir in coconut aminos, sesame oil, salt, and pepper.
  5. Serve hot!

Yum, yum, yum!! Enjoy....
​~Billie

0 Comments

Salty, Cinnamon Sweet Potato Fries

4/5/2016

0 Comments

 
Gluten, Dairy, & Soy Free
Picture
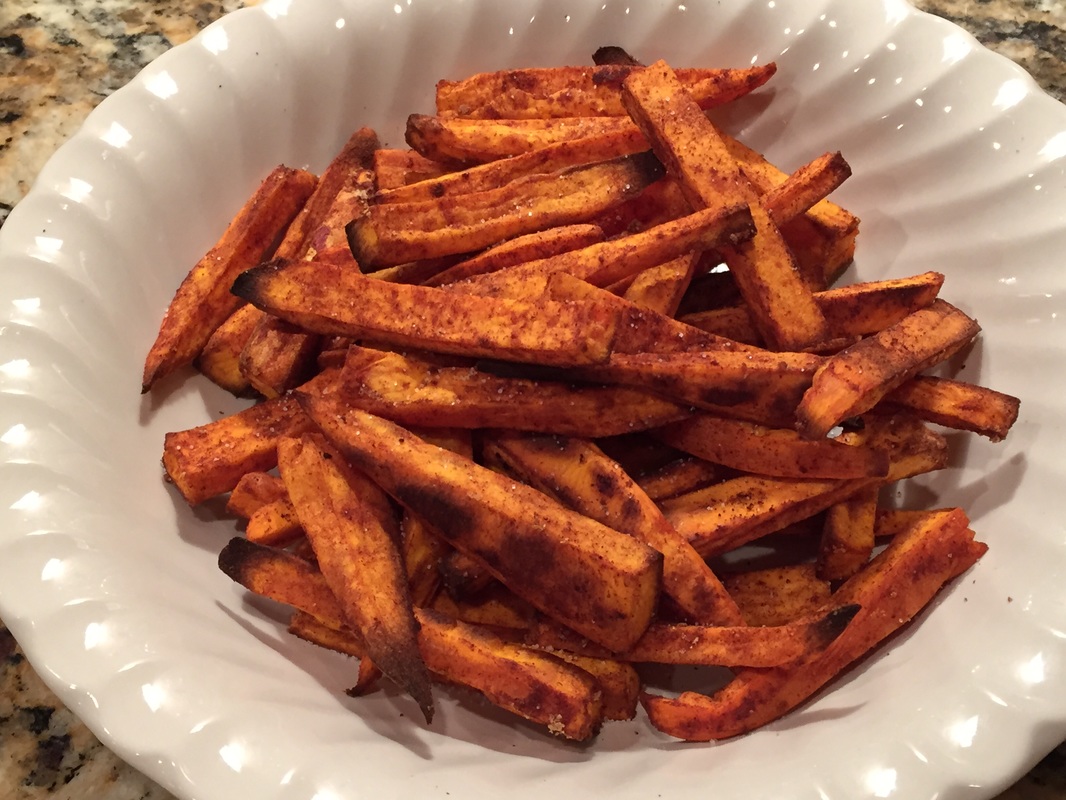
Sweet potatoes are a great source of antioxidants, beta-carotene, and Vitamins A & C to support a healthy immune system. Because they are more fibrous than white potatoes, they have a lower glycemic response and fall into the “good carb” category!  Cinnamon can also help to reduce sweet cravings –an awesome bonus! Plus these sort of taste like you are having a dessert:) This is just one of over 30, clean food dishes in our 10 Day Sugar Detox eBook, a 10 day clean eating guide to help you ditch processed foods, beat cravings, and boost your nutrition!

Salty, Cinnamon Sweet Potato Fries: (PRINT RECIPE)
Serves 4

Ingredients:
2 medium sweet potatoes, sliced into fries*
1 ½ tablespoons coconut oil, melted
1 teaspoon ground cinnamon
1 teaspoon sea salt

Directions:
  1. Preheat oven to 425 degrees and line a baking sheet with parchment paper.
  2. Place fries in a large bowl, then add melted coconut oil, cinnamon, and salt and toss well to coat fries.
  3. Pour the potatoes in a single layer onto your baking sheet. Be sure to not overlap any fries, this will help them cook evenly and crisp slightly.
  4. Bake in oven for about 30-35 minutes or until fries are slightly browned.
  5. Serve hot!

*You can peel your potatoes, but we leave the peel on for the extra vitamins. You can also chop these into small cubes if you prefer instead of fries- either way they are delicious! 

Enjoy friends!
~Billie

0 Comments

Anti-Inflammatory Diet: Best Oil Choices for Cooking

3/29/2016

2 Comments

 
Picture
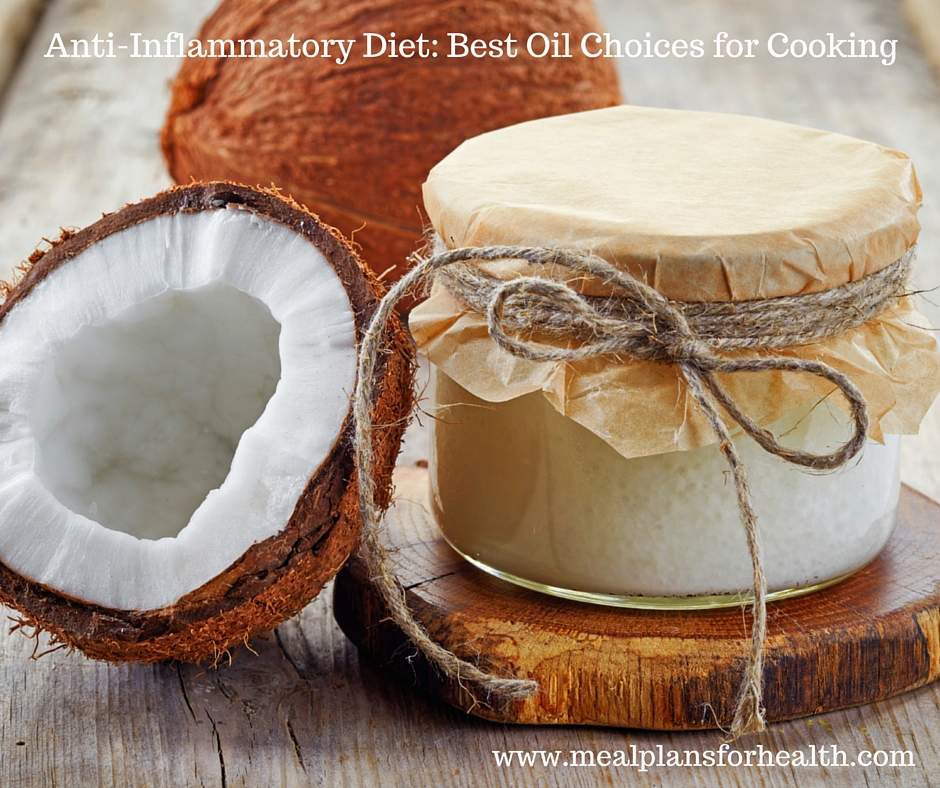
When it comes choosing to healthy oils, there are two important things to consider; the type of fat (pro-inflammatory vs. anti-inflammatory) and it's heating capacity.  Its very important to understand that anytime you heat  an oil, you risk overheating it past its smoke point, which can cause oxidation and lead to the formation of carcinogens and other unhealthy compounds that are toxic to consume.  

Additionally, the type of oil or fat you use is enormously important. Much of our food supply, especially processed and restaurant foods use harmful polyunsaturated oils that have a high ratio of Omega 6 to Omega 3 fatty acids like corn, soy, and sunflower oils.  These oils have a 54:1 to 71:1 ratio and current research clearly shows that it is this skewed ratio that may be one of the biggest contributing factors to the rising number of autoimmune diseases like morbid obesity, diabetes, fibromyalgia, Parkinson's, Alzheimer's and more. Check out our blog, Omega-6 & Omega-3 Fats for an Anti-Inflammatory Diet to learn more and see our recommendations on the healthiest  and most harmful choices in this category. 

Now that we've covered the two most important criteria for choosing a healthy oil, the rest of this week's What's That?! Wednesday post will walk you through my recommendations for the healthiest oil choices that can help to reduce inflammation and prevent disease. Plus several recipes to help you incorporate these oils into your diet...

Best For High Heat Cooking:
  1. Organic, Unrefined Coconut Oil - This medicinal food is super versatile and good for you in so many ways. It can help to strengthen your immune system with its broad anti-microbial effects,  decrease your risk of heart disease, and stabilize your blood sugar.  It has a slightly sweet taste making it perfect for baking,  but it is also great for roasting, or sauteing because it is very stable at high heats, up to 425 degrees. 

    Check out our Raw Coconut Snack Balls , our Grain-Free Banana-Cinnamon Waffles, or our Balsamic Roasted Kabocha Squash. I also like to add 1/2 -1 tablespoon raw, unrefined coconut oil to my daily lemon water for additional detoxification, immune support, and fat-burning power! Be sure to choose a coconut oil that is organic, unrefined, and cold-pressed. 

  2. Organic Ghee -  Ghee is clarified butter, which is butter that is processed by simmering it on low until most of the milk and and water evaporates and you are left with the pure fat.  For this reason, ghee is a good choice for those who are allergic or sensitive to dairy.  Ghee also has a 400 degree smoke point so it is a good choice for high-heat cooking, searing, and even frying.

    Try our Herb Crusted Chicken Breast for a mouthwatering meal that will become a family favorite! It's important to choose ghee made from grass-fed butter since butter from grain-fed cows is loaded with inflammatory fats and hormones that will drive up inflammation and increase your risk of disease. My personal favorite brand is Purity Farms Ghee, which is sold at most Whole Foods and natural food stores or online retailers like Thrive Market and Amazon.

    Both coconut oil and ghee are healthy saturated fats that help reduce inflammation and burn fat. To learn more about the healthiest choices when it comes to saturated fats, read our blog: 4 Sources of Healthy Saturated Fats!

Best for Medium-Heat Cooking:
  1. Organic, Extra Virgin Olive Oil - This heart-healthy oil is loaded with antioxidants and healthy mono saturated fats. It has been shown to prevent cancer, heart disease, and diabetes. Olive oil is best used at room temperature but is also safe for medium-low heat saute cooking.  Extra virgin olive oil has a smoke point of about 320 degrees, so I would not recommend using  for any recipe that cooks at over 300 degrees. My favorite way to use olive oil is to drizzle some over some steamed veggies, as a base for my homemade salad dressings, or as a light saute oil for some veggies on the stove top over medium heat. 

    Try our Apple Cider Vinaigrette.  Or check out one of my favorite anti-inflammatory meals packed with healthy mono saturated fats, our Walnut Chicken Pesto with Zucchini Noodles. 

Best for No-Heat Cooking:
  1. Organic Flaxseed Oil -  Flax oil actually has the very best ratio of Omega-6 to Omega-3 fatty acids, and is one of the most powerful plant foods on the planet.  It's been shown to fight heart disease, stroke, and cancer and can also help you to lose weight!  It is packed with fiber, protein, and loads of antioxidants and should be considered as a part of a anti-inflammatory diet. 

    Be aware that you can NEVER heat it, though, and it has to be stored in the refrigerator.  In addition to being amazing in salad dressings, it's great drizzled over steamed veggies or added to smoothies.
    ​  An organic, cold-pressed, unrefined oil is best. 

  2. Organic, Unrefined Sesame Oil - A good source of calcium and iron, this oil is a perfect way to flavor your dish...after you've cooked it that is. I like to drizzle it onto my steamed or blanched veggies or use it in a salad dressing. Try our Arugula & Carrot Salad with Sesame-Ginger Dressing. 

Thanks for tuning into this week's post...next week, we will continue the Anti-Inflammatory Diet theme. I will be sharing the Top 10 Anti-Inflammatory Herbs & Spices as well as several new recipes so you can get these medicinal foods into your diet with ease!

​~Billie
2 Comments

Pumpkin Seed-Goji Berry Dark Chocolate Bark

3/22/2016

0 Comments

 
Grain free. Gluten free. Dairy free option. 
Picture
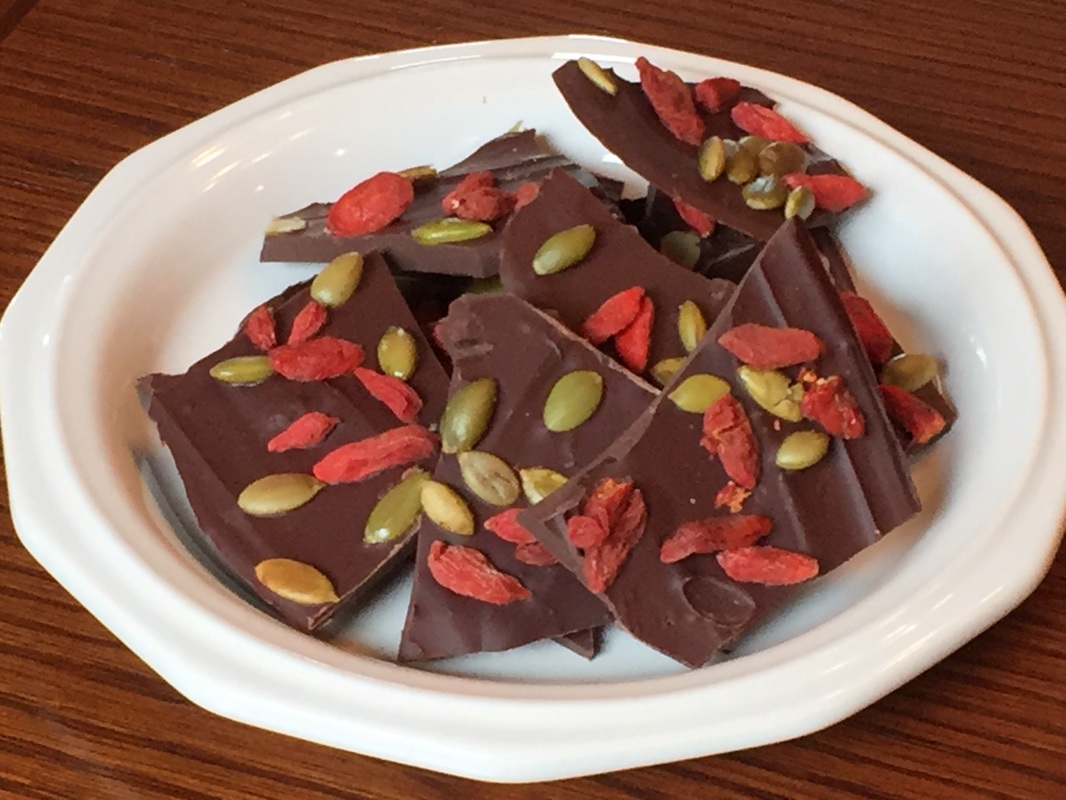
This recipe is a perfect way to make your own "candy-like" dessert at home. Dark chocolate bark is super simple to make and does not require an oven or a stove top.  It only takes about 10 minutes of your time and you can customize this recipe to meet your taste buds.  For example, instead of pumpkin seeds and goji berries try: shredded coconut, chopped almonds, walnuts, or macadamia nuts or some craisins.  I like this combination because pumpkin seeds and goji berries are super-foods that are packed with additional antioxidants - always a good thing:) Enjoy...

Pumpkin Seed Goji Berry Dark Chocolate Bark (PRINT RECIPE)
Makes 10-12 servings

Ingredients:
1 cup dark chocolate chips or 1 (8-ounce) dark chocolate bar (70% or higher)
      or vegan chocolate chips/carob chips
3 tablespoons raw pumpkin seeds
3 tablespoons go-ji berries
¼ -½ teaspoon coarse sea salt (optional – for a salty-sweet taste)

Directions:
  1. If you are using a chocolate bar, chop it into coarse pieces before you begin.
  2. Line a baking sheet with a silicone mat or parchment paper and set aside.
  3. Place chocolate chips or chopped chocolate bar into a microwave bowl and microwave for 30 seconds.
  4. Remove from the bowl from the microwave, stir well, then place back into microwave for an additional 30 seconds.
  5. Remove again, stir well and if there are still chunks, continue to microwave in 30 second increments. Stir each time because sometimes, just by stirring the chunks will suddenly melt.  TIP: This is a simple method for tempering chocolate. You do not want to overheat it in the microwave though, so be sure to stir each time.
  6. Pour melted chocolate onto parchment paper or silicone mat and use a spatula to spread it out into a thin layer, about 1/8 inch thick. It can be a huge circle, a square shape or any shape really – totally up to you. The melted chocolate will not cover the entire pan, so don’t worry about that.
  7. Evenly sprinkle chocolate with pumpkin seeds and goji berries. Add salt if desired.
  8. Place in fridge to harden for 15-20 minutes.
  9. Once completely hardened, take a chef knife to chop large pieces of “dark chocolate bark”.
  10. Store at room temperature and enjoy!

Let me know what you think and what your favorite combinations are!
~Billie
0 Comments
<<Previous
Forward>>
    Picture
    Billie Shellist, FDN-P

    I practice functional nutrition, an approach that allows me to look at your entire health history and help you find the "root causes" of your chronic health complaints.  

    ​This cuts out the trial and error process and helps you get real symptom relief and resolution!


    Food is medicine and knowledge is power -I hope you enjoy my anti-inflammatory recipes which are gluten, dairy, and soy free as well as very low grain and sugar.  

    If you'd like to heal from the root cause(s) of your chronic symptoms,  try starting with a complimentary 15-minute consultation.  Click here to request your free session.


    Categories

    All
    Anti Inflammatory Foods
    Appetizers & Side Dishes
    Autoimmunity
    Beverages & Smoothies
    Breakfast & Brunch
    Desserts
    Detox & Cleansing
    Food Sensitivities
    Gluten & Dairy Free Recipes
    Gluten Free Recipes
    Grain Free Recipes
    Gut & Digestive Health
    Histamine Intolerance/MCAS
    Holiday Recipes
    Hormonal Health
    Kid Friendly
    Main Dishes
    Self Care Practices
    Snacks
    Soups & Salads
    Special Diets
    Vegan Recipes
    Vegetarian Recipes
    Weight Management


Email Us
​Call us: (720) 213-8359


Copyright 2018 Functional Diagnostic Healing. All rights reserved.
Professional photography by Priscilla Durkin- www.priscilladurkin.com
Privacy Policy   -    Legal Notice