
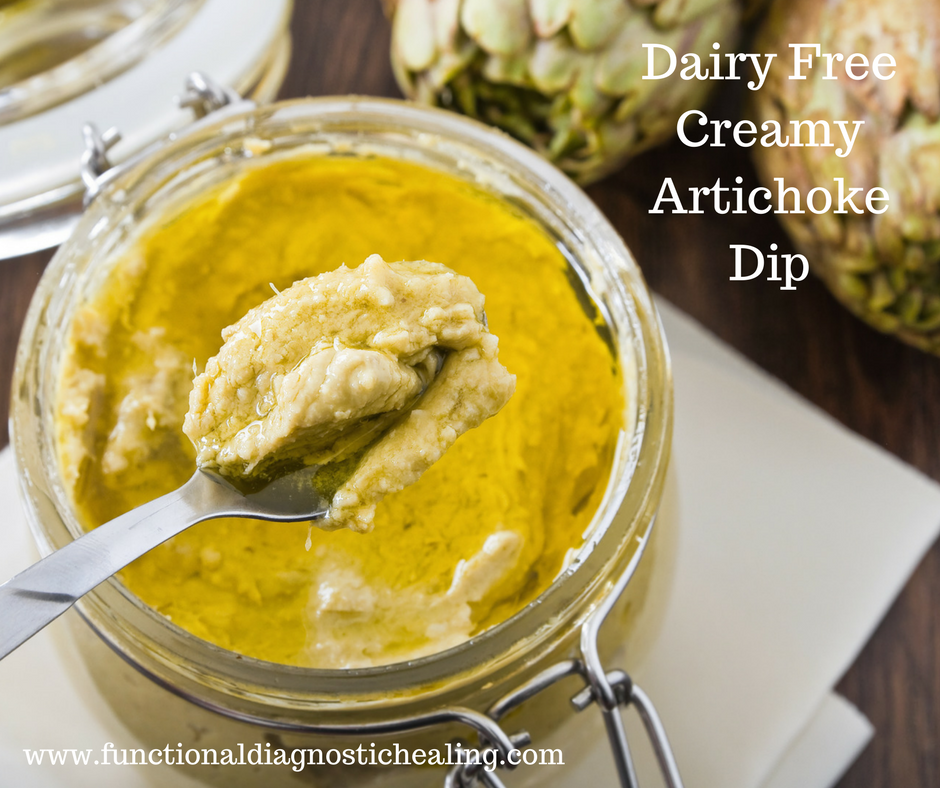
 Artichoke dip is one of the most well loved appetizers out there but is often off limits for those of us who eat a dairy free diet. Well, not any longer my friends...
This delicious dip will blow your mind with its rich, creamy texture and flavor that comes from a combination of white beans and organic mayonnaise made from cage free eggs. It's the perfect addition to your upcoming Easter or Mother's Day brunch celebrations or makes an excellent snack to have on hand for some quick protein and fiber! Plus it comes together in less than 15 minutes. Sometimes for variety, I'll stir in 1 tablespoon homemade pesto as well. Dairy Free Creamy Artichoke Dip: (PRINT RECIPE) Ingredients: 2 cloves garlic, peeled 1 shallot, diced 2 tablespoons lemon juice ½ cup mayonnaise made from cage free eggs and olive oil 1 tablespoon extra virgin olive oil 1 tablespoon apple cider vinegar 1 (15-ounce) can great northern beans/cannellini beans, drained ½ teaspoon salt ½ teaspoon mustard powder ¼ teaspoon pepper 1 (4-ounce) can chopped green chilis, undrained 2 ½ cups canned artichoke hearts, drained (About 1 ½ cans) Serve with your choice of: Raw veggies Gluten free seed crackers Directions:
You can find this recipe and others like it in my Anti-Inflammatory Diet Spring eBook. YUM, YUM, and YUM!! Enjoy! Billie
0 Comments
Gluten Free. Grain Free. Paleo. Dairy Free. Soy Free. Nut Free 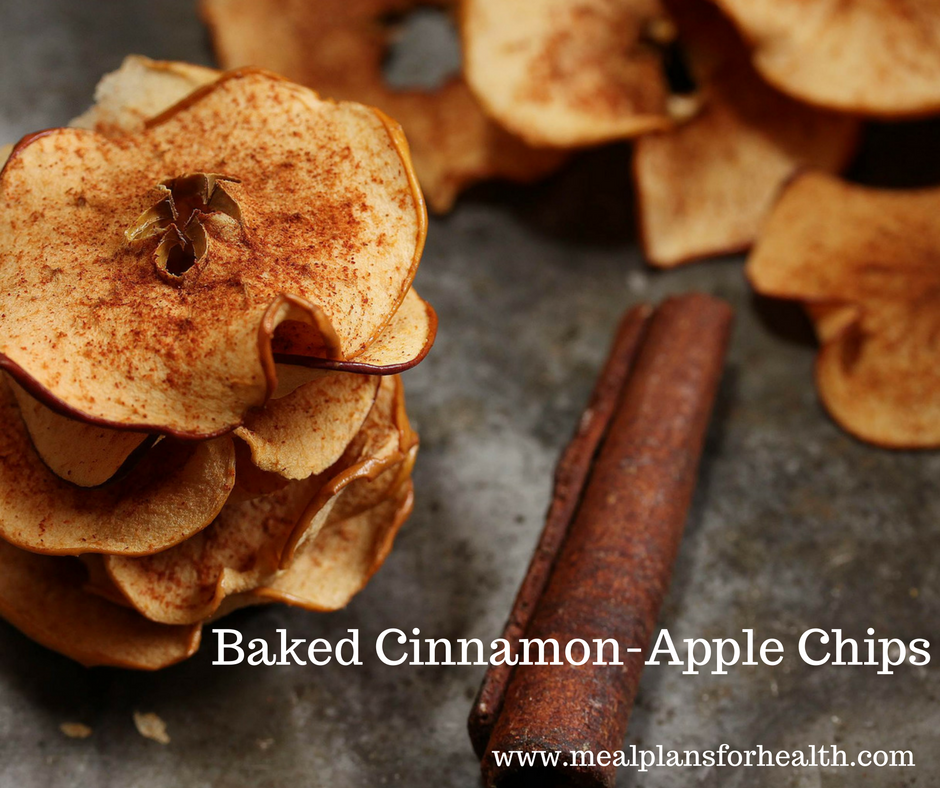 If you are looking for the ultra healthy sweet snack, try slowly baking sliced apples sprinkled with cinnamon to make apple chips. This recipe doesn't require a dehydrator, only an oven. These apple chips are the perfect snack on the go, ideal for kids lunches, and contain no added sugar - AWESOME SAUCE!
It's as simple as that! If you are ready to try some, follow the easy steps below and consider doubling the recipe since these may disappear very quickly:) Baked Cinnamon-Apple Chips (PRINT RECIPE): Serves 4 Ingredients: 2 large, organic apples of choice Ground cinnamon to taste Directions:
Let me know what you think friends! ~Billie Grain free. Nut free. Soy free. Dairy free. Gluten free. Low carb. 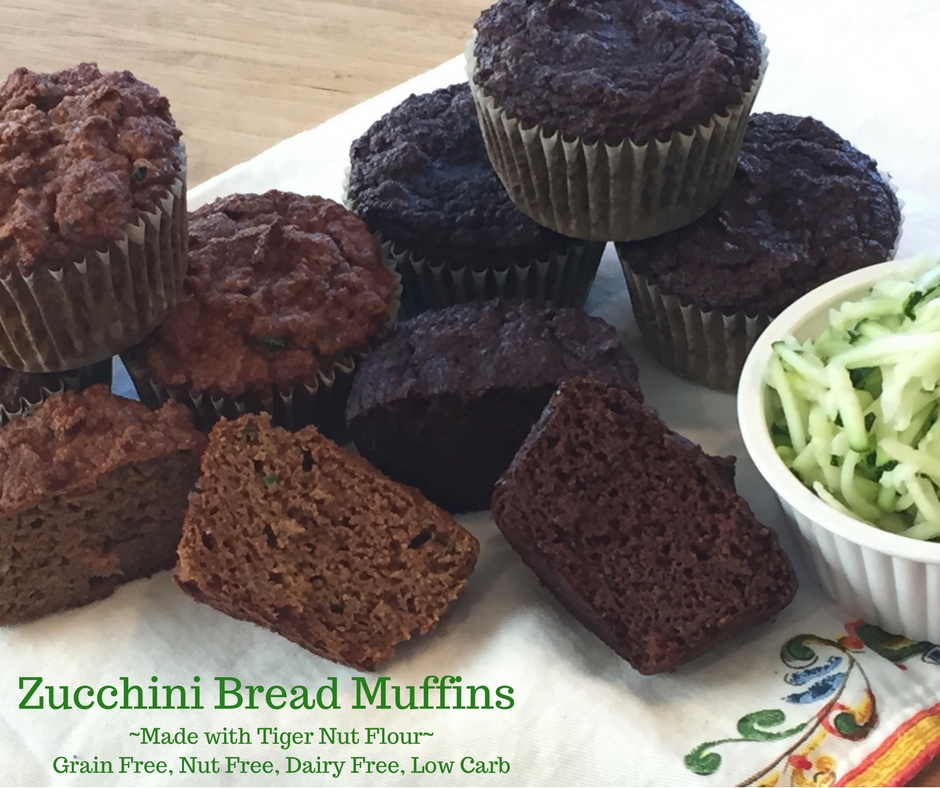 These muffins are a creative way to use up the endless amount of summer zucchini coming out of your garden or being dropped off by your neighbor from their garden. I don't have a garden currently but am lucky enough to have a neighbor who does:)
Last week our neighbor dropped off a big harvest and after making lots of zucchini pasta, I had to think of something else. And that is how this muffin recipe was born. You can make a regular or chocolate version of these muffins that are both super moist, fluffy, delicious, and filling! These are incredible and packed with vegetables and fiber to keep your blood sugar stabilized. A MUST TRY!! I like to pre-shred the zucchini onto some tea towels or paper towels and let it sweat out some moisture. Then blot with the towels to get rid of more moisture before using in the recipe. Store leftover shredded zucchini in 1 cup serving sizes in a freezer safe zip lock. This will allow you to defrost it at a later date for another batch of these fabulous muffins when a craving strikes! And it will...these are addictive! You can also stir shredded zucchini into a pasta sauce or casserole or lasagna for some added veggies:) Lately, I've been experimenting with nut free flours and avoiding coconut specifically and was really surprised to find Tiger Nut Flour which I absolutely LOVE! It has both sweet and nutty notes and nice light texture. Despite its deceptive name, Tiger Nuts are not nuts are all, they are actually from the tuber family. So they are perfect for those who want grain free and nut free flour options. You can read more about tiger nuts and tiger nut flour on my post: What is Tiger Nut Flour? In the meantime, check out this recipe...you will not be disappointed! Zucchini Bread Muffins (PRINT RECIPE) Makes 12 muffins Ingredients: 1 ¾ cup tiger nut flour** 1 ½ teaspoons ground cinnamon ½ teaspoon nutmeg 1 teaspoon baking soda ½ teaspoon salt 3 organic, pastured eggs ¼ cup honey, agave, or coconut nectar ½ cup applesauce 1 heaping cup shredded zucchini (with green peel on) For the Chocolate-Zucchini Muffins: (use same recipe above with adjustments listed below)
Directions:
*Each muffin has a total of 10 grams of sugar, but keep in mind that 5.8g of these come from the tiger nuts naturally. The remaining amount is the honey. You can ditch the sweetener completely and increase the apple sauce by 3 tablespoons if you are watching your sugar intake closely. I did this on one of my batches and the muffins still had a good amount of sweetness to them. **You can find Tiger Nut Flour online on Amazon or Thrive Market and it is also making its way onto shelves at some Whole Foods and other natural grocery stores. If you can’t find it, you can substitute almond flour here in the same amount if you’d like. Let me know what you think! Enjoy... ~Billie Gluten Free. Dairy Free. Soy Free. Grain Free. Low Sugar. Low Carb.  If you've never tried chia seed pudding, you are missing out! This recipe is a highly nutritious and energizing way to start the day or get through an afternoon slump. Chia seeds are a low calorie, nutrient dense superfood that offer a great source of fiber, heart healthy omega-3 fats, and protein. Omega-3 fats are super important to get in each day in some way to help reduce inflammation and protect your heart and brain. You can learn more on my blog: Health Benefits of Omega-3 Fats.
This pudding takes 5 minutes to make and will set overnight. The chia seeds will absorb the liquid and expand into a pudding-like consistency. And because chia seeds are so high in fiber and protein, just one serving will really work to stabilize your blood sugar levels, reduce sugar cravings, and keep you feeling fuller longer. Chia seeds can be very energizing, so I like this as a snack in the afternoon when I'm feeling fatigued and craving something sweet:) The flavors and texture are very close to real chocolate pudding so you really feel like you are eating a sweet treat when this hits your mouth! Creamy Chocolate Chia Pudding (PRINT RECIPE): Makes 4 small servings Ingredients: 1 3/4 cups unsweetened non-dairy milk of choice Heaping 1/3 cup chia seeds 2 tablespoons organic unsweetened cocoa powder or cacao nibs ½ teaspoon ground cinnamon ½ teaspoon 100% pure vanilla extract 2 tablespoons raw honey, maple syrup, or coconut sugar/nectar Pinch of salt Optional Toppings: (choose one) ¼ cup shredded unsweetened coconut ¼ cup raw walnuts, almonds, or macadamia nuts 2-3 strawberries, 6 raspberries or 9 blueberries** Directions:
This keeps well in the fridge for about 3-4 days. So I like to make a batch at the beginning of the week and scoop out a snack in the afternoon! If you like simple, anti-inflammatory recipes like this one, check out our Anti-Inflammatory Meal Plans for a wide variety of easy meals and "make ahead" preparation plans. Let me know what you think about the pudding. What other types of chia pudding do you like? ~Billie Vegan. Gluten Free. Raw. Delicious. 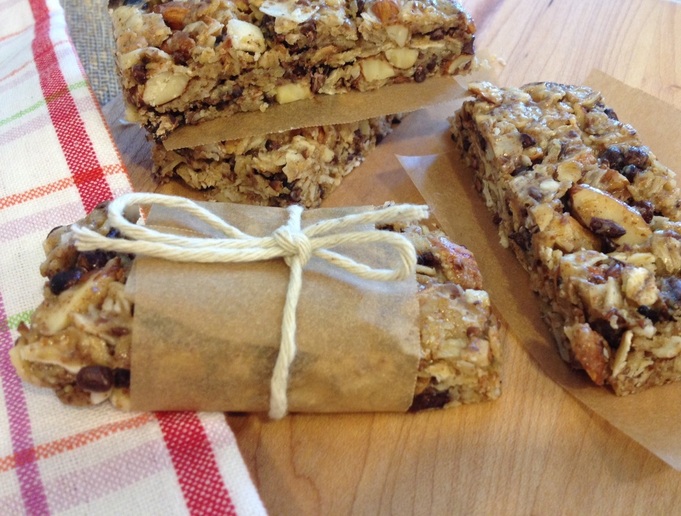 The granola bar has always been one of my quintessential comfort foods! It reminds me of my childhood and my grandparents specifically - my brother and I spent lots of time hiking and biking in the summers with them. We would always pack our day packs with a granola bar so that we'd have a great snack to enjoy when we reached the summit of whatever mountain we were climbing that day. It always hit the spot and still does today because it satisfies that sweet tooth while providing ingredients that are nutrient dense and give you energy.
This recipe is an easy and healthy way to satisfy your granola bar craving, you don't have to turn on your oven and the best part about this recipe is that's it completely customizable to whatever your likes and dislikes are. Don't like coconut? Use gogi berries, raisins, or craisins instead. No almonds on hand? Grab some sunflower or pumpkin seeds or a combination of the two. Check it out... No Bake Granola Bars (PRINT RECIPE) Makes 12-14 bars Ingredients: 1 cup whole rolled oats/gluten free whole rolled oats ¼ cup ground flaxseed 1 cup sliced almonds (substitute sunflower or pumpkin seeds or a combination) ½ cup toasted coconut flakes (substitute another dried fruit like go-gi berries, raisins, or craisins) ½ cup cacao nibs or dark chocolate chips 2/3 cup raw almond butter or natural peanut butter 6 tablespoons honey or agave 1 teaspoon vanilla extract Directions:
While these bars won't stand up well in the heat, they do stay very fresh for up to 10 days if they are wrapped in parchment paper and kept in an airtight container in the fridge. And they will do well at room temperature for up to a few hours. Happy Eating! ~Billie 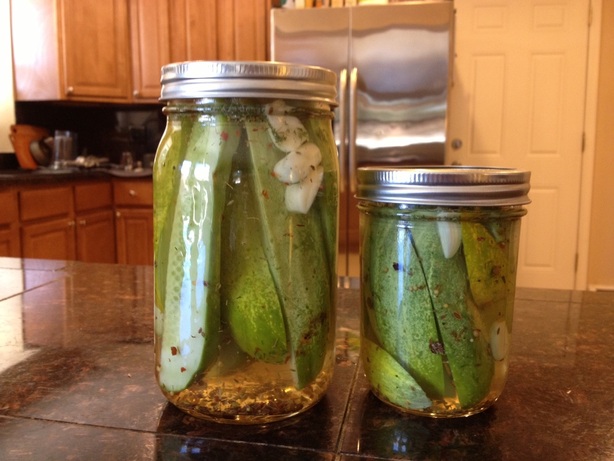 If you are looking for an easy way to use up those cucumbers (and fresh dill) coming out of your garden, try this simple recipe for Sweet & Spicy Refrigerator Dill Pickles.
Ingredients: 6 pickling cucumbers 2 cups water 1 3/4 cups distilled white vinegar 1 cup packed, coarsely chopped fresh dill 1/2 cup sugar 8 cloves garlic, halved 1 1/2 tablespoons coarse salt 2 tablespoons pickling spice mix* 1/2 teaspoon dried red pepper flakes (more or less depending on your desired spiciness level) *Some grocery stores do not carry pickling spice, so if you cannot find it, substitute for 1 tablespoon plus 1 teaspoon dill seeds, 1 teaspoon whole black pepper corns, and 1 teaspoon caraway seeds. Directions: 1. Combine all ingredients, except dill, in a large bowl. Let stand at room temperature for about 2 hours or until the sugar and salt dissolve. 2. Quarter each cucumber into spears and then place in wide-mouth jars. You will need about 3 jars depending on the size of your cucumbers and the sizes of your jars. 3. Pour vinegar/spice pickling mixture evenly into each jar. 4. Cover jars with lids and close tightly. Refrigerate for 2 weeks. These will stay fresh for 1 additional month following the 2 week 'pickling time'. Keep refrigerated and enjoy! ~Billie Vegan. Grain Free. Low Carb. 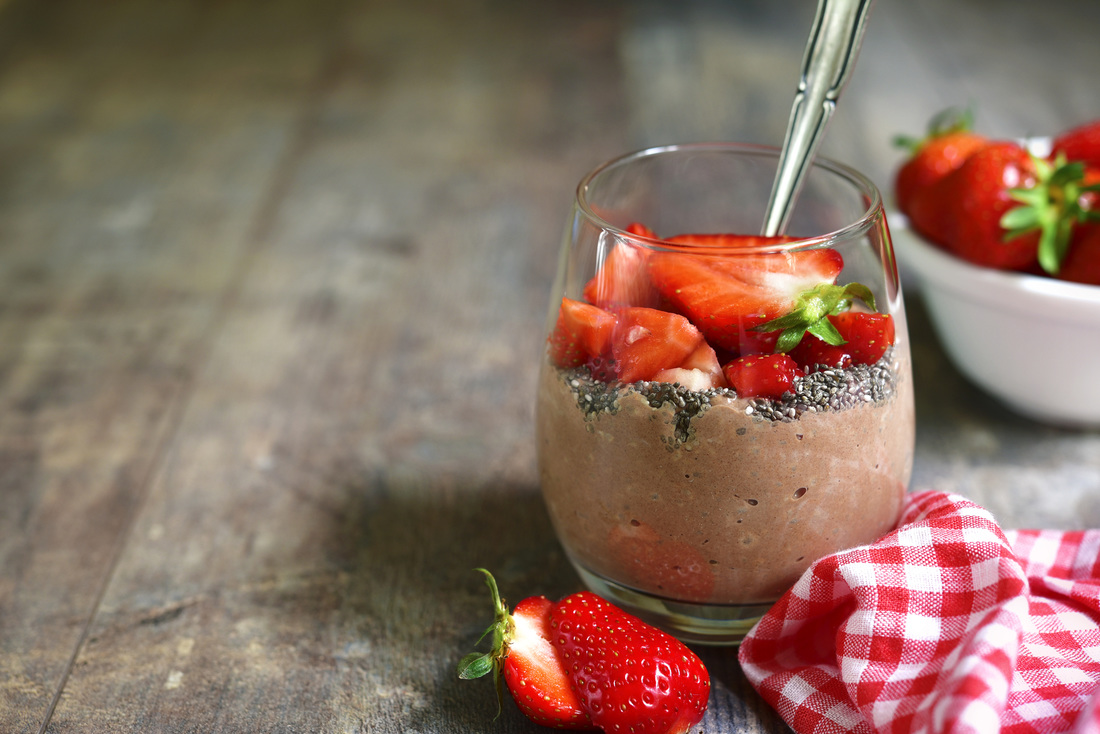 Have you ever tried chia seed pudding? This recipe is a highly nutritious and energizing way to start the day or get through an afternoon slump. The flavors and texture are very close to real chocolate pudding so you really feel like you are eating a treat when this hits your mouth. Chia seeds are a low calorie, nutrient dense superfood that offers a great source of fiber, healthy omega 3 fats, and protein and when allowed to set overnight in liquid, they will absorb the liquid and expand into a pudding like consistency. Because chia seeds are so high in fiber and protein, just one serving will really work to stabilize your blood sugar levels and keep you feeling fuller longer.
In this recipe, I've combined chia with Maca, another powerful superfood, known for it's energy boosting benefits. To learn more about Maca, click here for our 5 Health Benefits of Maca Root post. So, if you are in a need of an energy lift (and who isn't these days really?!), without a caffeine crash later in the day, this is a great non-caffeinated way to go. In fact, the combination of Chia and Maca are both so energizing that I'd recommend avoiding eating this pudding within 5 hours of bedtime as you could find yourself a bit restless. Keep this in mind when giving it to your kiddos:) Chocolate-Maca Chia Pudding (PRINT RECIPE) Serves 2 Ingredients: 2 cups milk of choice (I like to use almond or coconut milk here) 1 tablespoon pure maple syrup , agave, or dark liquid stevia to taste (about 1/4 teaspoon) 2 tablespoons unsweetened cocoa powder 1-2 teaspoons maca powder (optional)** 6 tablespoons chia seeds Optional Toppings: Shredded coconut or coconut flakes Fresh berries Sliced banana Directions:
Alternatively, you could add the ingredients to a blender, blend on high for 30 seconds, then pour into a container, cover and place in the fridge to set. Your choice. Sometimes I like the smoother texture of blended:) This keeps well in the fridge for about 4 days. Just add your favorite fresh toppings and eat! Hope you enjoy it as much I do! Happy eating! **Maca root is not recommended for kids, pregnant women, anyone with a hormone dependent cancer, or women in hormone replacement therapy unless otherwise directed by a treating physician. For more information on maca, check out our blog: 5 health benefits of maca powder. ~Billie Grain Free & Vegan  Homemade crackers are actually one of the easiest snacks you can make! I like to make my own so that I can control the ingredients and keep my snack time clean of preservatives.
Since I'm on a low-carb diet right now, I also love these crackers because they are grain free and packed with tons of protein - so I only need a few crackers to feel satisfied. One serving of 4-5 crackers only contains 6.9 grams of carbs but gives you 4.8 grams of protein! Almond-Seed Crackers (PRINT RECIPE) Makes 3 dozen crackers Ingredients: 1 ½ cups blanched almond flour 1/2 cup raw sunflower or pumpkin seeds 1/2 teaspoon salt 1 tablespoon extra-virgin olive oil 1 tablespoon honey or maple syrup 1 tablespoon water Directions:
These are delicious as is, but you can also play around with the flavors of these crackers. Just add the variation ingredients to the flour mixture after it is processed and before the wet ingredients are mixed in. Here are some of my favorite versions: Cracked Pepper Variation: ½ or more teaspoon ground pepper 1 teaspoon dried oregano Rosemary-Garlic Variation: 1 teaspoon garlic powder 1 tablespoon fresh rosemary or 1 teaspoon dried As always, let me know what you think...happy baking! ~Billie Grain Free & Vegan 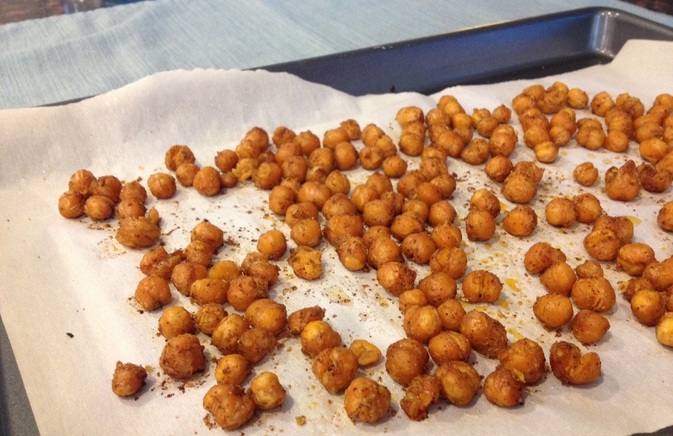 Watch out - these super easy, high fiber snacks are additive and a great way to satisfy a salty craving! These normally soft, mushy beans become crispy, crunchy bites after you roast them -YUM! Just grab a can of chickpeas (aka garbanzo beans), toss them in oil and add your favorite spice combination. Then roast them in the oven for 30-40 minutes or until crunchy.
The first time I made these, I ate the whole batch in two "snacks". Yep...sure did...so...maybe you will want to double or triple the recipe?! You can eat them just as snacks (highly recommended) or toss them into other meals to bulk up the protein, fiber, and flavors - salads, soups, casseroles, and stir fries are all great vessels to host these crunchy beans. We especially love these on salads this time of year, try them on our: Roasted Vegetable & Quinoa Tabbouleh, Spring Pea Salad with Roasted Fennel & Chickpeas, or Dairy Free Caesar Salad. Crispy Roasted Chickpeas (Print Recipe) Makes: 4 servings Serving Size: About 1/3 cup Ingredients*: 1 can garbanzo beans (aka chickpeas), rinsed and drained** 2 tablespoons grapeseed oil ½ teaspoon ancho chili powder ½ teaspoon cumin ½ teaspoon salt 1 teaspoon dried parsley Directions:
*You can really flavor these with anything you want: oregano, thyme, sage, lemon juice, cayenne - ANY seasoning you enjoy really. You can mix and match the seasoning to the compliment the flavors of your meal. **If you are on top of it enough to soak and cook your own beans, you will use 1 cup dried beans in this recipe. Soak overnight and cook until tender. Happy Roasting & Snacking! ~Billie & Jennifer Raw, Grain Free, Vegan, Low Carb, Low Sugar 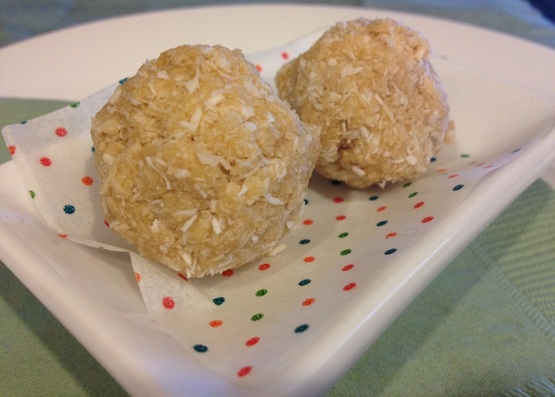 So...a few weeks ago I went grocery shopping by myself at Whole Foods. (Happy dance happening over here now!) This was a significant day for me because I've been in treatment for Chronic Lyme disease and have not been able to drive myself to and from the store or do my own grocery shopping for the last 6 months. It was a nice milestone for my recovery and I walked into Whole Foods full of excitement for the bright colored organic vegetables, the miles of raw food bins, and the other lovely goodness that I was about to encounter. This day seemed like vacation to me and I suddenly found myself wandering down aisles I generally stay clear of...specifically the snack/chip/cookie aisles. Yep, you guessed it, the next thing I know my cart is loaded with a few items that were not on the list and definitely fell into the splurge category for us. One of those items was a package of raw coconut macaroons - specifically a brand called Snakaroons. You may have started to see these on the shelves like I have - there are several companies making various versions of raw coconut macaroons. They are all VERY enticing but SUPER pricey! One bag contains eight macaroons and costs between $6.99 and $10.99, depending on the brand. I ripped the bag open in the car and devoured two macaroons before I even left the parking lot. I was immediately delighted by these soft, slightly sweet, coconutty snacks. After reviewing the ingredients for a second time, I thought to myself, I need to figure out how to make these at home!!!! And so I did, and this recipe is the result. I must say that these are very similar to the pre-packaged varieties out there and are much more cost effective. These have become my new favorite treats and I hope you enjoy them as well. These guilt free snacks are a super quick way to satisfy your sweet tooth without turning on your oven or feeling guilty that you treated yourself. They contain only six main ingredients and come together in ten minutes. And they are only 73 calories per snack ball, with only 5.3 grams of carbs, and 2.3 grams of sugar. Raw Coconut Snack Balls (Print Recipe) Makes: 10-12 Snack Balls Ingredients: ¾ cup unsweetened shredded coconut, plus 1 tablespoon 3 tablespoons coconut flour* 2 ½ tablespoons maple syrup or raw honey 2 tablespoons coconut oil, melted ½ teaspoon vanilla extract Pinch of sea salt Lemon Vanilla Variation:** Juice and zest of 1/2 of a lemon Ginger-Cinnamon Variation:** ½ teaspoon ground ginger ¼ teaspoon cinnamon Directions: 1. Combine coconut, coconut flour, and salt in a medium bowl. 2. Combine maple syrup or raw honey, coconut oil and vanilla in a small bowl and whisk well to combine. 3. Pour wet ingredients into dry and mix until a dough forms. It will be crumbly, but should stick together if you give it a good squeeze with the palm of your hand. If it doesn't stick together, add more oil or sweetener by the teaspoon. If it is too sticky, add more coconut flour by the teaspoon. 4. Squeeze a tablespoon of dough together in your hand and use your fingers to gently roll or mold into a ball. Repeat to make 10-12 balls total. 5. Place the snack balls in the refrigerator for about 20-30 minutes to allow them to firm up before enjoying. 6. Store raw snack balls in the refrigerator for up to 5 days. *Many of these pre-packaged snack balls use blanched almond flour instead of coconut flour, if you decide to try it out with almond flour, I recommend increasing the flour to 1/4 cup and decreasing the shredded coconut to only 3/4 cup.
**You can easily change up the flavors to suit your tastes, both the Lemon Vanilla and the Ginger-Cinnamon variations of this recipe are amazing - my personal favorite is the Lemon Vanilla!! Simply add the listed ingredients to the base recipe and stir to combine. What other variations can you think of? Enjoy! ~Billie Like low-carb eating? Check out our Anti-Inflammatory Eating Plans with delicious, whole food recipes for the whole family to enjoy! Gluten Free & Vegan 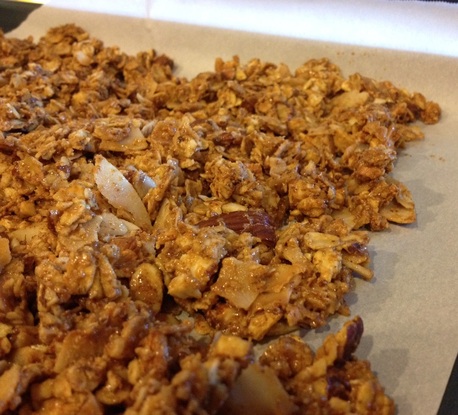 One of the snacks my husband loves the most is granola. When we both went gluten free a few years ago, he tried several brands of gluten free granola that were lower in sugar and ended up LOVING the Kind Brand Granola - his favorite being the honey oat with toasted coconut. The problem is that these types of high quality granola are like $5.99-$8.99 for one small bag that only gives you about 4-5 servings. You can relate, right?!
So I decided to save us some money and create my own homemade version to keep the hubby happy! I can safely tell you that this recipe kicks the KIND Granola's booty in the taste department. It also has a little less sugar and 8 less grams of carbohydrates compared to the Kind Brand. My version is higher in fat, but contains all healthy fats from the almonds, almond butter, and coconut oil. This granola makes a great breakfast or snack when combined with Greek yogurt or your favorite milk. Or grab a raw handful when you are on the go - running errands, sitting at the kids sports games, making tracks down the slopes, or hitting the trail. Download the recipe below that works best for you and enjoy! Honey Vanilla-Almond Granola Honey Vanilla-Almond Granola (Gluten Free) Vanilla-Almond Granola (Vegan) ~Billie p.s. - if you like this recipe, check out my blog on Ginger Almond Granola as well. Gluten Free & Vegan 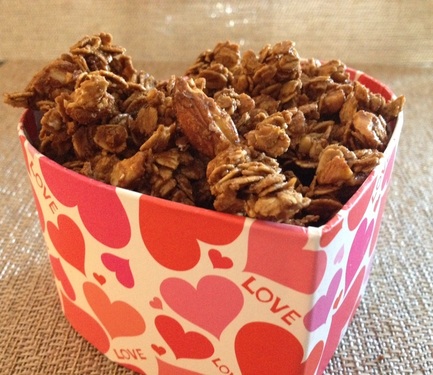 Give your Valentine a healthy home-made snack this year instead of a box of chocolates!
This granola is delicious all by itself or paired with your favorite milk or yogurt. Packed with heart healthy monounsaturated fats from the almonds this granola will keep you feeling fuller longer and provide a rich infusion of potassium and magnesium - both essential for good cardiovascular health. The ground ginger lends a subtle spice and comes with lots of therapeutic benefits, including improving digestion and reducing inflammation. This granola is also under 7 grams of sugar per serving - another bonus for those of you who are watching your sugar intake! Ginger Almond Granola (PRINT RECIPE) (PRINT GLUTEN FREE RECIPE) Makes 1 1/3 cups, Serving size 1/3 cup Ingredients: ¼ cup pure maple syrup 1/4 cup creamy unsalted almond butter 2 tablespoons blackstrap molasses 1/2 teaspoon vanilla extract 3/4 teaspoon ground ginger 1/2 teaspoon ground cinnamon 1/4 teaspoon ground nutmeg 1/8 teaspoon ground cloves 1/8 teaspoon salt 2 cups rolled oats or gluten free rolled oats 2/3 cup sliced or chopped almonds Directions:
You can store this in airtight container for up to a week, but it probably won't last that long. Enjoy! ~Billie & Jen 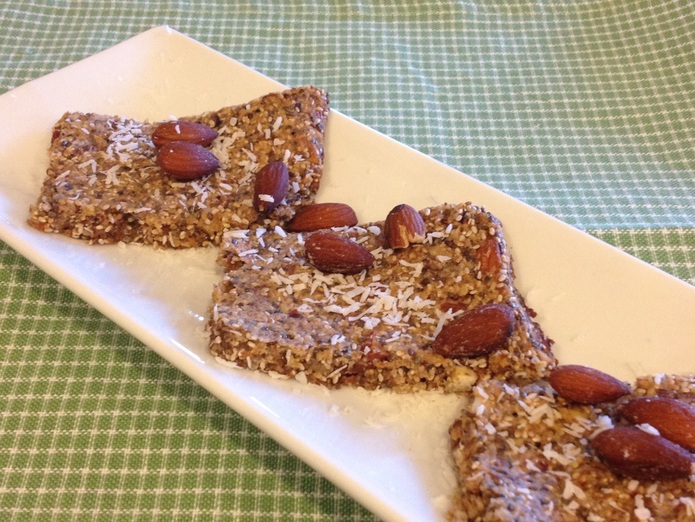 Grain Free, Dairy Free, Vegan, Low Carb I don't know how you feel, but it seems to me that finding a pre-packaged protein bar that doesn't break the bank is pretty tough, especially for those of us with food sensitives and/or blood sugar issues. I recently found Health Warrior Chia Bars and fell in love with the coconut flavor, so I thought I'd try to make my own version. MISSION ACCOMPLISHED! These bars are truly delicious and are also...
Chia seeds were once the staple of the Aztec and Mayan diets and today are being hailed as one of the top superfoods - and for good reason! This nutrient dense food packs a lot of benefits:
Coconut-Almond Chia Seed Bars (PRINT RECIPE) Makes 12 bars Ingredients: 4 large Medjool dates, pitted and halved ¼ cup filtered water ½ cup chia seeds ½ cup raw almonds, chopped ¼ cup almond meal/flour 2 tablespoons shredded coconut 2 tablespoons coconut oil, melted Dash of salt ¼ teaspoon cinnamon ½ teaspoon vanilla extract Directions:
Happy Eating! ~Billie |

Billie Shellist, FDN-P
I practice functional nutrition, an approach that allows me to look at your entire health history and help you find the "root causes" of your chronic health complaints. This cuts out the trial and error process and helps you get real symptom relief and resolution! Food is medicine and knowledge is power -I hope you enjoy my anti-inflammatory recipes which are gluten, dairy, and soy free as well as very low grain and sugar. If you'd like to heal from the root cause(s) of your chronic symptoms, try starting with a complimentary 15-minute consultation. Click here to request your free session. |
|
Copyright 2024 Functional Diagnostic Healing. All rights reserved. Professional photography by Priscilla Durkin- www.priscilladurkin.com Privacy Policy - Legal Notice |