|
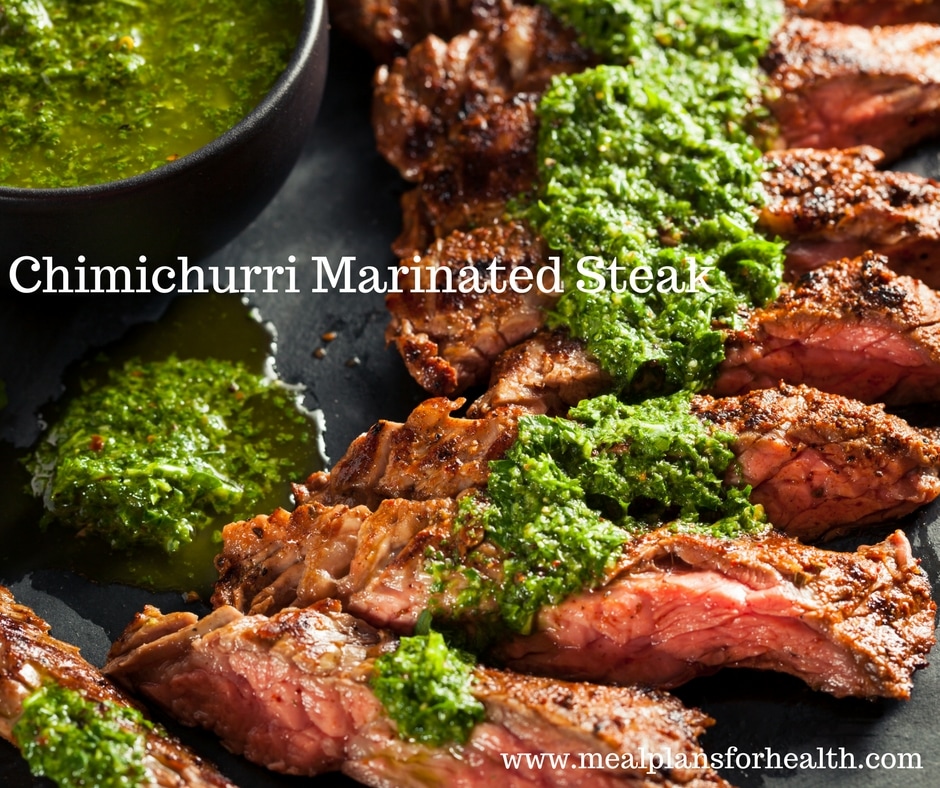
Paleo. AIP. Gluten Free. Dairy Free. Soy Free. Grain Free. Delicous! If you are looking for a super easy dish that is packed with flavor this holiday weekend...look no further. This chimichurri marinated steak recipe will blow you away and is just one of the delicious dishes in our Spring Anti-Inflammatory Eating Plan eBook.
Spring and summer are bursting with fresh, anti-inflammatory herbs and this dish is the perfect vessel for them to shine! This recipe works for any cut of steak, so feel free to substitute your favorite. I like to double or triple the chimichurri sauce recipe and freeze it in 1 cup increments for easy defrosting later down the line. Just defrost in the fridge overnight. This chimichurri can be used with any other cut of meat of fish and tastes divine on grilled, steamed, or roasted vegetables so experiment and have some fun with it! Chimichurri Marinated Steak (PRINT RECIPE) Serves 4 Ingredients: 1 ½ lbs grass-fed steak (skirt, flat iron, flank) 1 teaspoon salt 1 teaspoon pepper Chimichurri: ¼ cup chopped fresh oregano leaves ¼ cup chopped fresh cilantro 2 tablespoons chopped fresh parsley 1 tablespoon fresh thyme ¼ cup finely minced shallots 5 cloves garlic, chopped ½ teaspoon red pepper flakes ¼ cup red wine vinegar 1 cup olive oil Directions:
I like to pair this dish with some roasted potatoes or celery root fries (recipe included in our Spring Anti-Inflammatory eBook) and some steamed or grilled asparagus. But you can also go more traditional and serve this with rice, beans and a veggie of choice. Either way this dish is a winner! Enjoy & Happy Memorial Day Everyone! ~Billie
0 Comments
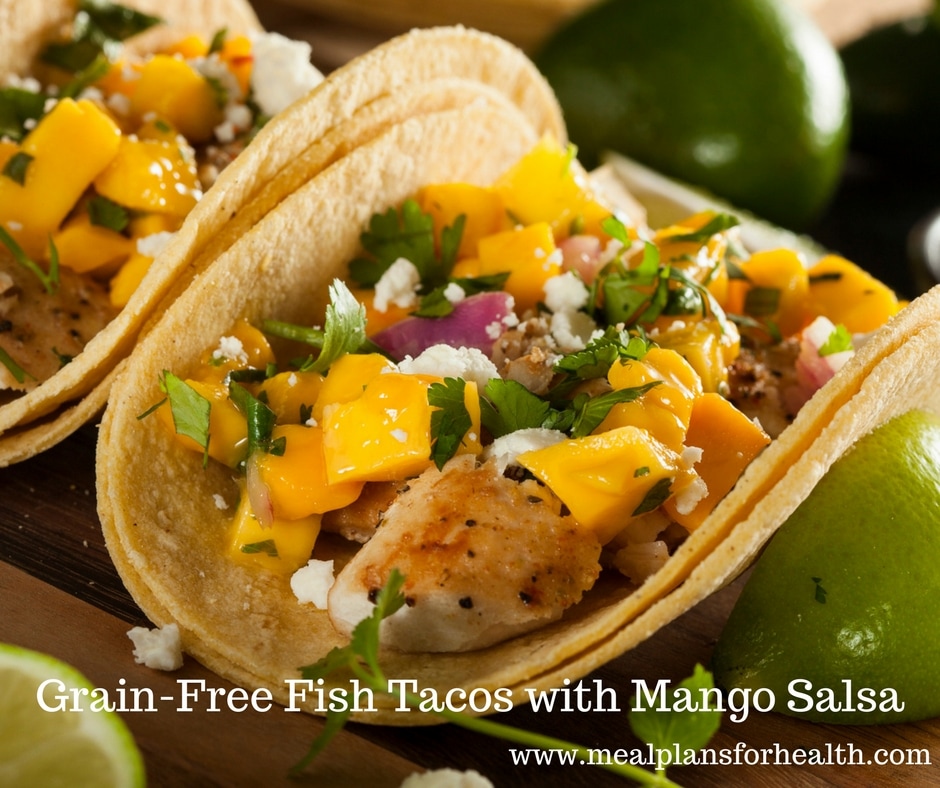
Gluten, Grain, Dairy, and Soy Free If you are a fan of fish tacos, this recipe is right up your alley and perfect for your upcoming Cinco De Mayo Celebrations! You can do these in lettuce wraps, store bought grain free tortillas, or Homemade Grain-Free Tortillas - whichever you prefer.
I also love to double this salsa recipe and use it a second night over some grilled chicken. In fact these recipes are part of my new, Spring Anti-Inflammatory eBooks. These one week meal plans come complete with recipes, a menu with preparation tips, and a shopping list to save you time at the store. So if you like meals like these, check out my downloadable Anti-Inflammatory Meal Plans. Grain-Free Fish Tacos with Mango Salsa: (PRINT RECIPE) Serves 4 Ingredients: 4 wild caught cod filets (about 6 ounces each) 1 tablespoon avocado or coconut oil 2 teaspoons paprika 1 teaspoon garlic powder 1/2 teaspoon salt 1/4 teaspoon black pepper ½ teaspoon cumin 1/8 teaspoon cayenne ½ teaspoon chili powder 1 avocado, sliced (optional)* Large leaf lettuce for lettuce wraps or Grain-Free Cassava Tortillas Mango Salsa: 1/4 cup sweet onion 2 ripe mangos, peeled and chopped ¼ cup chopped red bell pepper 3 tablespoons cilantro, chopped 1/2 tablespoon olive oil 1 1/2 tablespoons fresh-squeezed lime juice Pinch of salt Directions:
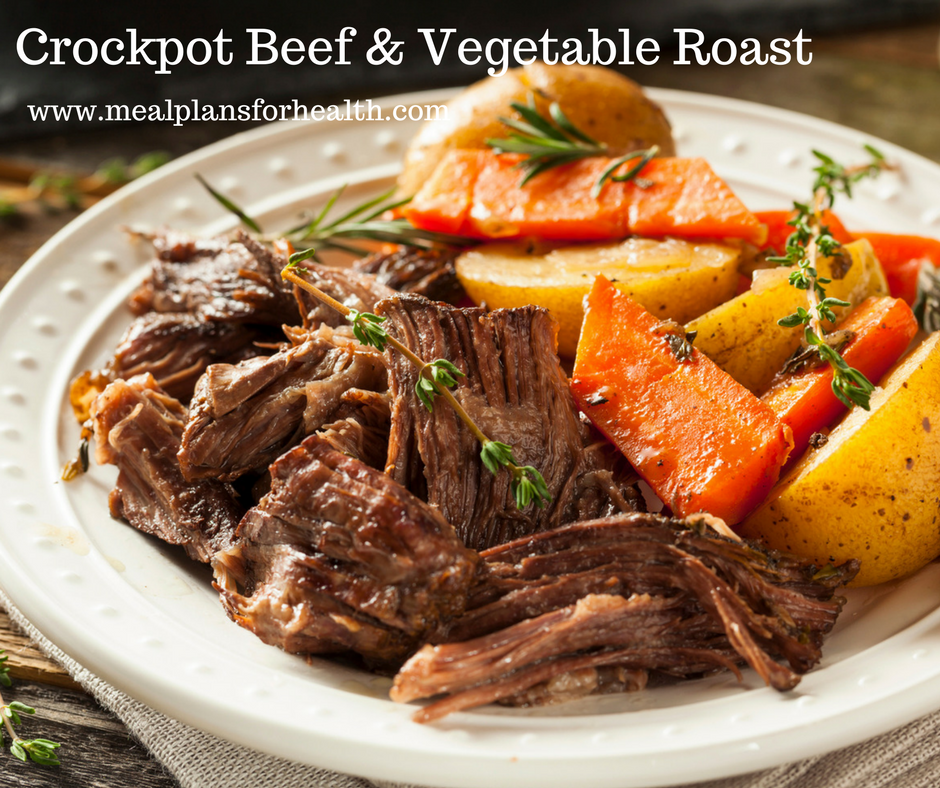
Enjoy and let me know what you think! ~Billie Grain Free. Gluten Free. Dairy Free. Paleo. AIP. I love this meal because when its done it tastes like a "restaurant quality" dish BUT it only requires 15 minutes of hands-on time. So you can put the items into your Crockpot or Slow-cooker, go about your busy day, and then come to home to an amazing meal! This meat just falls apart in your mouth...its amazing!
In fact, my husband and I don't ever go out for Valentines Day ever since the food is way overpriced and the atmosphere is too loud and crowded. Instead, we enjoy a home-cooked meal...this year, this dish is on the menu along with my favorite Grain-Free Ginger Cookies for a sweet treat. If you don't eat potatoes, substitute your favorite root vegetable instead like parsnips, turnips, celery root, or yucca. In our house, I like to use the leftovers the following day to make "Paleo Bowls" which is basically the leftover meat on a bed of seated kale or chard with the roasted veggies on top. If I'm out of the veggies from the crockpot, I will often roast a squash to accompany the dish. You can get the details of this recipe plus others like it in our Anti-Inflammatory Winter Meal Plan: Week 1. Packed with super simple and delicious meals your whole family will love! Check out the recipe below and enjoy... Crockpot Grass-Fed Beef & Vegetable Roast (PRINT RECIPE) Serves 4-6 Ingredients: 2-4 pound organic, grass-fed beef chuck roast 1 teaspoon dried herbs like thyme or rosemary 1 teaspoon ground turmeric 1 teaspoon salt ½ teaspoon pepper (optional) 1 teaspoon onion powder ½ teaspoon garlic powder/granules 1 cup organic beef broth 2 large carrots, chopped into 2 inch pieces 1 stalk celery, chopped into ½ inch pieces 3 red or white potatoes OR 1 sweet potato, chopped into bigger chunks ½ a large onion, quartered 2-4 springs fresh herbs like rosemary, thyme, or sage Directions:
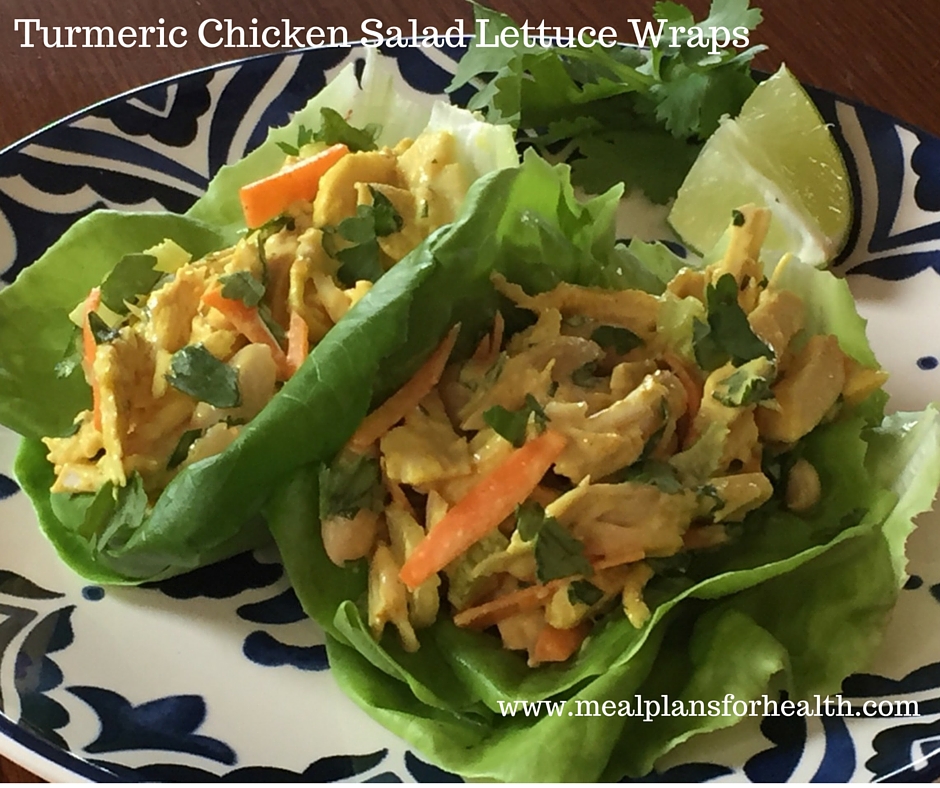
Let me know what you think by leaving me some feedback below... ~Billie Anti-Inflammatory, Gluten Free, Dairy Free, Low carb, Super Delicious This nutrient dense, anti-inflammatory recipe will awaken your taste buds and keep you feeling satisfied long after your meal. Chicken salad lettuce wraps are a popular meal in our house, especially since most weeks I make a a big Crockpot Roasted Turmeric Chicken.
Then I simply use leftover chicken to make chicken salad;this gives me two simple, healthy meals to start the week off. I'm all about making bigger batches of things and then working leftovers in new ways. This method saves some of my precious energy and makes eating clean much easier! Check it out... Turmeric Chicken Salad Lettuce Wraps: (PRINT RECIPE) Serves 4 Ingredients: 1 teaspoon coconut oil 1 ¼ pounds organic, free range chicken breast, chopped or shredded ** 3 tablespoons organic mayonnaise made from cage free eggs & olive oil ½ teaspoon ground turmeric ½ teaspoon salt ½ teaspoon pepper 1 carrot, peeled and julienne sliced or minced 1 rib celery, minced 3 tablespoons fresh cilantro, minced Juice of ½ a lime 1 cup organic cannellini or great white northern beans, rinsed 8 large organic leaf lettuce leaves (Romaine, Butter, Bibb, Boston, etc) **Or use leftover, pre-cooked chicken to save time. Directions:
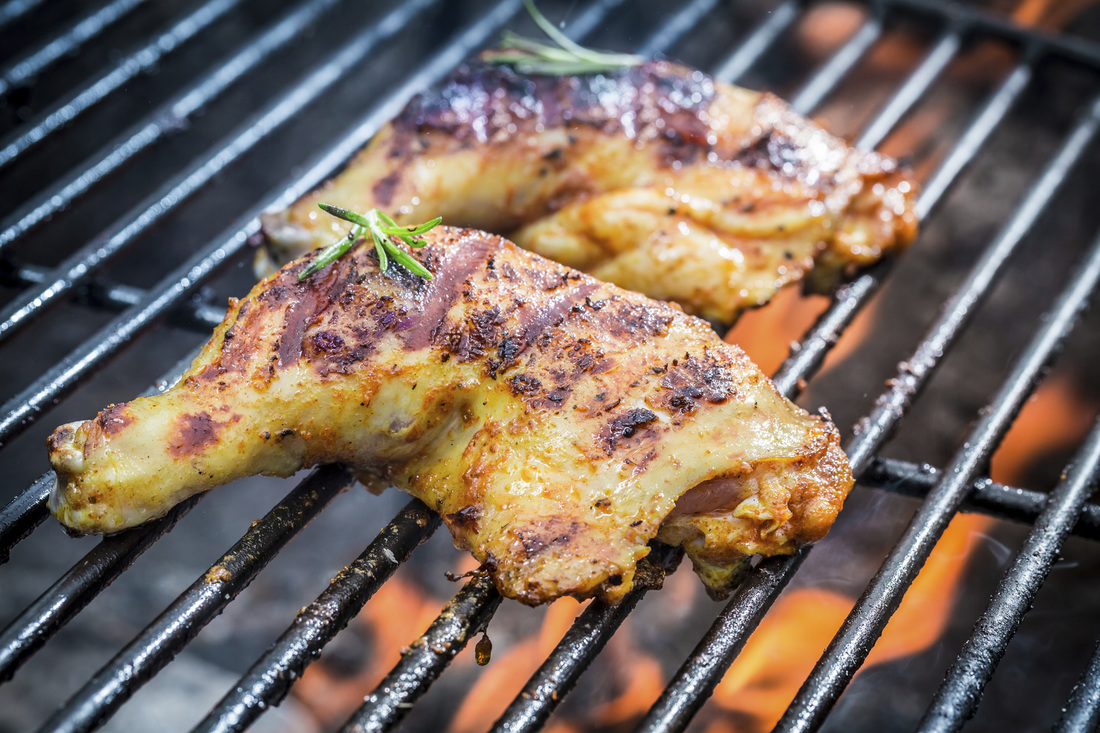
I hope you enjoy these as much as I do! Let me know what you think. ~Billie Gluten Free. Low Sugar. Dairy Free. Soy Free. BBQ chicken seems like an essential component to a fabulous 4th of July celebration. Paired with some baked beans and coleslaw or a seasonal garden salad and baked or grilled sweet potato wedges...perfection!
This simple BBQ marinade is low in sugar compared to most BBQ sauces so that you can enjoy some without feeling too guilty. Just be sure to use organic, no sugar added ketchup or a can or organic tomato sauce. Try this with our Simple Coleslaw and Baked Black-Strap Beans and let me know what you think. BBQ Chicken: (PRINT RECIPE) Serves 4 Ingredients: 1/2 cup organic ketchup or organic tomato sauce 2 tablespoons apple cider vinegar 3 tablespoons Dijon mustard 3 cloves garlic, minced 2 tablespoons coconut sugar or raw honey 1/4 cup blackstrap molasses 1 teaspoon lemon juice 1 ½ pounds organic, free range chicken (breast, drumstick, etc, your choice) ½ teaspoon chili powder ¼ teaspoon cayenne (optional) ½ teaspoon garlic granules ¼ teaspoon salt ½ teaspoon pepper Cooking spray Directions:
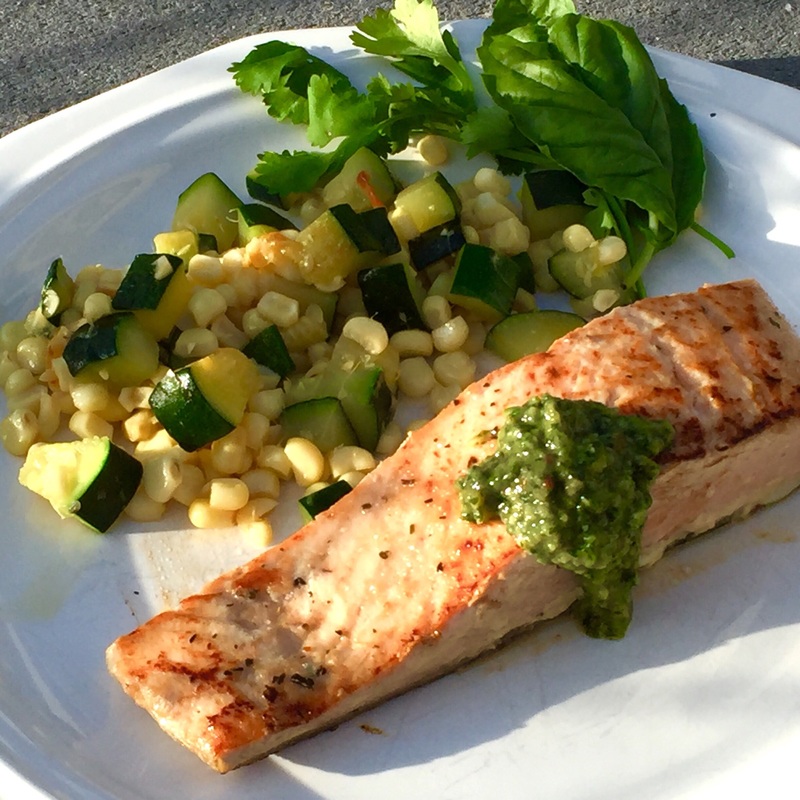
LEFTOVER IDEA: use your leftover chicken to make BBQ chicken chopped salad, BBQ chicken lettuce wraps, or BBQ chicken & hummus quesadillas (hummus replaces the cheese). YUM! Enjoy your holiday weekend with friends and family! ~Billie Anti-Inflammatory. Grain Free. Dairy Free. Gluten Free. Soy Free. Low Carb. In the Spring and Summer there is an abundance of fresh herbs like basil, cilantro, and mint. I love to make homemade pesto's out of these herbs and experiment with new combinations of flavors. This recipe has a balance of spicy and sweet that you will love paired with fresh seafood or organic chicken, turkey, or pork. This pesto also tastes fabulous on grilled, roasted, or steamed vegetables like zucchini, peppers, mushrooms, squashes, or carrots.
This simple wild caught salmon dish is perfect for grilling, pan-searing, or baking. Cook to your preference then add the flavorful pesto and you have a fabulous meal loaded with healthy fats and anti-inflammatory herbs. Salmon with Cilantro-Basil Pesto (PRINT RECIPE) Serves 4 Ingredients: 4 (6-ounce) wild caught salmon filets ½ teaspoon salt ¼ teaspoon pepper ½ teaspoon garlic granules 1 tablespoon extra virgin olive oil Cilantro-Basil Pesto: 2 cups fresh cilantro 1 cup fresh basil 1/3 cup pine nuts, cashews, or pumpkin seeds 2 cloves garlic, peeled ½ teaspoon salt ¼ cup extra virgin olive oil + 1 tablespoon (if needed) Directions:
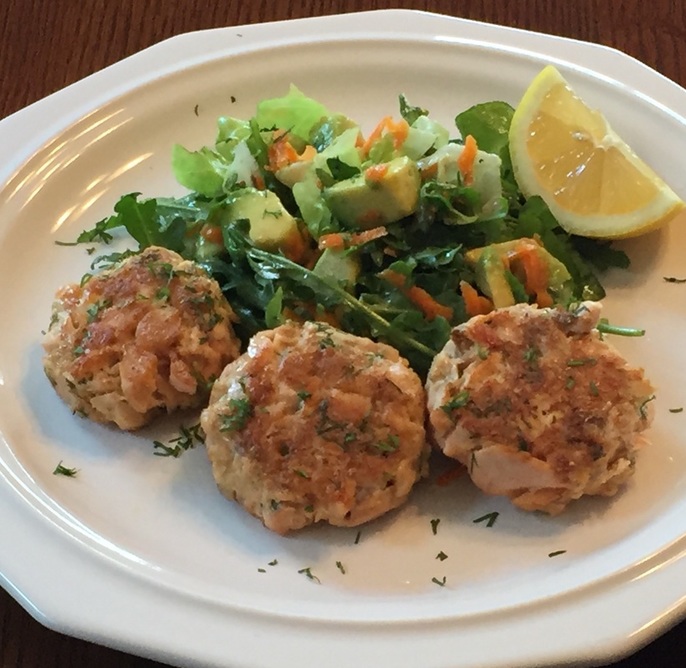
This recipes makes extra pesto which you can store in an airtight container in the fridge for up to 2 weeks or in the freezer for up to 3 months. Happy Eating! ~Billie Gluten Free. Dairy Free. Soy Free. Low Carb. Anti-Inflammatory These mini salmon cakes are moist on the inside with a slight crunch on the outside. They are busting with flavors but contain very simple ingredients so they come together easily and keep well for leftovers. Remember to choose wild caught salmon to prevent consuming harmful PCP's and antibiotics. Wild caught salmon is an excellent source of Omega-3 fatty acids, which are know to be one of the most powerful medicines when it comes to reducing inflammation. Healthy, versatile, and delicious - I know you will love this recipe! Check it out...
Quick Salmon Dill Cakes: (PRINT RECIPE) 4 Servings Ingredients: 20 ounces wild caught salmon (canned or pre-cooked)* 2 tablespoons fresh dill ¼ red onion, minced 3 heaping tablespoons ground flaxseed 1 egg, lightly beaten 1 tablespoon Dijon mustard (optional) ½ teaspoon salt ½ teaspoon pepper 1 tablespoon organic ghee or coconut oil 1 lemon, cut into wedges Directions:
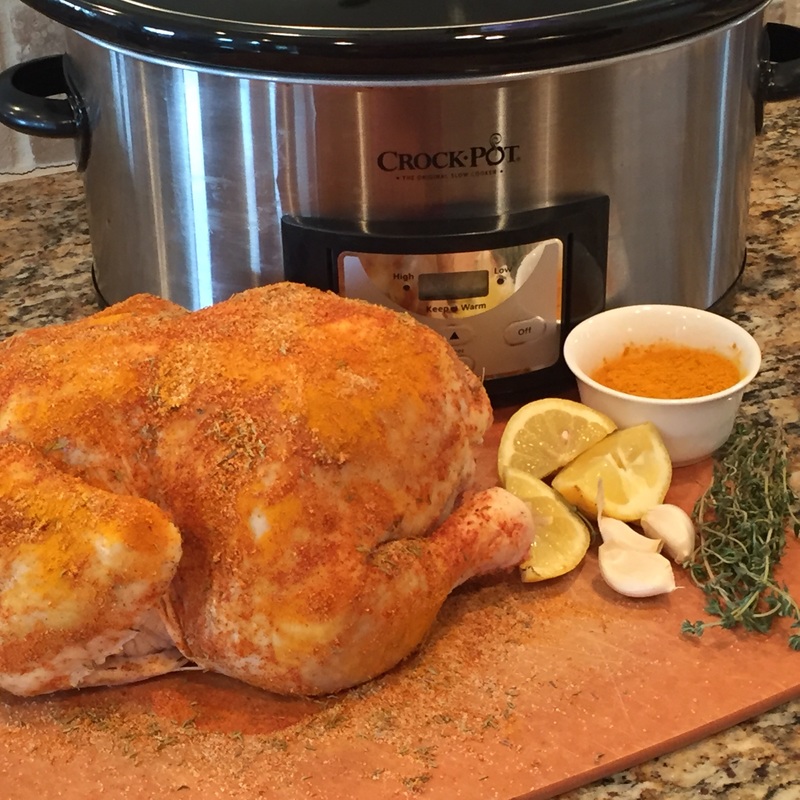
*Trader Joes sells 14.5-ounce cans of wild caught salmon for like $3.49; best price by a long shot I’ve found out there. Or you can buy fresh wild caught salmon filets. Add some salt, pepper, and lemon juice and bake in the oven at 400 degrees for 8-10 minutes. Then shred to make the “cakes”. These also taste great cold – I like to double this recipe so that I can toss the leftover patties onto a salad for a great healthy lunch option. I hope you enjoy these as much I do! Leave me some feedback below if you try them out! ~Billie Gluten, Dairy, & Soy Free. Anti-Inflammatory Meal. This is an amazing hands-off recipe that will give you enough food for at least a couple meals depending on the size of your family. Turmeric is one my favorite anti-inflammatory spices and this dish is a perfect way to boost your intake. The chicken comes out moist and delicious and practically falls off the bones. Plus you can use your bones to make some organic chicken bone broth as well! FYI - Don't worry about the small amount of moisture used in this recipe, the chicken will release a lot more as it cooks so you really don't need to add more than 1/2 cup.
I like to take the leftover chicken and use it in other meals like over a salad, shredded into a soup or stew, or mixed into my Turmeric Chicken Salad Lettuce Wraps. This gives you some healthy, quick protein for easy lunches or an evening when you don't have any time to cook! Crockpot Roasted Turmeric Chicken: (PRINT RECIPE) Servings 8-12 (depending on the size of your chicken) Ingredients: 1 (4-6 pound) whole organic, free-range chicken ½ a large lemon, sliced into wedges 4 cloves garlic, peeled and left whole 1 large onion, peeled and sliced into large half-moon shapes A few sprigs of fresh herb or herbs of choice (sage, rosemary, thyme, oregano, etc) 1 teaspoon ground turmeric 1 teaspoon dried thyme 1 teaspoon salt ½ teaspoon black pepper (optional) 1 teaspoon garlic powder ½ cup organic chicken or vegetable broth or filtered water Directions:
If you want to make organic chicken bone broth – this is great opportunity to do so. After you’ve sliced all the meat off the bones, place the carcass and bones back into your crockpot. Keep the onions in there too– and then add 8-12 cups water, depending on how much your crockpot holds, 3 tablespoons raw apple cider vinegar (to help draw minerals out of the bones), & a few more sprigs of herbs of choice (I recommend thyme and parsley). Cover and cook on low for 10-12 more hours. Run through a fine mesh strainer to isolate broth when its done cooking. Store broth in fridge for up to a week or in the freezer for up to 3 months. Check out our blog, Health Benefits of Bone Broth & How to Make It to learn more. I like to serve this dish with some fiber based carbohydrates like roasted squash or my Salty, Cinnamon Sweet Potato Fries and some steamed or sauteed green vegetables. Try my Ginger Snap Peas/Snow Peas -as ginger pairs very well with turmeric:) Enjoy friends and let me know what you think! ~Billie Anti-Inflammatory. Gluten-Free. Dairy-Free. Grain-Free. Soy Free. Low Carb. Nightshade Free Optional. This is a great meal to feed a large group or perfect for a "cook once, eat twice" (or 3-4 times) family meal:) I make this for my family of four and it gives us each 3-4 meals that week which saves me time and energy! The leftover meat makes for a great lunch to go in a wrap or on a salad. Or reheat the meat and serve with sauteed greens and some roasted squash or sweet potatoes for a completely different dinner later in the week.
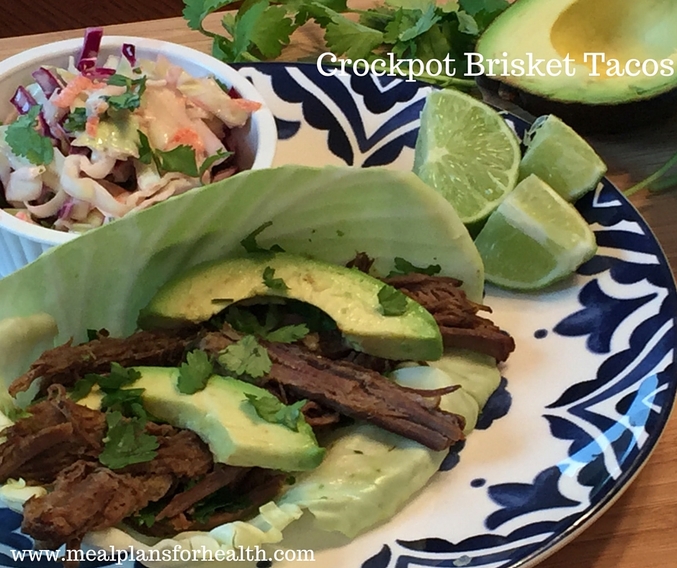
This recipe is very simple with only 15 minutes of hands-on time and then you don't have to touch it for 6-8 hours. The flavors of this spice rubbed, slow cooked meat create an amazing, mouth watering bite everyone at your table will love! It is not "over-seasoned" or crazy spicy so its good for those who don't LOVE spice. You can always add more spice if you like more and or you can omit the nightshade items (marked as*) completely if you want less or none at all. Just be sure to use organic, grass-fed beef and this will be a meal of healthy saturated fats and clean proteins. Non-organic, grain-fed beef is fed with GMO-based, grain-feed that is highly inflammatory and should be avoided. Plus conventional meats are loaded with antibiotics that kill your good gut flora and hormones that can throw off your metabolism. Stick with grass-fed and you will be good to go! If brisket is a bit too pricey or you can't find it, a grass-fed beef roast or beef shoulder would also work just as well and cost a little less. Crockpot Grass-Fed Beef Brisket Tacos (PRINT RECIPE) Serves 8-12 Ingredients: 3-5 pounds of grass-fed beef brisket 1 large yellow onion, coarsely chopped 6-8 cloves of garlic, sliced in half lengthwise 1-2 jalapenos, de-seeded and roughly chopped* (optional – leave it out if you don’t like spice or can’t do nightshades) 1 cup cilantro, chopped ½ cup organic beef broth 1 small head green cabbage or lettuce for “taco shells” 2 avocados, deseeded, peeled, and sliced ½ cup fresh cilantro, chopped for garnish 4-6 limes, quartered Salsa (optional)* Spice Rub: 4 teaspoons sea salt 1 teaspoon ground pepper* 1 teaspoon ground turmeric 1 teaspoon cumin 1 teaspoon coriander 1 teaspoon onion powder 1 tablespoon chili powder* Directions:
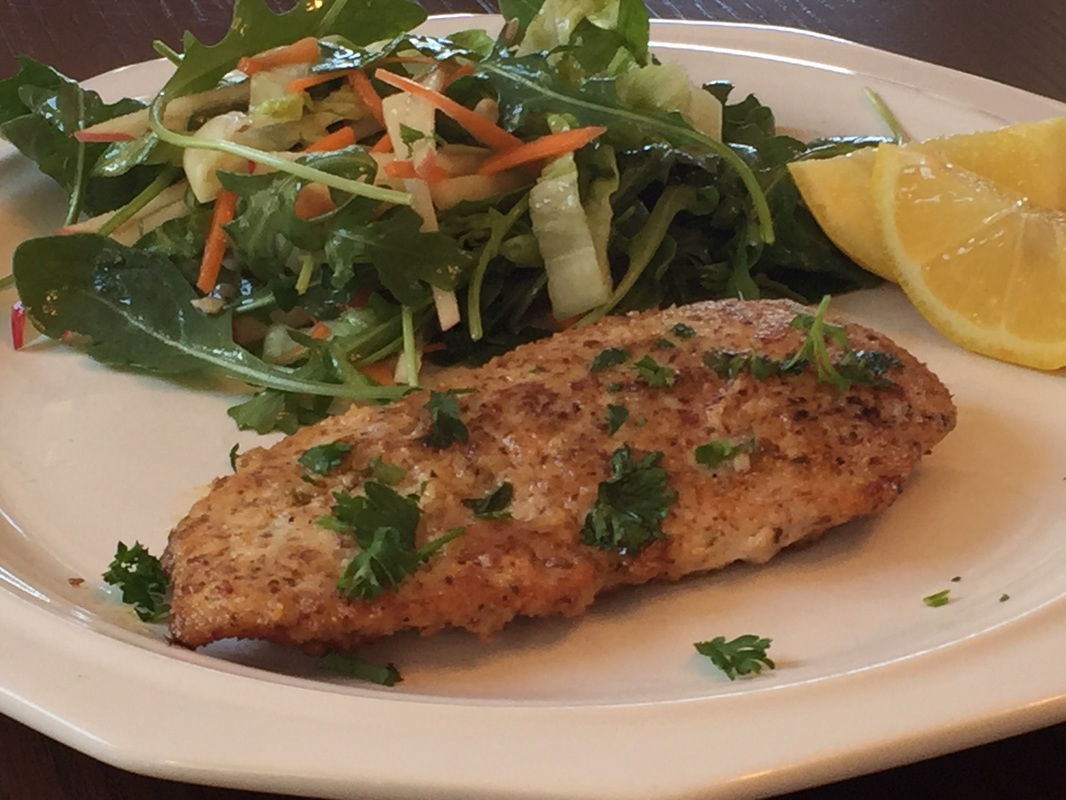
*Leave these items out if you are sensitive to nightshades or don’t like spicy foods. This dish will still come out amazing, I promise! **I like to double this spice rub, so I’ve already got some on hand for next time. You can store it in a small jelly jar/glass container for up to 3 months. ~Happy Eating! Billie Anti-Inflammatory, Grain-free, Gluten-free, Dairy-free, Soy-free, Low-carb Herb Crusted Chicken Breast (PRINT RECIPE):
Serves 4 Ingredients: 4 (6-ounce) organic skinless, boneless chicken breasts ½ teaspoon sea salt ½ teaspoon ground black pepper ½ teaspoon garlic granules/garlic powder ½ teaspoon dried oregano ½ teaspoon sweet paprika 2 tablespoons Dijon mustard 2 large egg white, lightly beaten ½ cup almond meal 2 tablespoons finely chopped fresh parsley (sub 1 teaspoon dried) 1 ½ tablespoons organic ghee 4 lemon wedges Directions:
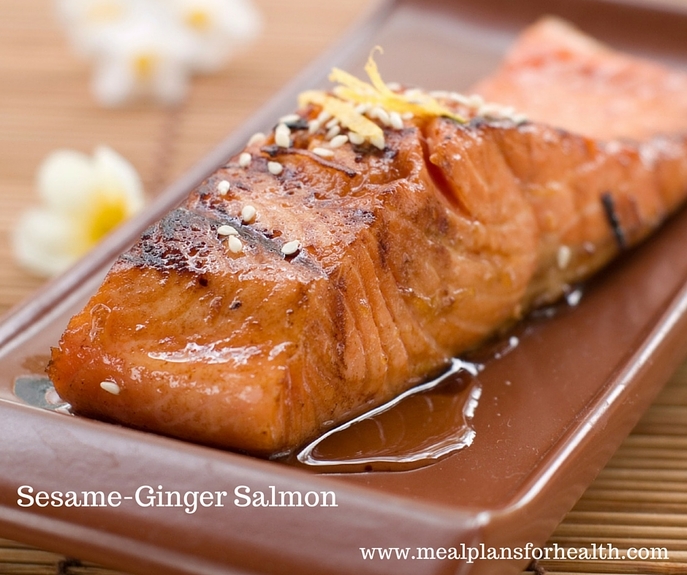
I hope you enjoy this dish as much my family does! Thank you in advance for sharing this recipe if you are so inspired:) Your support means a lot to me and helps me help more people! ~Billie p.s. - If you like meals like these, you may like our Anti-Inflammatory Meal Plans. You get 5 new dinner recipes weekly with preparation tips and grocery lists to make your life easy! Anti-Inflammatory. Grain Free. Gluten Free. Dairy Free. Soy Free. Sugar Free. Low Carb. This is one of my favorite ways to make wild salmon and get a healthy boost of Omega-3's:) These healthy fats help to reduce inflammation, prevent heart disease, and regulate metabolism. Learn more about how to get the right balance of Omega-3 to Omega-6 fats on our post: Omega-3 & Omega-6 Fats for an Anti-Inflammatory Diet!
This recipe is a regular meal on the menu in my house because it's super fast, packed with flavors and pairs well with any steamed, roasted, or sauteed vegetables. I like to add a friendly carbohydrate like sauteed zucchini noodles, cauliflower-rice, quinoa, or black rice to round out the meal. Additionally, ginger is a powerful, medicinal food that can help to reduce inflammation and improve digestion so I like to get it into my diet everyday! I usually double this recipe and eat leftovers on top of a salad for quick, weekday lunches. If you like easy and delicious, anti-inflammatory meals like these, check out our 10 Day Sugar Detox eBook, it has over 30 recipes that will nourish, balance, and heal your body! Sesame-Ginger Salmon: (PRINT RECIPE) Serves 4 Ingredients: 4 (6 ounce) wild caught salmon fillets 3 tablespoons coconut aminos (a gluten & soy free soy sauce substitute make from the sapp of coconuts) 1 inch ginger, peeled and minced 3 cloves garlic, peeled and minced ½ teaspoon salt ½ teaspoon pepper 1 tablespoon sesame oil 1 tablespoon sesame seeds 2 green onions or chives, minced Directions:
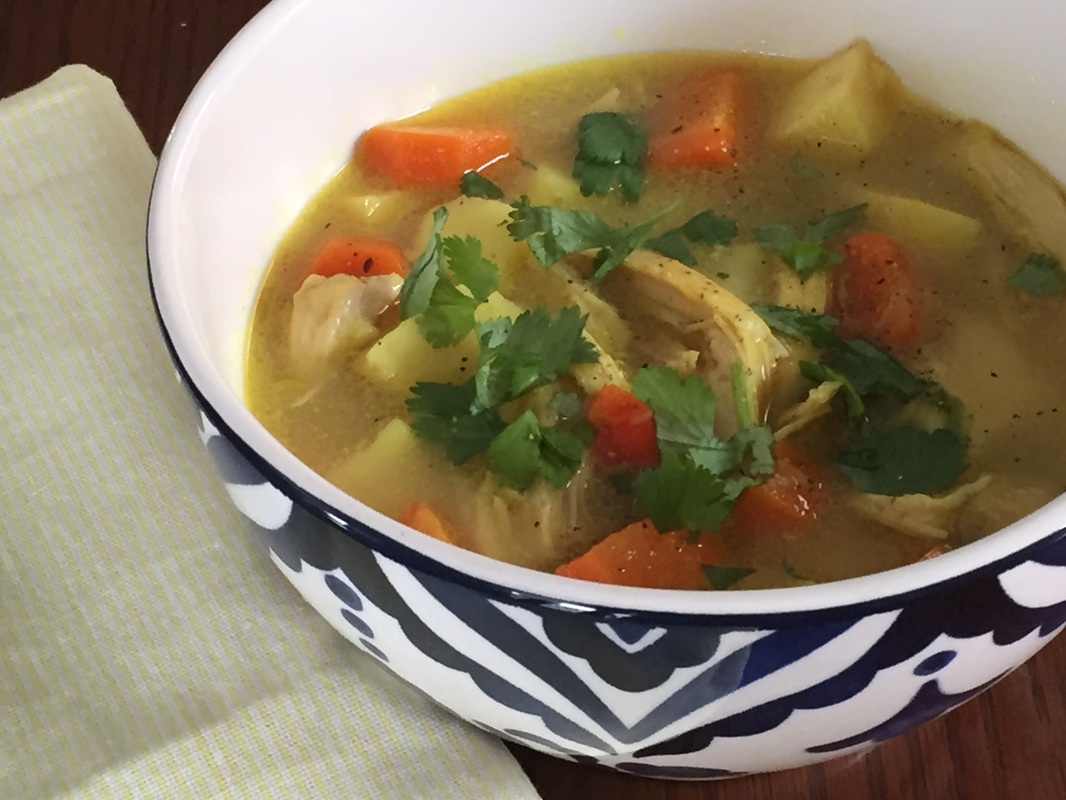
~In Good Health, Billie Anti-Inflammatory. Paleo. Low Carb. Dairy Free. Grain Free. Soy Free. I created this recipe last year when I was trying to get more turmeric into my diet to help manage my inflammatory symptoms from Chronic Lyme Disease. It is still a personal and household favorite - it warms the body, soothes the gut, and gives you a huge boost of nutrient dense foods all in one bowl! I'm all about getting turmeric into my diet wherever I can and this recipe is one my favs!
Turmeric is arguably one of the worlds most potent anti-inflammatory foods and several studies have shown it can play a large role in managing and reversing some of our most difficult auto-immune and inflammatory conditions. Head on over to our blog, 7 Health Benefits of Turmeric & Curcumin, to learn more about this powerful medicinal spice! I love crockpot meals not only because you can toss a bunch of stuff in a pot and come out with complete deliciousness in 4-6 hours but, crockpots are also great vessels to double or triple recipes like these. I always take advantage of this to use my limited energy well in the kitchen. I generally triple this recipe -we eat 4 servings for one meal, I keep 4 servings in the fridge for 4 days and use it for quick, health lunches, and I freeze another 4 servings so that I've got an easy meal down the line when my fridge is out of fresh food and I've not made it to the grocery store yet. Can you relate?! If so, check out this healing, delicious soup... Crockpot Turmeric Chicken Stew (PRINT RECIPE): Serves 4+ Ingredients: 2 pounds organic, boneless skinless chicken thighs 1 tablespoon coconut oil, melted 1 medium to large onion, diced 3 carrots, peeled and sliced into ¼ inch rounds ½ a red bell pepper, diced* 1 teaspoon ground turmeric 2 cloves garlic, minced 1 inch ginger, peeled and minced 1 small-medium sweet potato, peeled and cubed into bite size pieces* 1 quart organic chicken broth or homemade bone broth for an extra immune boost 1 cup coconut milk, reserve ¼ cup 1 tablespoon arrowroot powder (sub cornstarch if needed) ½ cup cilantro, chopped for garnish Salt & pepper to taste Directions:
*For nightshade free, you can drop the sweet potatoes and the bell pepper off the recipe and increase the carrots and/or add some raw cauliflower. From my kitchen to yours...enjoy! ~Billie p.s. - If you want more anti-inflammatory meals like this one, check out our Downloadable ,One Week Anti-Inflammatory Meal Plans and eBooks. Anti-Inflammatory, Paelo, Low-Carb, Gluten Free, Dairy Free Optional, Vegetarian Version Available I sometimes watch the Food Network or the Cooking Channel to get inspired and learn new cooking techniques; one of my favorite chefs to watch is Giada. She always makes everything look easy and I'm often drooling at her magnificent creations - but as with a lot of Italian food, her dishes are often filled with loads of gluten and dairy - both things that I don't and can't eat.
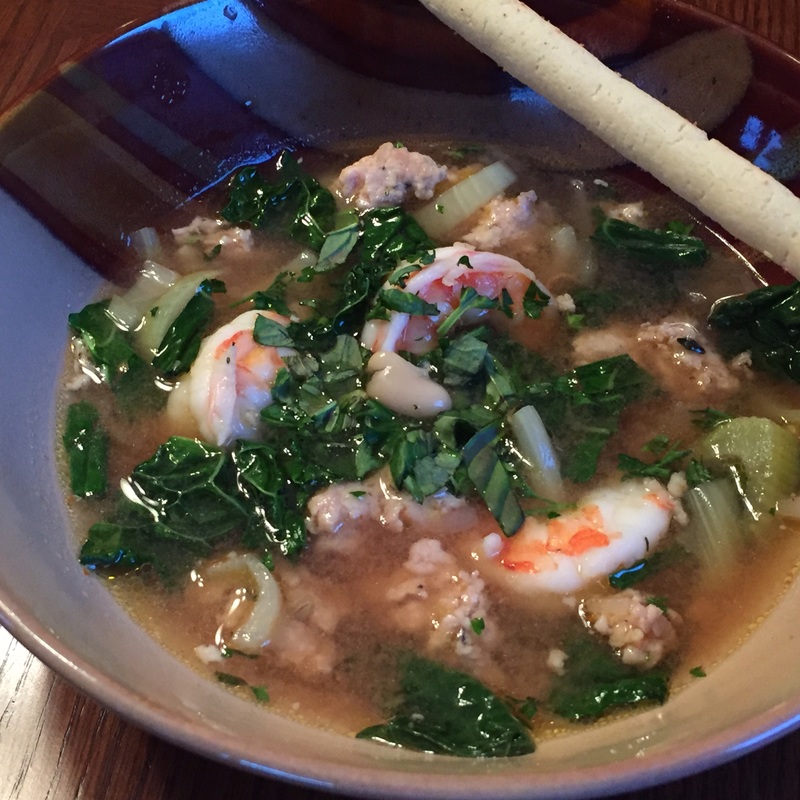
I had never made a cioppino before watching Giada makes hers that day and WOW- this classic and easy Italian soup is packed with flavors and will warm your body up from head to toe. When I wrote my recipe, I was sure to capture her traditional flares but added some additional fiber and nutrition like white beans and chopped kale to make this a nice, well rounded dish that can stand by itself. One of the unique flavors in this dish is fennel, if you've never tried fennel, don't be afraid...check out our Health Benefits of Fennel blog to get more comfortable and learn how to chop it up. This recipe was a HUGE hit in my house and I know it will be in yours as well! Italian Chicken Sausage & Shrimp Cioppino (PRINT ANTI-INFLAMMATORY RECIPE) (PRINT CLEAN PLATE RECIPE) (PRINT VEGETARIAN/VEGAN RECIPE)*** Serves 4+ Ingredients: 1 tablespoon olive oil 3 cloves garlic, diced 1 fennel bulb, white part only chopped 2 large shallots, diced 1 pound organic bulk, Italian chicken or turkey sausage 1 pound wild caught shrimp, peeled and deveined 4-5 cups organic chicken or vegetable broth 2 tablespoons organic tomato paste* 1 (15-ounce) can white beans (great northern, cannellini)** ½ teaspoon salt ½ teaspoon pepper 2 heaping cups kale, chopped 1 teaspoon fresh thyme or ½ teaspoon dried Fresh basil and/or parsley for garnish *If you are sensitive to nightshades, you can leave out the tomato paste all together and this dish is still amazing! **If you cannot eat legumes, leave the beans out and add 2 more cups chopped kale. ***For a vegan/vegetarian version, cut the meat and seafood out, add one more can of beans (either cannellini or garbanzo beans, and increase the kale to 4 cups.) Directions:
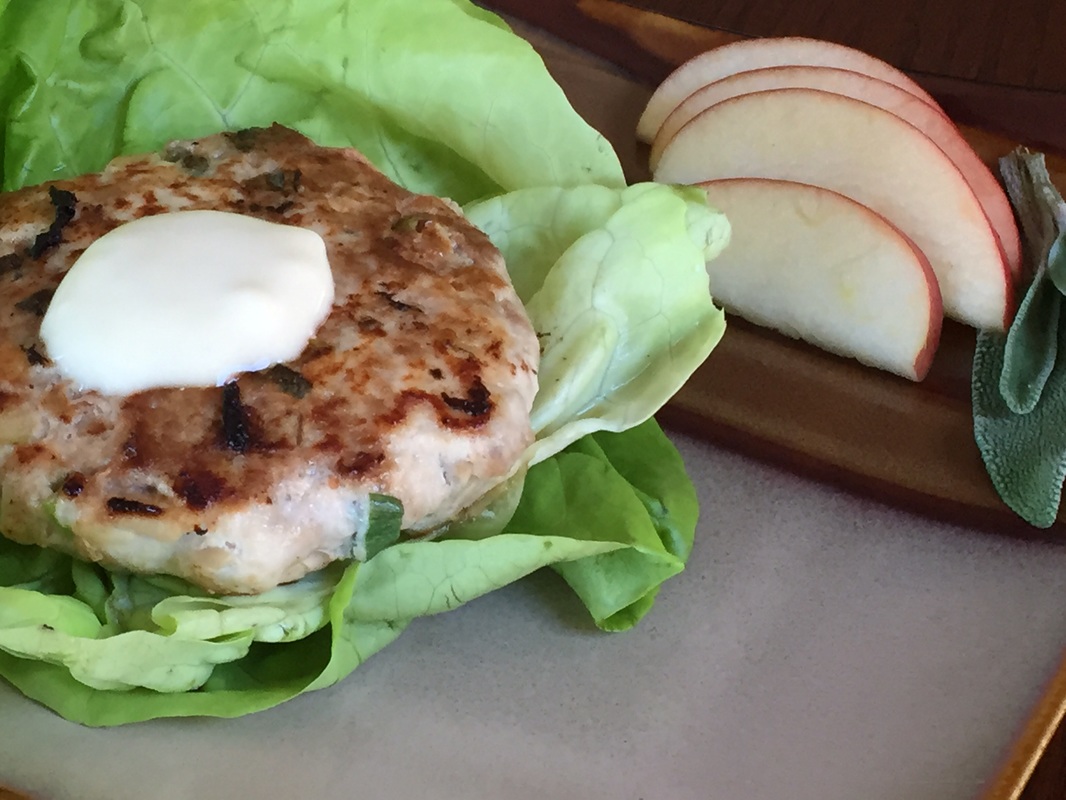
p.s. - Try this with Grain-Free Garlic Breadsticks or crusty bread of choice. Enjoy, friends! ~Billie Anti-Inflammatory, Paleo, Low-Carb, Gluten Free, Dairy Free, Egg-Free Optional We couldn't let Fall go by without giving you another awesome, apple recipe. These organic turkey burgers are packed with flavors like sage and green onions, and diced or grated apple helps the burger stay moist as you cook it.
This recipe is a family favorite and is just one of the delicious meals inside our NEW! Downloadable, One Week Seasonal Meal Plans Check it out... Apple-Sage Turkey Burgers with Garlic Aioli (PRINT RECIPE) Makes 4-5 burgers; total time 35 minutes Ingredients: For the burgers: 1 ¼ pounds organic, free range ground turkey ¼ cup almond meal (omit if you are sensitive to nuts or don't have any) 2 scallions, thinly diced 2 tablespoons fresh sage, minced ½ cup shredded apple (sweet or tart) 1 tablespoon Dijon mustard 2 cloves garlic, minced ½ teaspoon salt ½ teaspoon pepper 1/2 tablespoon coconut oil, red palm oil, or grapeseed oil 4-8 large leaf lettuce leaves for burger wraps (like Boston, Butter, or Bibb Lettuce) (sub burger buns of choice) For the aioli:* ¼ cup organic mayonnaise made from cage free eggs and olive oil 1 clove garlic, minced 1 teaspoon Dijon mustard Salt and pepper to taste 1 tablespoon fresh lemon juice *leave out aioli and just use Dijon mustard as garnish if you want an egg-free meal. Directions:
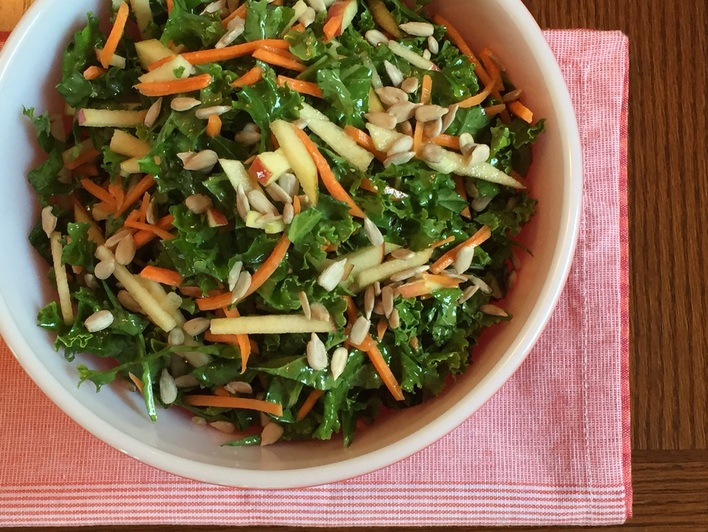
Enjoy, enjoy...and share this blog if you like this recipe please! ~Billie Kale has become know as the one of the most nutrient dense super foods out there but we find that most people are still unsure of how to cook with it to make it taste good - especially in it's raw form when it can be more fibrous and bitter. Adding some raw foods to each meal can assist in digestion and make you feel fuller longer, but how do you get raw kale to taste good?! We've got a couple secrets for you...
The first secret to making kale taste good is to remove the leaves from the stems - the stems are very bitter and difficult to digest. The second secret is to let the chopped kale marinate in a dressing that has either vinegar and/or citrus for up to 30 minutes before serving it. I like to "massage" the dressing into my chopped kale using my hands - the vinegar will help to break down the tough, fibrous texture and taste, making it easier to eat. In this recipe we've added some sweeter fruits and vegetables to balance out the earthy kale flavor and an apple cider vinaigrette to bring all the flavors together and provide some additional gut healthy enzymes. We've also included sunflower seeds and olive oil to get a boost of healthy fats. This recipe makes for a great side dish to pair with quiches, hot soups and/or clean proteins. I also like to add fresh sliced avocado, chickpeas or pre-cooked chicken to this meal, increase the portion size and eat it as a lunch or light dinner. One last benefit...this salad really holds up well dressed in the fridge for 2-3 days so it actually works for the "make ahead" type of meal to have on hand at your house. The kale will not wilt since its much more fibrous and dense than other traditional salad greens. This recipe is truly one of my staples and favorites, I hope you enjoy it as much I do! Kale-Apple-Carrot Slaw (PRINT RECIPE) Serves 4 Ingredients: 1 large bunch kale 2 medium carrots or 1 small bag shredded carrots 1 medium apple (both sweet or tart apples go well here) ½ cup raw sunflower seeds Dressing Ingredients: ¼ cup olive oil 2 tablespoons apple cider vinegar ½ teaspoon sea salt 1 ½ teaspoons Dijon mustard 1 tablespoon pure maple syrup Directions:
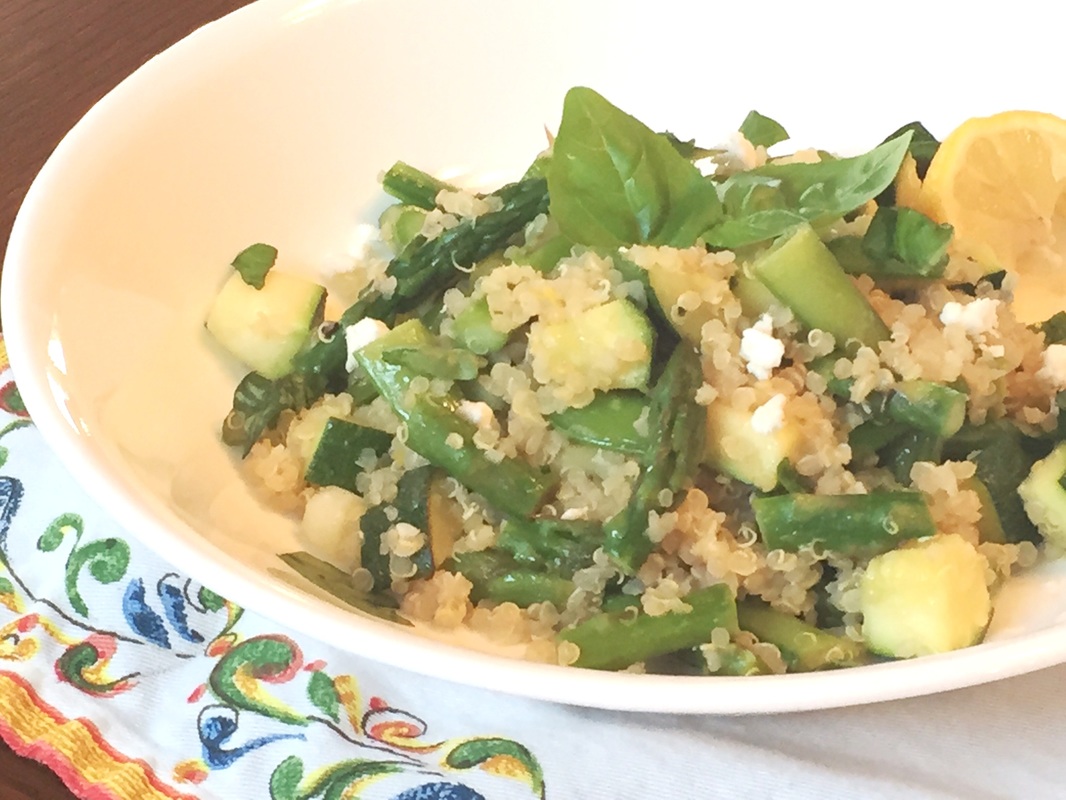
Let me know what you think once you've tried it. Happy Kale Eating! ~Billie Gluten Free. Dairy Free Version. Vegan Version. This dish is one of the meals included in week three of our 28-Day Detox Diet Program and is full of fresh seasonal veggies paired with a bright creamy lemon flavor. It has a lot less fat than traditional risotto and comes together pretty quickly. We've also used quinoa, a "friendly carbohydrate", instead of traditional white or arborio rice to give you an extra boost of protein and fiber. We get heaps of positive feedback from our members and detox diet participants that this is one of their favorite meals in the program, so we wanted to share it with you as well.
Enjoy it alone as a main meal, as a side dish or toss a scoop over some mixed greens or arugula for a nice, lightweight lunch. Feel free to change up the veggie combination to your liking or based on what veggies you have in the fridge already. Broccoli, mushrooms, green beans, or sugar snap peas would all be awesome in this recipe. Lemony Quinoa & Vegetable "Risotto" (PRINT RECIPE) Serves 4-6 Ingredients: 1 cup dry quinoa 1 cup water 1 cup organic low sodium veggie broth 3 tablespoons organic, grass fed butter or organic ghee (use grapeseed oil for vegan version) 3 green onions, diced 2 ears sweet corn, corn cut off cob raw (Substitute 1 additional zucchini or other veggie of choice if corn-free) 1/2 bunch asparagus, cut into 1 inch pieces 1 small zucchini or yellow squash, cut into 1/2 inch square cubes 1/2 cup sugar snap peas, cut in halves 1 bunch fresh basil, diced ½ teaspoon salt, divided ½ teaspoon ground black pepper, divided ¼ cup soft cheese like goat or feta (optional- for dairy free version use 2-4 tablespoons nutritional yeast instead) 2 tablespoons lemon zest (about 1 ½ lemons) 4 tablespoons lemon juice (about 1 ½ lemons) 1 clove garlic, minced 1 tablespoon honey or agave Directions:
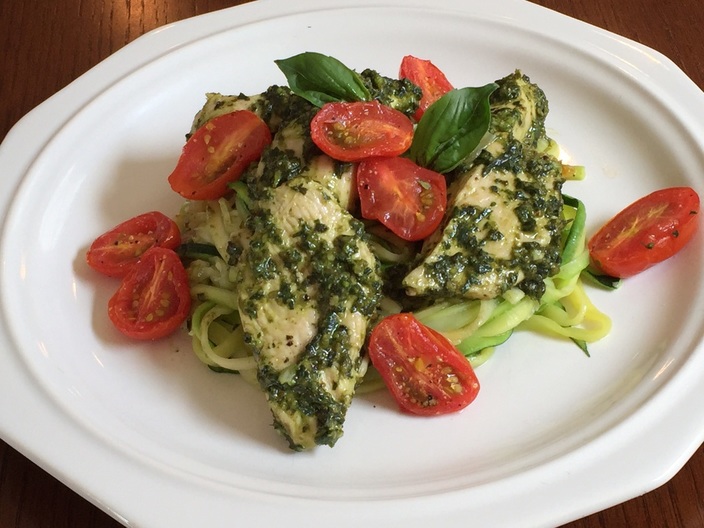
Enjoy! ~Billie & Jen Grain Free. Dairy Free. Soy Free. Low Carb. AMAZING! This is one of my favorite meals, hands down, so I'm very excited to share it with you! Now that Spring is in full swing and I can get my hands on some fresh, organic basil, zucchini and tomatoes - I just had to whip up a batch of pesto and make this recipe this week! I LOVE pesto - its a really versatile, healthy condiment that you can use as a sandwich spread or as a sauce/light accent of flavor to sauteed or roasted vegetables, poultry, fish and even some cuts of red meat.
This meal is also one of the meals in our 4 Week Detox Diet and I'm just about to start week 4 so the timing was perfect. This dish melts in your mouth and fills you up - its packed with healthy fats and nutrient dense ingredients and is bursting with super food flavor! While many traditional pesto's use pine nuts, we designed this recipe around walnuts which are loaded healthy fats and have left out the Parmesan cheese - trust me, you won't even miss it in this dish! Like many of the meals in our 4 Week Detox Diet/Spring Cleanse Eating Plan this meal will become a family favorite that you will enjoy regularly for a weeknight meal or dinner party! Check it out friends... Walnut Pesto Chicken with Zucchini Noodles & Roasted Tomatoes (PRINT RECIPE) Serves 4 Ingredients: 3 cups fresh basil 1/3 cup raw walnuts 2 cloves garlic ½ teaspoon salt ¼ cup extra virgin olive oil 1 ½ pounds of organic, free range chicken breasts, sliced into 2 inch long and ½ inch thick strips 4 medium to large zucchini 1 cup cherry tomatoes, halved 2 tablespoons, divided, plus one teaspoon grapeseed oil ½ teaspoon dried oregano Pinches of salt and pepper ¼ cup Parmesan cheese, shredded (optional for those who are dairy eaters - but you won't miss this ingredient if you are dairy free - I promise!) Directions:
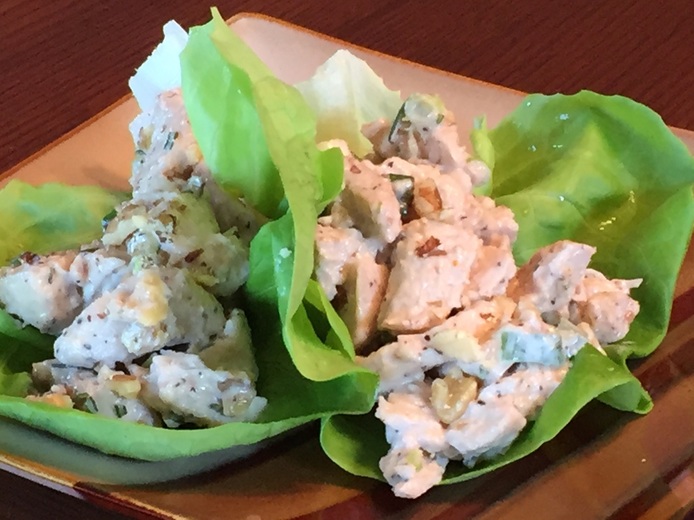
TIME SAVING TIPS: You can make the pesto ahead of time - it will stay good in the fridge for up to 3-4 days - I always make a double batch and place half in the freezer in an airtight container to unfreeze for another meal down the line. The top of the pesto will brown a bit if you make it ahead of time -this is normal, just give it a good stir and you will see the rest is a fresh, bright green color. Additionally, you can spiral cut your zucchini noodles, let them sweat out their moisture and then place them into a container in the fridge 1-2 days in advance. Some grocery stores like Whole Foods even sell pre-spiraled zucchini noodles as well to save you time. You can also use leftover pesto chicken (if you didn't devour all of it!) inside a wrap or mixed into a romaine or arugula salad with fresh tomatoes and veggies for an awesome lunch! Enjoy! Eat. Drink. And Be Happy Friends. ~Billie Grain Free. Dairy Free. Soy Free. Low Carb. So Delicious. This recipe leads with whole food ingredients like freshly chopped rosemary, raw walnuts, and green onions and its creamy consistency will melt in your mouth. I like to enjoy this chicken salad in a lettuce wrap but if you'd like to add some grains to this meal, toss it into a sprouted grain tortilla, wrap, or whole grain sandwich bread.
It's a perfect fast meal to enjoy on a weeknight and makes for great leftovers for lunches during the week. Each time I make this for my family or friends, I get rave reviews and now I'd like to share it with you... Rosemary Chicken Salad Wraps (PRINT RECIPE) Serves 4 Ingredients: 1 ¼ -1 1/2 pounds organic, free range chicken breast, sliced into ½ wide, 2-3 inch long strips 1 tablespoon grapeseed oil 3 scallions, diced 1/3 cup mayonnaise made from cage free eggs and olive oil 1/3 cup raw walnuts, chopped 1 ½ teaspoons fresh rosemary, chopped 1 ½ teaspoons Dijon mustard ¼ teaspoon salt ¼ teaspoon black pepper 8 butter or large leaf lettuce cups Directions:
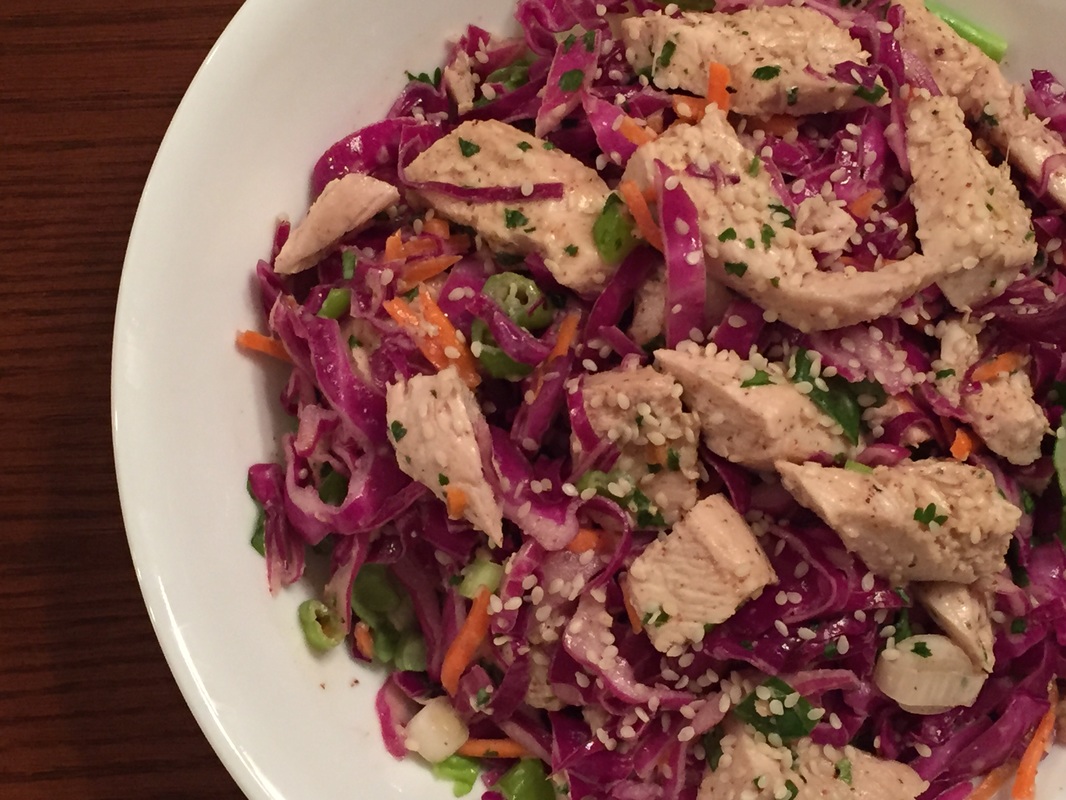
Hope you enjoy this recipe as much as I do! Let me know what you think. ~Billie Grain Free, Gluten Free, Dairy Free, Soy Free, Low Carb, Anti-Inflammatory Meals. This is one of my favorite entree salad recipes because it is super hearty and filling. It is loaded with nutrient dense, whole food ingredients and clean protein and you will love the flavor profiles it brings. This salad also keeps well (even dressed) for leftovers for a couple of days.
If red cabbage isn't the most popular vegetable at your house, try mixing in some firm, light greens like romaine. Shred them like you would when making tacos and mix into cabbage as desired. I tried this trick recently on my step-dad who HATES cabbage and he ate the whole plate! The "pre-marinate" and dressing helps the cabbage to become softer to chew and less bitter - I've converted many non-cabbage eaters to cabbage lovers with this salad! it is a must try for sure friends! Chinese Chicken Salad (PRINT RECIPE) (PRINT ANTI-INFLAMMATORY VERSION) Makes 4 servings Ingredients: 1 ¼ pound organic, free range chicken breast, thinly sliced into ¼ inch strips 2/3 a medium head red cabbage, very thinly sliced 2 medium carrots, shredded 5 green onions, green and white parts, diced 2-4 cups hard lettuce like romaine (shredded) (optional) 5 tablespoons coconut aminos (substitute gluten free or regular soy sauce or tamari here) 2 tablespoons honey or agave, divided** 2 cloves garlic 1 ½ inches fresh ginger, peeled and sliced 1/3 cup cilantro, tightly packed ¼ cup creamy natural almond butter (can substitute creamy natural peanut or sunflower seed butter here) 2 tablespoons fresh lemon or lime juice 1 tablespoon coconut oil, divided 1 ½ tablespoons sesame oil 1/3 cup almonds, chopped **For a more anti-inflammatory version, you can decrease honey to 1 tablespoon total or substitute a few drops of dark liquid stevia instead here is you are avoiding sugar all together or are doing a detox diet or gut repair protocol. Directions:
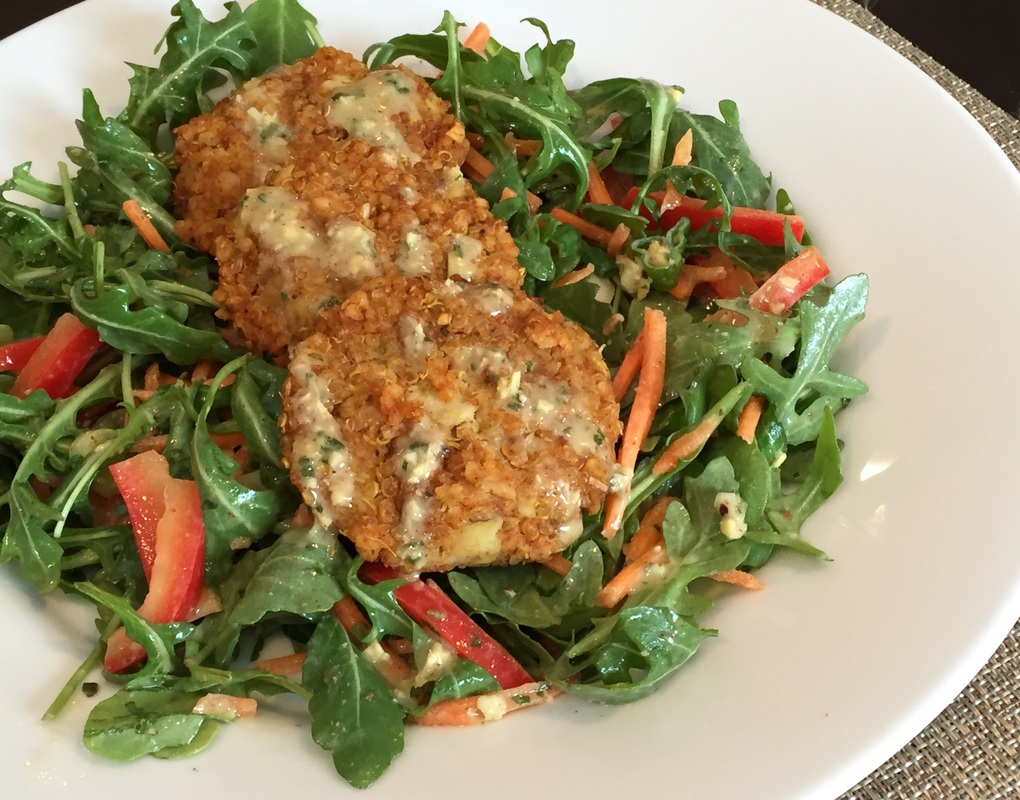
Enjoy! ~Billie Gluten Free. Vegan. Soy Free. Antioxidant Packed. Full of Flavor. This meal is bursting with antioxidants and packs a flavorful punch - these little patties pair perfectly with your favorite mixed greens, sliced raw veggies, and our dairy and soy free Creamy Thai Vinaigrette Dressing. One of the things I like to do to keep healthy eating easy and make sure I stay on track with my diet is to make 1-2 dishes at the start of each week that I can use as quick lunches. I generally eat a raw lunch of salad and veggies with either a clean protein added like organic chicken or wild caught salmon or a serving of healthy grains or carbs like quinoa, sweet potatoes, or legumes.
When I make these patties, we eat them one night for dinner and then use leftover patties as a healthy and quick lunch option. They also make a great appetizer to put out at your next social gathering! Curried Sweet Potato & Quinoa Patties with Creamy Thai Vinaigrette Dressing (PRINT PATTIES RECIPE) (PRINT DRESSING RECIPE) Makes 12-15 patties, Serving size is 3-4 patties Ingredients: 2 small sweet potatoes, peeled and diced 3/4 cup dry quinoa 2 cloves garlic, minced 1 small sweet onion, finely chopped 1 tablespoon coconut oil, melted 1 teaspoon salt 1 teaspoon pepper 1 tablespoon paprika 2 tablespoons all purpose, brown rice, or quinoa flour 2 teaspoons cumin 2 teaspoons curry powder 2 teaspoons dried oregano 2 cups mixed greens of choice (I used arugula here, use your favorite seasonal green!) Other salad veggies; we recommend sliced red peppers, shredded carrots, chopped avocado, and scallions. Creamy Thai Vinaigrette Dressing Ingredients: 1 ½ tablespoons peanut, almond, or sunflower butter 3 tablespoons full fat canned coconut milk* 2-3 tablespoons cilantro 1 tablespoon soy sauce, tamari, or coconut aminos 1 tablespoon apple cider vinegar 1 tablespoon fresh lime juice 2 teaspoons honey or agave 1 clove garlic, minced 1-inch piece of ginger, peeled and chopped ¼ teaspoon salt ¼ cup olive oil 2 tablespoons sesame oil Directions:
Happy Eating! ~Billie and Jen |
Billie Shellist, FDN-P
I practice functional nutrition, an approach that allows me to look at your entire health history and help you find the "root causes" of your chronic health complaints. This cuts out the trial and error process and helps you get real symptom relief and resolution! Food is medicine and knowledge is power -I hope you enjoy my anti-inflammatory recipes which are gluten, dairy, and soy free as well as very low grain and sugar. If you'd like to heal from the root cause(s) of your chronic symptoms, try starting with a complimentary 15-minute consultation. Click here to request your free session. |

