
 Real pumpkin puree is one of my favorite health foods and something I like to enjoy year round, but especially during the Fall and holiday season. Jen and I like to make our own pumpkin puree since one "pie pumpkin" yields quite a good bit of pumpkin and it is easy to make. Check out out blog to learn how to make your own Homemade Pumpkin Puree. But you can also find pumpkin puree in cans year-round at the store. Make sure to choose 100% pure pumpkin puree in these recipes and not canned pumpkin pie mix. So....if you love pumpkin as much as we do, check out some of our favorite recipes and let us know what you think.... 
3 Comments
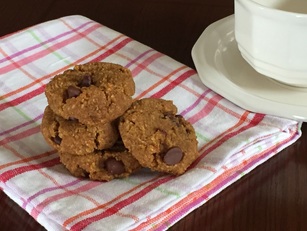
Grain free. Gluten free. Soy free. Dairy free. Low Carb. Low Sugar. 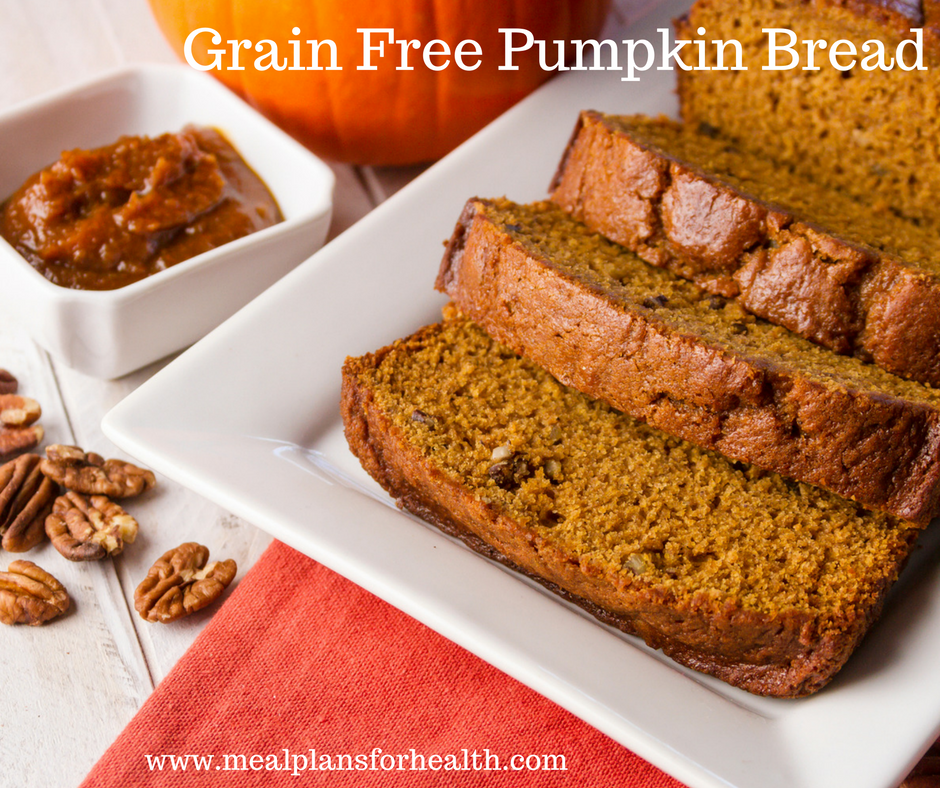 This delightful bread is low in sugar but high in flavor and deliciousness and highlights one of my favorite seasonal foods - pumpkin!! Pumpkin used to be a year round food for me until I learned I had a histamine intolerance which made me sensitive to foods like pumpkin and cinnamon. So this whole year I've excluded these items from my diet, which has been challenging for me but has paid off. And now that Fall has arrived, I'm treating myself to some of my favorite pumpkin recipes in small amounts and wanted to share some with you:)
This bread is super versatile and can be made into a dozen muffins if you prefer. I recommend adding your favorite "crunch" to this bread –I love walnuts because they are a healthy source of omega-6 fats and have been shown to be neuro-protective for the brain, but pecans or hazelnuts could also work well in this recipe. Or for a special treat every once in awhile, add 1/3 cup dark or vegan chocolate chips or even some craisins or raisins. For more recipes like these, check out our Anti-Inflammatory Holiday Cookbook with over 20 holiday recipes, plus a holiday meal plan that can save you time and stress! ON SALE NOW -- MONDAY 10/31. Grain Free Pumpkin Muffins: (PRINT RECIPE) Serves 12 Ingredients: Heaping ½ cup 100% pure pumpkin puree ¼ cup coconut flour* 1 ½ cups blanched almond flour or almond meal 1 teaspoon baking powder ½ teaspoon baking soda ½ teaspoon salt ½ teaspoon ground cinnamon ½ teaspoon ground ginger 1 teaspoon pumpkin pie spice 3 large organic, pastured eggs 3 tablespoons coconut palm sugar* 2 tablespoons maple syrup 1/3 cup coconut oil, melted (can sub melted ghee or avocado oil here instead) 1 teaspoon pure vanilla extract *If you are sensitive to coconut, try using 1/3 cup tiger nut flour or quinoa here instead and swap the coconut sugar for additional maple syrup.* Optional Ingredients: (Choose one) 1/4 cup chopped nuts (walnuts, pecans, or hazelnuts work well) 1/3 cup dark or vegan chocolate chips Directions:
p.s. - if you decide to make 12 muffins instead of bread, bake for 18-25 minutes or until a toothpick inserted in the center of the muffin comes out clean. Remove muffins from the tin but leave the muffin paper/wrapper on until completely cool. If you try to peel it too early, lots of the muffin will stick to the paper and it will be a mess! Enjoy! Billie Grain free. Gluten free. Dairy free option. 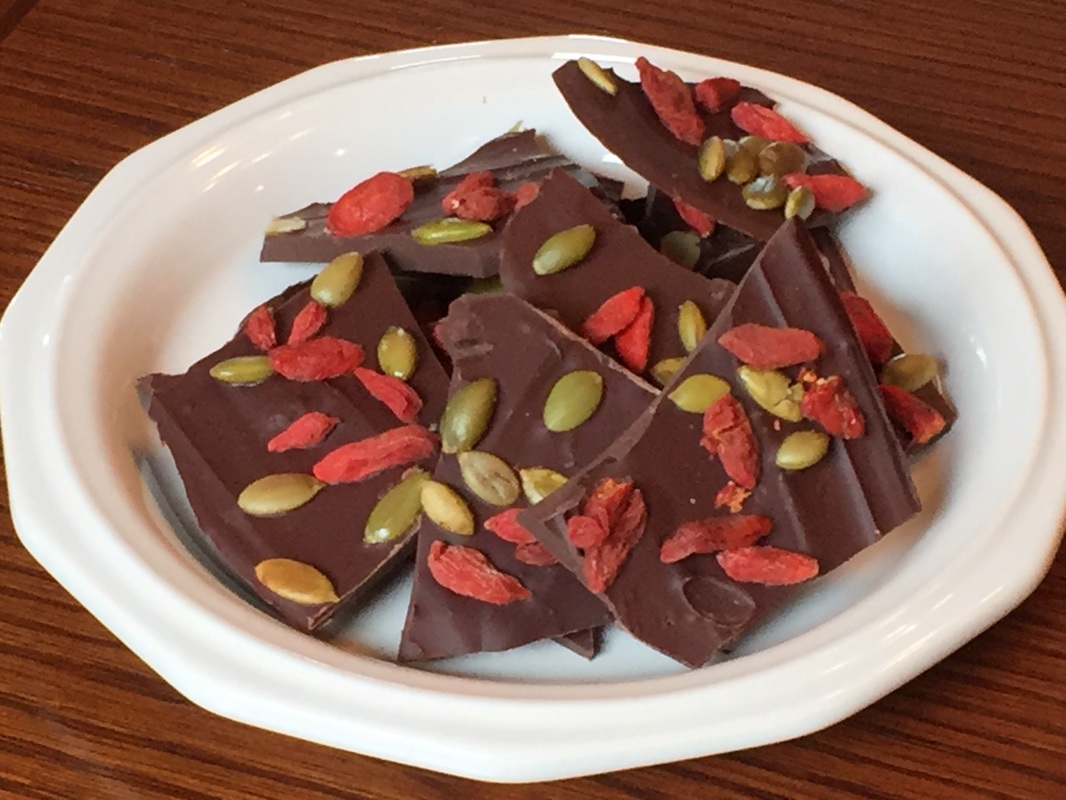 This recipe is a perfect way to make your own "candy-like" dessert at home. Dark chocolate bark is super simple to make and does not require an oven or a stove top. It only takes about 10 minutes of your time and you can customize this recipe to meet your taste buds. For example, instead of pumpkin seeds and goji berries try: shredded coconut, chopped almonds, walnuts, or macadamia nuts or some craisins. I like this combination because pumpkin seeds and goji berries are super-foods that are packed with additional antioxidants - always a good thing:) Enjoy...
Pumpkin Seed Goji Berry Dark Chocolate Bark (PRINT RECIPE) Makes 10-12 servings Ingredients: 1 cup dark chocolate chips or 1 (8-ounce) dark chocolate bar (70% or higher) or vegan chocolate chips/carob chips 3 tablespoons raw pumpkin seeds 3 tablespoons go-ji berries ¼ -½ teaspoon coarse sea salt (optional – for a salty-sweet taste) Directions:
Let me know what you think and what your favorite combinations are! ~Billie  The holiday season is filled with temptation after temptation when it comes to food and drinks! Everywhere you turn there is another box of fresh baked goodies or a candy bowl filled with your favorite treats! Not to mention the many social gatherings you look forward to this time of year that often revolve around rich foods and make it super easy for us all to overindulge a bit.
Many of us say to ourselves, myself included, "I'm so good all year long! I deserve this!" But it turns out that while giving yourself "time off" from your healthy diet for "good behavior" seems like an easy justification in the moment, its more difficult to justify the 5 extra pounds staring back at you from the scale on January 1st! UGH! Not a great way to start a new year, right?! You've worked hard to eat healthy all year long, end the year strong and full of pride! Don't worry about losing weight during the holiday season, just focus on maintaining it. In this week's What's That?! Wednesday post we want to help you stay on track with your diet this holiday season and avoid the "holiday bulge" with these simple tips: 7 Tips to Eat Healthy During the Holidays:
Now we want to hear from you...what tips to you use to stay fit and health during the holidays?! Help spread the word by sharing this post with your friends and your tips and thoughts in the comments below! Happy Holidays Friends! ~Billie & Jen Dairy Free. Gluten Free. Soy Free. Grain Free. Vegan Version. 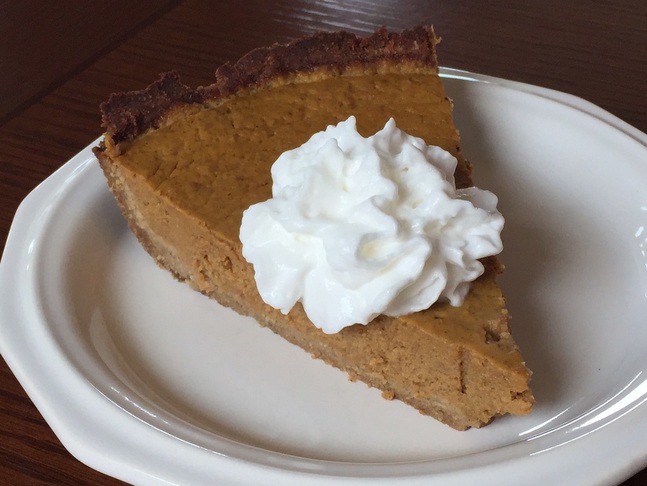 This recipe is a remake of a Thanksgiving tradition that is a must have at your celebration! Most pumpkin pie recipes rely on canned evaporated milk or heavy cream to provide the rich, creamy flavor. I don't know about you, but milk that can sit on a shelf for 365 days before going bad is a bit scary to me! I use full fat canned coconut milk here instead to give that rich, creamy flavor and consistency.
My mother in law makes an amazing traditional pumpkin pie that my husband dreams about all year long...he literally cannot celebrate Thanksgiving without this pie!! In the 5 years we've been married, we've spent several Thanksgiving day celebrations away from his family and his mother's pumpkin pie and no pie seems to be able to meet his expectations. But a few years I met the challenge...with this recipe! I hope you enjoy it as much as we do! You may also want to check out our Anti-Inflammatory Holiday eBook for 24 more holiday recipes that are all gluten, dairy, and soy free as well as low in sugar and carbohydrates. We've also included a 5-Day Thanksgiving Preparation & Meal Plan to help you rock your holiday celebration! Pumpkin Pie with Ginger Cookie Crust (PRINT RECIPE) Serves 8 Ingredients: Filling: 2 cups 100% real pumpkin puree (not pumpkin pie filling)* ½ cup full fat canned coconut milk 3 eggs, plus one egg white ¼ cup 100% pure maple syrup 1 teaspoon vanilla extract ¼ teaspoon kosher salt 1 heaping tablespoon pumpkin pie spice Crust: Homemade “Ginger-Cookie” Crust: 1/3 cup blanched almond flour ½ cup, plus 2 tablespoons coconut flour ¼ teaspoon salt ¼ teaspoon baking soda 1 ½ teaspoons ground ginger ½ teaspoon ground cinnamon ¼ cup coconut oil, melted + 2 tablespoons 2 tablespoons 100% pure maple syrup 1 tablespoon blackstrap molasses 1 egg 1 teaspoon vanilla Directions:
Trust me - this recipe is KITCHEN TESTED and HUSBAND APPROVED - just give it a try - you will be happy you did! Although you may be upset that you did not make a second one:) Enjoy & Happy Thanksgiving! ~Billie (PRINT VEGAN RECIPE) - uses silken tofu to replace the eggs and coconut milk Grain Free. Vegan. Paleo. Low Carb. Low Sugar. Super Good. 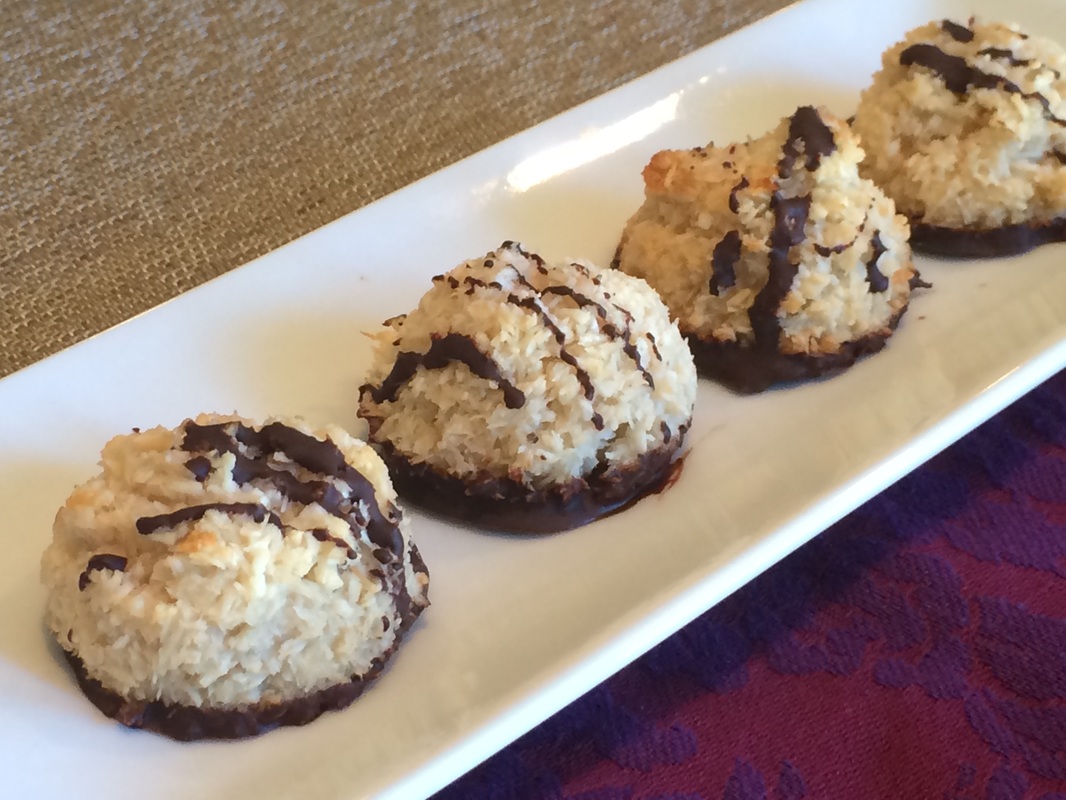 Macaroons may seem like they would be tough to make, but it only takes six simple ingredients and little bit of time to make these delectable and beautiful treats. Each bite is slightly crunchy on the outside and soft and moist on the inside. YUM...writing this blog is making me want to eat another one.
Instead of using sweetened condensed milk like most macaroon recipes do, we substituted a can of full fat coconut milk and some honey that we boiled down to make a thicker, sweeter milk. It is similar enough to sweetened, condensed milk but with healthier fat and a cleaner sugar choice...and it really pulls these treats together nicely! If you are on a low or little to no sugar diet like I am, these beauties fit the bill. They are under 5 grams of sugar and 8 grams of total carbs per serving, making them a great low carb dessert for your holiday, special occasion or for when a sweet tooth strikes. A must try for anyone wanting a simple, elegant dessert that is light on sugar and carbs. If you like this dessert and want more recipes like these, check out my Anti-Inflammatory Diet Holiday Cookbook, with 24 more additional recipes that are low sugar, paleo, mostly grain free, dairy free, gluten free, and soy free. Dark Chocolate Drizzled Coconut Macaroons (PRINT RECIPE) Makes about 18 macaroons Ingredients: 1 (14-ounce) can full fat coconut milk ¼ cup raw honey or agave 2 cups unsweetened shredded coconut ½ teaspoon vanilla extract Pinch of salt 1 (3-ounce) dark chocolate bar Directions:
Enjoy friends! ~Billie & Jennifer Grain Free. Paleo. Vegan. Perfect Holiday Snack. 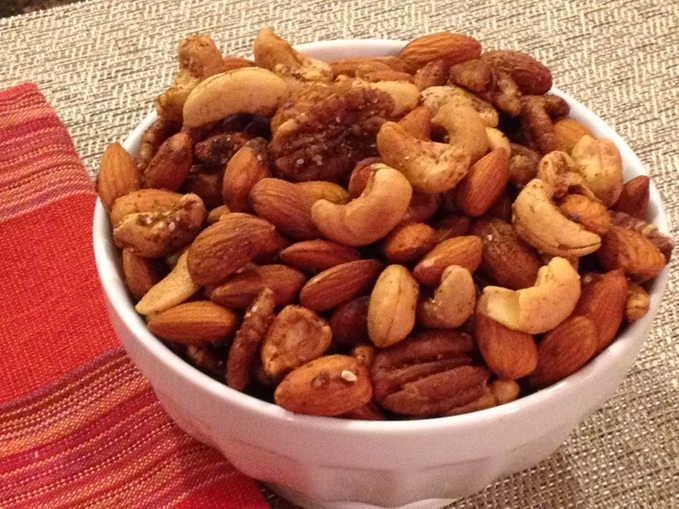 Let's be honest, the holiday season can fill you with lots of empty calories really quickly. Everywhere you turn someone is offering you baked goods, candy, decadent snacks, and more. That's why we wanted to give you a nutrient dense, protein packed holiday snack that you can carry with you or serve at your next holiday gathering. This snack will fill you up and keep you satisfied so you are less temped to munch, munch, munch away at other holiday snacks and treats.
Save your calories for the main meal and try this is a super simple recipe that takes no time at all. Use your favorite combination of nuts and alter the spices to suit your tastes. You can keep these in an airtight container or baggie in your purse or bag for a great on-the-go snack. Store nuts in an airtight container for up to 2 weeks on the counter top. Looking for more clean, delicious holiday recipe ideas? Check out our Holiday Anti-Inflammatory Diet Cookbook, over 24 amazing holiday recipes plus a "Holiday Meal Game Plan". Holiday Spiced Slow Roasted Nuts (PRINT RECIPE) Makes 3 cups/12 servings Ingredients: 1 large egg white, whisked until foamy* 2 tablespoons coconut palm sugar 1 teaspoon salt ½ teaspoon chili powder ¼ teaspoon all spice ½ teaspoon ground cumin 1/8 teaspoon cayenne 3 cups raw nuts of choice like: almonds, cashews, pecans, walnuts, or Brazil nuts Directions:
*You can substitute oil instead of egg white here if you are sensitive to eggs: red palm oil or coconut oil would both work well. GO NUTS!!! ~Billie & Jen Grain Free. Paleo. Vegan & Vegetarian Versions. 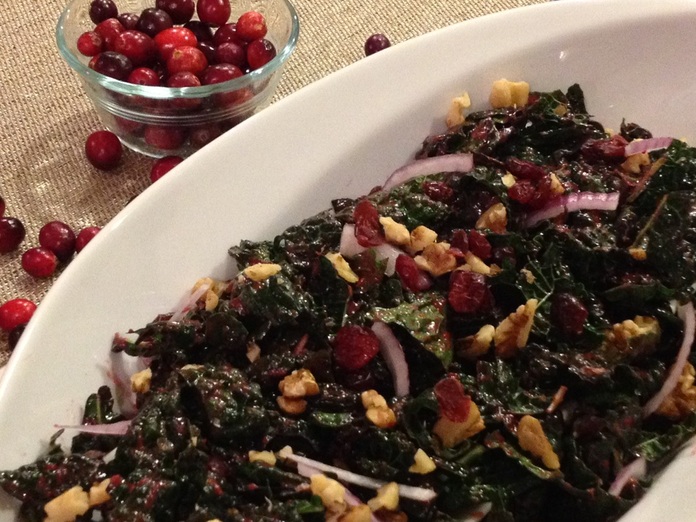 Brighten up your holiday celebration with this beautiful, antioxidant packed side dish! Remember, color equals antioxidants and this salad is packed full of color, flavor, and nutritional goodness. A great recipe to infuse into your holiday spread, this salad is actually best made in advance because the longer you marinate the salad the better it tastes. We recommend an overnight marinating time for best results.
Need a great seasonal weeknight dinner? You can also make this into an entree salad by adding some Crispy Roasted Chickpeas (see recipe) or even some diced roasted sweet potatoes. Or for you meat eaters out there, a nice piece of broiled or roasted salmon or organic grilled chicken breast on top of this salad makes it into a very filling meal. Either way...you can't go wrong...check it out... Marinated Cranberry Kale Salad (PRINT RECIPE) Serves 4-6 Ingredients: 4 oz fresh cranberries 1/3 cup water 2 tablespoons maple syrup 2 tablespoons apple cider vinegar 1 teaspoon Dijon mustard 1/2 teaspoon lemon juice 1/2 teaspoon salt 1/8 teaspoon freshly ground black pepper 1/4-1/2 cup walnut oil or extra virgin olive oil 8 oz fresh kale (Tuscan/Lacinato works best in this recipe) 1/4 cup dried cranberries/craisins (leave out if following an anti-inflammatory or low sugar diet) 1 cup walnuts, coarsely chopped 1/4 cup thinly sliced red onion Soft goat cheese or feta crumbles (optional) Directions:
Happy Holidays! ~Billie & Jennifer Grain Free. Soy Free. Paleo. Vegetarian & Vegan Versions. 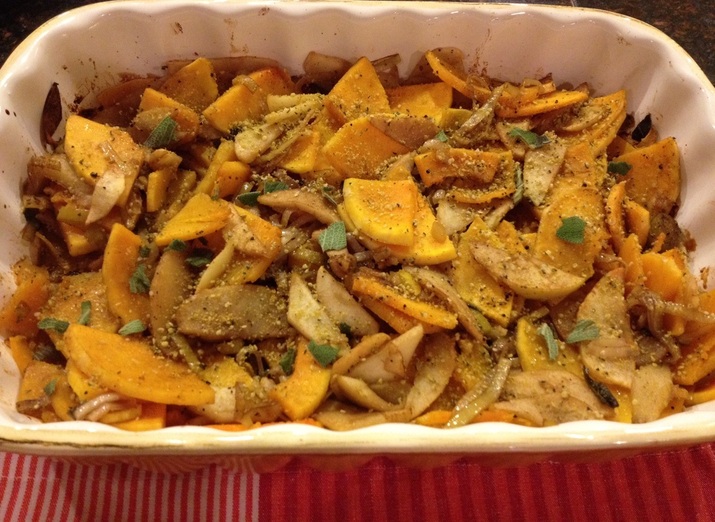 With Thanksgiving just around the corner, we thought we'd give you some great holiday planning recipes and side dishes the whole family will love. This is a new recipe of ours that is full of both sweet and savory flavors. If your family typically does candied yams or a sweet potato souffle or casserole, this dish would run in the same category but uses organic apples to sweeten the dish instead of brown sugar, marshmallows, or other processed sugars that are usually a part of sweet potato casserole. I personally like to eat my sugar in the form of dessert and not a side dish, so this is a great dish to help me not overdo the sugar intake during dinner and save some room for dessert!
If you are dairy free, no worries, use our fabulous Hemp Parmesan (as pictured above) instead of regular Parmesan to add some healthy fats and clean protein. This is a flavor combo you will not want to miss! Apple, Squash, Leek Gratin (PRINT VEGETARIAN RECIPE) (PRINT VEGAN/PALEO RECIPE) Serves 6 Ingredients: 3 tablespoons grapeseed oil 2 leeks, white part only, thinly sliced crosswise, washed well and drained 2 tablespoons water ½ teaspoon coarse salt ¼ teaspoon freshly ground pepper ½ cup dry cooking sherry 1 tablespoon chopped fresh sage leaves, plus whole leaves for garnish 1 pound butternut squash, peeled, seeded, and cut into 1/8-inch-thick slices 1 pound organic apples, such as Gala or your favorite, cored and thinly sliced ½ cup grated Parmesan (2 ounces) OR 1/2 cup Dairy Free Hemp Parmesan (PRINT RECIPE) Directions:
Happy November Friends! Enjoy! ~Billie & Jennifer Grain Free. Soy Free. Dairy Free. Vegan Version. 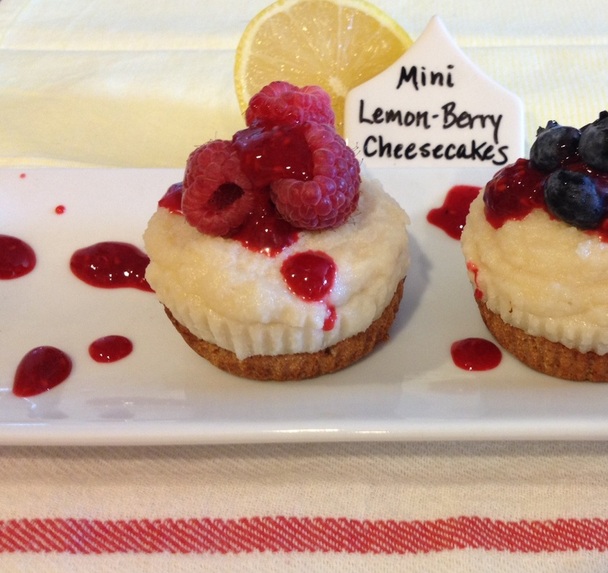 Hey friends...guess what today (July 30th) is?! National Cheesecake Day!!! As soon as we learned about this totally awesome holiday, we got really excited to do some experimenting in the kitchen and give you a unique and delicious dessert to spoon into your mouth on this or any other indulgent holiday or celebration. For the last several years Jen and I have been making lovely tofu based, dairy free cheesecakes for friends and family with rave reviews. But I know we have lots of soy sensitive members, readers, and clients out there who, like me, prefer to limit their intake of high quality organic soy products. So after a bit of experimenting and husband sponsored taste testing, we are super excited to share this cheesecake recipe that uses heart healthy macadamia nuts and cashews as the base of it's creamy filling paired with a grain free graham cracker crust. These cheesecakes offer so much deliciousness in such a small package and are sure to impress everyone at your table! This recipe takes about 40-55 minutes of hands on time plus about 7 hours of set time. The only part of this recipe that is cooked is the crust, so you will make that first. Use your hands to form 12 dough balls and place each dough ball inside each of the 12 muffin cups. It will look like this... 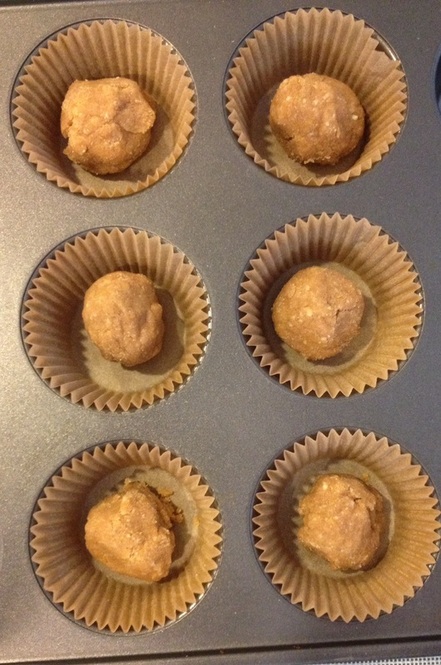 Then use a small spatula or the back or a spoon to smooth each ball down evenly inside each baking cup and slightly up the sides. It will look like this before you pop them into the oven: 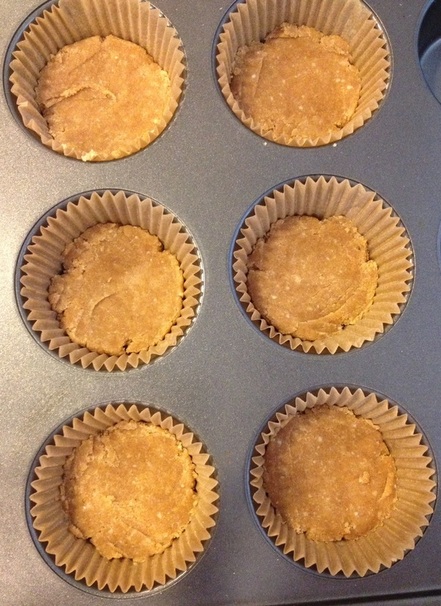 Mini Lemon-Berry Cheesecakes (Print Recipe) (Print Vegan Version)
Serves 12 Ingredients: 2 cups raw macadamia nuts, soaked overnight and drained ½ cup raw cashews, soaked overnight and drained ¼ cup shredded coconut ¼ teaspoon salt ½ cup honey or agave, plus 2 tablespoons ½ cups melted coconut oil 1/3 cup lemon juice, plus 1 tablespoon 2 teaspoons vanilla extract 6 ounces fresh berries of choice** 1 cup frozen berries of choice, thawed for 10 minutes** Homemade “Graham Cracker” Crust: ¼ cup blanched almond flour ½ cup coconut flour ¼ teaspoon salt ¼ teaspoon baking soda 1 teaspoon cinnamon ¼ cup coconut oil, melted 2 tablespoons honey or agave 1 egg 1 teaspoon vanilla Directions:
Raspberries and blueberries are my favorite to use with the hint of lemon this recipe offers, but any berry or combination of berries will be lovely. You could also use this same recipe and make a 9-inch cheesecake using a spring form pan if you prefer. These beautiful desserts also keep well in the fridge for up to 3 days and in the freezer for up to a week. Just gently wrap them in plastic wrap and place them in a freezer safe container. De-frost in the fridge for 24 hours before serving. Enjoy!! Happy Cheesecake Day Friends!! ~Billie & Jen Grain Free. Dairy Free. Soy Free. 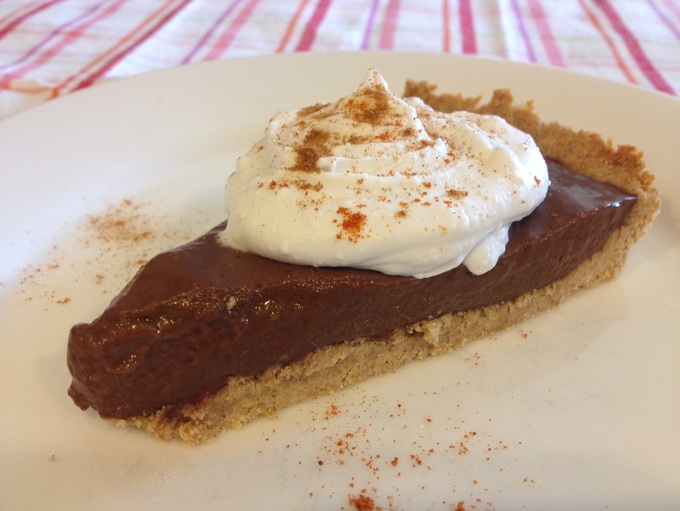 We ate this pie last night but as I'm writing this blog this morning I'm eating yet ANOTHER piece!! Very bad behavior on my part right now since I'm on a VERY LOW SUGAR diet for health reasons, but I just had to indulge once more because this pie is simply amazing!! The rich, chocolaty pudding-like center has just a slight hint of ground red pepper and coffee to it, making it an excellent dessert to add to your Cinco de Mayo celebration this year. The even more amazing part is that this pie has no refined sugars, refined flours or GMO ingredients - I relied on some my favorite cleaner, whole food ingredients - coconut palm sugar**, dark chocolate, almond & coconut flours, coconut oil, and coconut milk when I was designing this recipe. This homemade "Graham Cracker Crust" is a must try and a way for you to control the ingredients instead of purchasing a store bought crust or packaged graham crackers. This soft dough comes together easily and quickly - you will simply press it into a 9-inch pie plate with your hands. I use a piece of parchment paper between my hands and the crust to make it less sticky to work with. 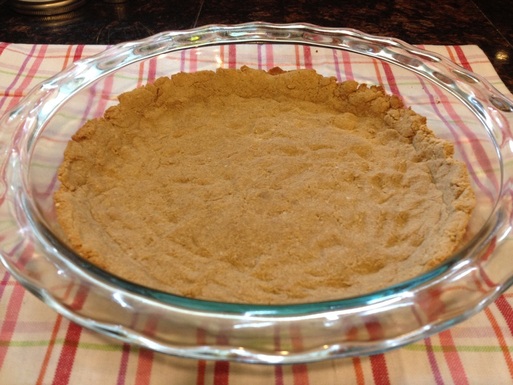 As your crust cooks and cools, you will make your filling ingredients - this is definitely a hands on type of recipe but I promise it is worth it. You will need to stand by the stove and whisk almost constantly as your filling mixture thickens and bubbles so that it doesn't burn. Then, you will place the filling in an ice bath for 8-10 minutes. It will start to thicken fairly quick into a pudding-like consistency, you will want to stir it occasionally as it cools. 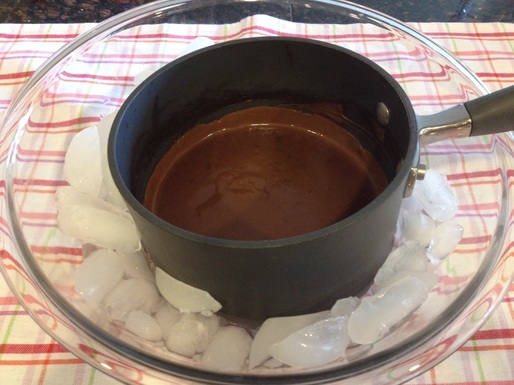 Then pour or spoon it into your cooled cooked pie crust and smooth out using a spatula. Cover and refrigerate for at least 3 hours before serving so that it has time to set. 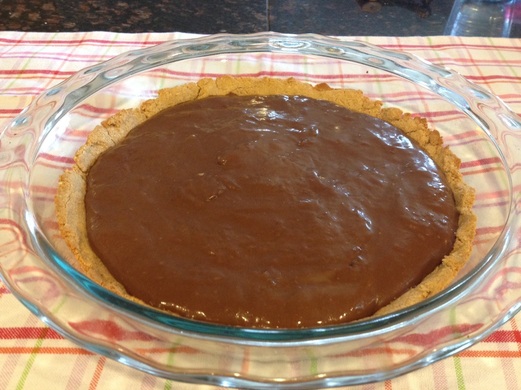 The final step is adding some Coconut Milk Whipped Cream to each piece of pie as you slice and serve it. Making your own healthy, dairy free whip cream is super easy. It takes less than 10 minutes and only requires two cans of coconut milk, a bit of honey, and an electric beater or stand mixer. We like to use this as a replacement for store-bought Ready Whip Topping as those types of products are filled with GMO's, hydrogenated vegetable oils and high fructose corn syrup. You can use this homemade whipped cream as a topping for pies or other sweets or I LOVE to eat it by itself with some fresh berries for a light, low-sugar dessert.
Whether you enjoy this pie following your Cinco de Mayo dinner celebration, with a cup of coffee the next day or ANY DAY for that matter, I promise you will love it! Here is the recipe...enjoy.... Mexican Chocolate Cream Pie (PRINT RECIPE) Ingredients: ½ cup coconut sugar 2 tablespoons arrowroot powder 1 tablespoon unsweetened cocoa powder ½ teaspoon instant espresso powder 1/8 teaspoon salt 1/8 teaspoon ground red pepper 1 large egg 1 large egg yolk 1 ¾ cup unsweetened coconut milk 2 ounces 65% of higher dark chocolate, chopped Homemade “Graham Cracker” Crust:* ¼ cup blanched almond flour ½ cup, plus 2 tablespoons coconut flour ¼ teaspoon salt ¼ teaspoon baking soda 1 teaspoon cinnamon ¼ cup coconut oil, melted 2 tablespoons honey 1 egg 1 teaspoon vanilla Directions:
Coconut Milk Whipped Cream (PRINT RECIPE - VEGAN) Happy Eating! ~Billie **Check out our blog, "Why Use Coconut Sugar?" to learn more about this lower-glycemic sweetener. Grain Free & Vegan 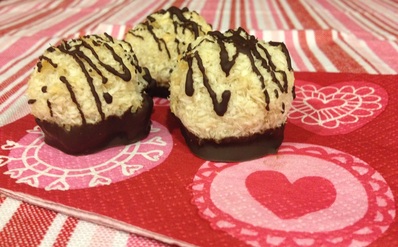 Two of my favorite things - coconut & dark chocolate - come together in these delicious little bites. And I think they make a perfect edible treat for those special loved ones in your life on Valentines Day!
They might look fancy, but making macaroons is easier than you think. Most traditional macaroon recipes use canned sweetened condensed milk and I'm just not a big fan since I can't control the ingredients used. So we made a homemade version by cooking down full-fat coconut milk with some honey or agave. While it does take up to 45 minutes to make, it is SUPER SIMPLE! Just pour your coconut milk into a small saucepan and bring it to a boil, then reduce to a simmer and add the honey or agave. You will continue to simmer for 30-45 minutes or until it is reduced by half. Let the milk cool completely before using it in the macaroon recipe. You can also store the sweetened condensed milk in an airtight container in the refrigerator for up to 3 days. Coconut Macaroons with Dark Chocolate Drizzle Happy Valentines Day! Enjoy! ~Billie Grain Free. Low Carb. Vegan Version. Amazing. 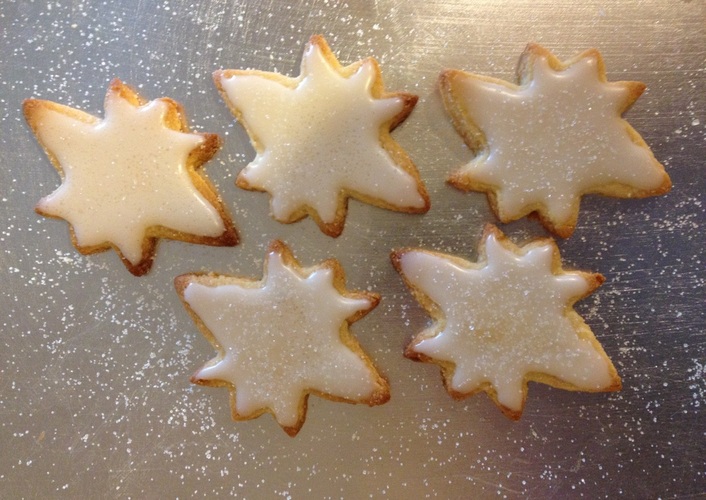 I'm not usually one to 'toot my own horn' but I must tell you that I make a darn good frosted sugar cookie every holiday season! For several years, they were so popular with friends and family that I made them in huge batches and shipped them all over the country to our loved ones! Three years ago, I went gluten free and because it was still a bit new to me, I just skipped the annual sugar cookie making routine. Trying to convert the recipe to gluten free sounded really overwhelming at the time as I was still new to gluten free baking!
Last year though, much to the happiness of our friends and family, I successfully converted my original recipe to a gluten free varietal - in fact it is actually grain-free and only uses blanched almond flour! The secret to this recipe is browning the butter, which lends a rich taste to these thin, melt in your mouth sugar cookies! These taste just like the traditional version you are used to...SERIOUSLY! Frosted Browned Butter Sugar Cookies (PRINT RECIPE) Ingredients: For the cookies: 2 cups blanched almond flour (not almond meal) 5 tablespoons organic, unsalted butter or organic ghee* ¼ cup honey or agave ½ teaspoon vanilla extract ¼ teaspoon sea salt For the frosting: ¾ cup powdered sugar ¼ teaspoon vanilla extract 1-2 tablespoons organic half and half or creamer or non-dairy creamer Evaporated cane juice sugar or coconut sugar for sprinkling (optional) Directions:
*You can substitute coconut or palm fruit oil here instead, start with 4 tablespoons and if it needs more moisture, add another tablespoon. You will also skip step #2 and just melt the oil in the microwave. **This dough will not be quite the same as your traditional sugar cookie dough; it is a bit more ‘delicate’ to work with. Once you have it rolled and your cutouts are made, I recommend transferring your cookies to the sheet using a flat, smooth spatula instead of your fingers to prevent your ‘fun shapes’ from ripping apart. Enjoy and Happy Holidays! ~Billie  This gravy will not disappoint - in fact when I served it at Thanksgiving the last few years and everyone was raving and asking for the recipe. I had two 'meat eaters' tell me it was the best gravy they had ever had! It really thew them for a loop when I told them it was a vegetarian gravy - they had no clue!!
Bottom line...you do not have to stand over the stove and frantically try to make gravy with your turkey drippings while the whole family waits to eat. And you certainly don't have to buy canned -huge yuck! You can make this gravy while your bird roasts or the stock and/or the gravy can be made up to 3 days in advance and stored in an airtight container in the fridge. It also freezes really well, so you can make a big batch for all your holiday meals at once. Just defrost in the fridge overnight (if needed) and reheat on the stove top over low heat when you are 20-30 minutes away from serving. This recipe also includes very simple conversion instructions to make it gluten free, dairy free, and vegan! It is also one of 24 delicious recipes included in our new, Anti-Inflammatory Diet Holiday eCookbook. This book is loaded with clean meals that your whole family love this holiday season - download your copy here today! ROASTED GARLIC VEGETARIAN GRAVY (PRINT RECIPE) Makes 4-5 cups gravy Ingredients: 1 large head garlic 2 tablespoons grapeseed oil plus additional for drizzling 1 leek, quartered and washed 1 onion, left unpeeled, quartered 2 carrots, quartered 2 celery ribs, quartered 1 bay leaf 1/2 teaspoon black peppercorns 1 1/2 cups dry white wine (sub more broth if you are sensitive to alcohol) 1/3 cup soy sauce 6 cups cold water 5 tablespoons organic unsalted butter, organic ghee, or vegan butter 1/3 cup all purpose flour, brown rice flour, or quinoa flour ½ teaspoon salt ½ teaspoon pepper Directions:
Happy Holidays! ~Billie Grain Free. Paleo. Vegan. Low Carb. My Favorite Cookie - Seriously. 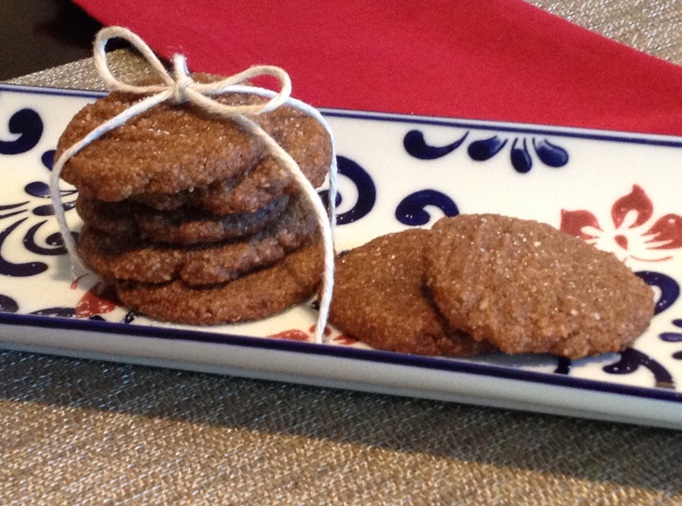 These cookies are grain free, vegan, and refined sugar free - but you would never know that because they are packed full of AMAZING FLAVOR and CHEWY DELICIOUSNESS! Each bite melts in your mouth.
And the best news is that if you are like me and need to carefully watch your sugar intake, these are the perfect holiday cookie to satisfy your sweet craving without 'breaking the sugar bank'. With only 6.5 grams of carbohydrates and 3.8 grams of sugar total, it's pretty easy to justify eating two of them:) I love my ginger cookies soft and chewy, but if you prefer more of a ginger snap version, just cook them an additional 2-3 minutes. Ginger Cookies (PRINT RECIPE) Ingredients: 1 1/2 cups blanched almond flour or almond meal* 2 tablespoons coconut oil, melted 1/4 cup 100% pure maple syrup 1 tablespoon blackstrap molasses 2 teaspoons ground ginger 1/8 teaspoon fine sea salt 1/4 teaspoon baking soda 1 tablespoon organic cane juice sugar or coconut palm sugar for sprinkling (optional) Directions:
*Either works fine here. Or you can even mix almond meal and almond flour together, which is what I often do depending on what I have on hand. Hope this recipe helps bring in the scents, flavors, and tastes of the holiday season into your home! Enjoy! ~Billie  There are two secrets to roasting the most amazing turkey that will have your friends and family begging you for the recipe and asking to you host again next year! Before I share those with you, I'd like to thank my step-mom, Debra Keuper, for sharing these with me - for more years than I can remember, she hosted Thanksgiving for 20-40 people and every year the turkey was perfectly amazing! Actually, everything was amazing and no one else in the family wanted to take over hosting Thanksgiving because she left such big shoes to fill....
SECRET #1 - BRINE YOUR BIRD! If you have never done this, this is the easiest and most important step to a perfectly juicy turkey. Brining is similar to marinating, you let the turkey soak in saltwater for 24 hours prior to cooking it. It increases the moisture holding capacity of the meat and results in a juicier product when cooked. Here is my brine recipe: Ingredients: 10 cups water 3 cups coarse salt 3 cups sugar 2 medium onions, coarsely chopped 2 medium leeks, white and pale-green parts only, rinsed and coarsely chopped 2 carrots, peeled and coarsely chopped 2 stalks celery, coarsely chopped 2 dried bay leaves 2 teaspoons whole black peppercorns (Optional - add 6 sprigs of your favorite fresh herbs - thyme, parsley, and rosemary are my favorite) **This is for a 15-20 lb turkey, if you have a larger bird, increase the sugar and salt by one cup each and add 2 more cups water. Directions: 1. Put all ingredients in a large stockpot and bring to a boil, stirring until salt and sugar dissolve. 2. Remove from heat and let brine cool completely. 3. If your stockpot is big enough, you can place your turkey directly into the pot of brine (BREAST FIRST), cover, and refrigerate for 24 hours. 4. Remove turkey from brine; pat dry with towels and let stand at room temperate for 30 minutes to 1 hour before roasting. NOTES: If your turkey is too big (most are) then you can use a BRINING BAG - sold in most kitchen stores (Bed Bath Beyond, Sur La Tab, Crate and Barrel, etc) and some grocery stores. If cannot find a bag or your turkey is too big for the bag, then you can do what I did last year and use a cooler. Yes, a camping cooler! If you live in a cool climate, you only need bit of ice to keep this bird cool enough, if you live in a warmer climate, then add more ice and store in a cooler place. SECRET #2 - USE A CHEESECLOTH DURING ROASTING! You can buy cheesecloths at most grocery stores. There are two ways to do this - one using no dairy or oils and only using broth and one slightly more indulgent version using butter and wine. The preference is yours. Either way, this comes out great. Here are the ingredients and steps to take: Ingredients: 5 cloves garlic. minced 2 teaspoons salt, divided 2 teaspoons pepper, divided 1 quart organic chicken broth Optional - 2 cups dry white wine plus 1-2 sticks organic, grass-fed unsalted butter (use this combination instead of broth) Directions: 1. Preheat your oven to 325. (You can look up the recommended cooking time based on the size of your bird here.) 2. Fold your cheesecloth into 4 quarters so that it is large enough to cover the breast. 3. Heat broth (or butter-wine mixture) in a small pot over medium heat. When hot and melted, add folded cheesecloth and immerse to soak completely. 4. Place the turkey, breast side up, in the roasting pan, fold wing tips under, sprinkle 1 teaspoon salt and pepper in the cavity and then loosely fill with stuffing (if using). Tie legs together with kitchen twine and fold the neck flap under; secure with toothpicks. Rub your turkey all over with minced garlic, salt, and pepper. 5. Remove cheesecloth from broth or butter-wine mixture and squeeze ever so gently. Lay dripping cheesecloth over turkey breasts and place turkey, legs first, into the oven. 6. Reserve broth or butter-wine mixture on stovetop and baste (or brush) onto turkey (soaking cheesecloth) every 30 minutes for the first 2 1/2 to 3 1/2 hours of roasting. Remove cheesecloth for the last hour to hour and half of cooking time. Once turkey juices start collecting in the bottom of the roasting pan, you can use those to re-baste and soak the cheesecloth and the turkey. Cover the turkey with tin foil if outside is browning too quickly. 7. Remove the turkey from the oven and let stand for 30 minutes before carving it. NOTES: I also rotate the roasting pan once during the middle of the cooking time. You want to cook the turkey until a meat thermometer inserted into the thickest part of the thigh registers 180 degrees (this is the U.S. Department of Agriculture's recommendation) and stuffing reaches 165 degrees. For an even moister turkey, I cook it until it reaches 170 as it will continue to cook a bit when you remove it from the oven and let it stand before carving. Jennifer and I both would like to wish each of you a Healthy and Happy Thanksgiving Celebration with your friends and family! Enjoy... ~Billie |

Billie Shellist, FDN-P
I practice functional nutrition, an approach that allows me to look at your entire health history and help you find the "root causes" of your chronic health complaints. This cuts out the trial and error process and helps you get real symptom relief and resolution! Food is medicine and knowledge is power -I hope you enjoy my anti-inflammatory recipes which are gluten, dairy, and soy free as well as very low grain and sugar. If you'd like to heal from the root cause(s) of your chronic symptoms, try starting with a complimentary 15-minute consultation. Click here to request your free session. |


|
Copyright 2024 Functional Diagnostic Healing. All rights reserved. Professional photography by Priscilla Durkin- www.priscilladurkin.com Privacy Policy - Legal Notice |