|
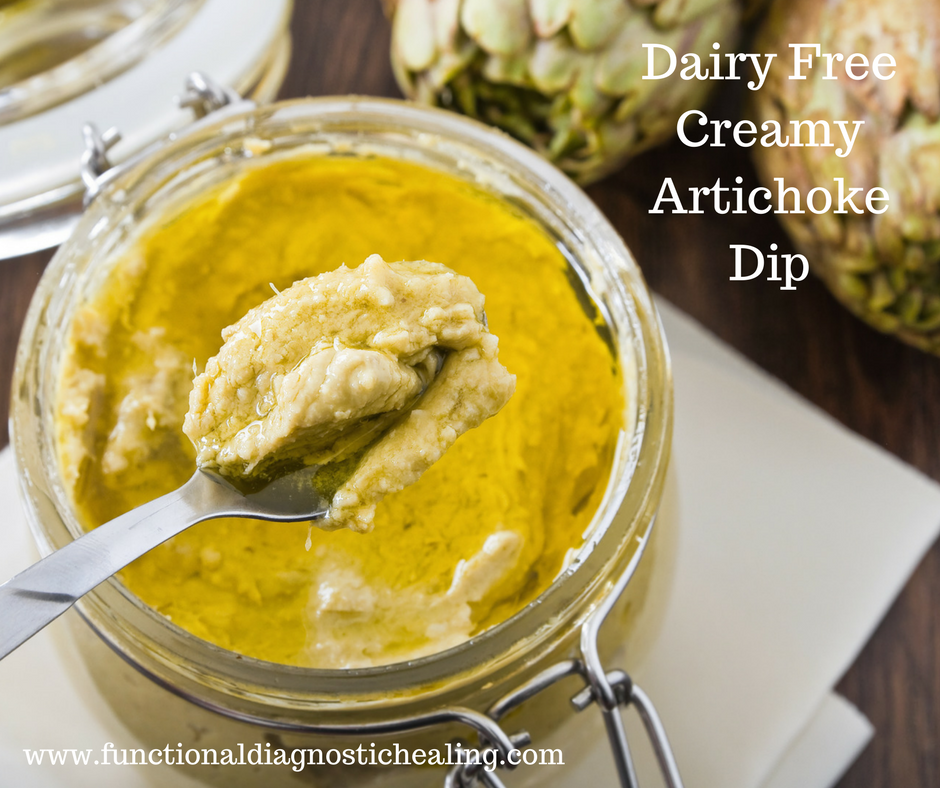
Artichoke dip is one of the most well loved appetizers out there but is often off limits for those of us who eat a dairy free diet. Well, not any longer my friends...
This delicious dip will blow your mind with its rich, creamy texture and flavor that comes from a combination of white beans and organic mayonnaise made from cage free eggs. It's the perfect addition to your upcoming Easter or Mother's Day brunch celebrations or makes an excellent snack to have on hand for some quick protein and fiber! Plus it comes together in less than 15 minutes. Sometimes for variety, I'll stir in 1 tablespoon homemade pesto as well. Dairy Free Creamy Artichoke Dip: (PRINT RECIPE) Ingredients: 2 cloves garlic, peeled 1 shallot, diced 2 tablespoons lemon juice ½ cup mayonnaise made from cage free eggs and olive oil 1 tablespoon extra virgin olive oil 1 tablespoon apple cider vinegar 1 (15-ounce) can great northern beans/cannellini beans, drained ½ teaspoon salt ½ teaspoon mustard powder ¼ teaspoon pepper 1 (4-ounce) can chopped green chilis, undrained 2 ½ cups canned artichoke hearts, drained (About 1 ½ cans) Serve with your choice of: Raw veggies Gluten free seed crackers Directions:
You can find this recipe and others like it in my Anti-Inflammatory Diet Spring eBook. YUM, YUM, and YUM!! Enjoy! Billie
0 Comments
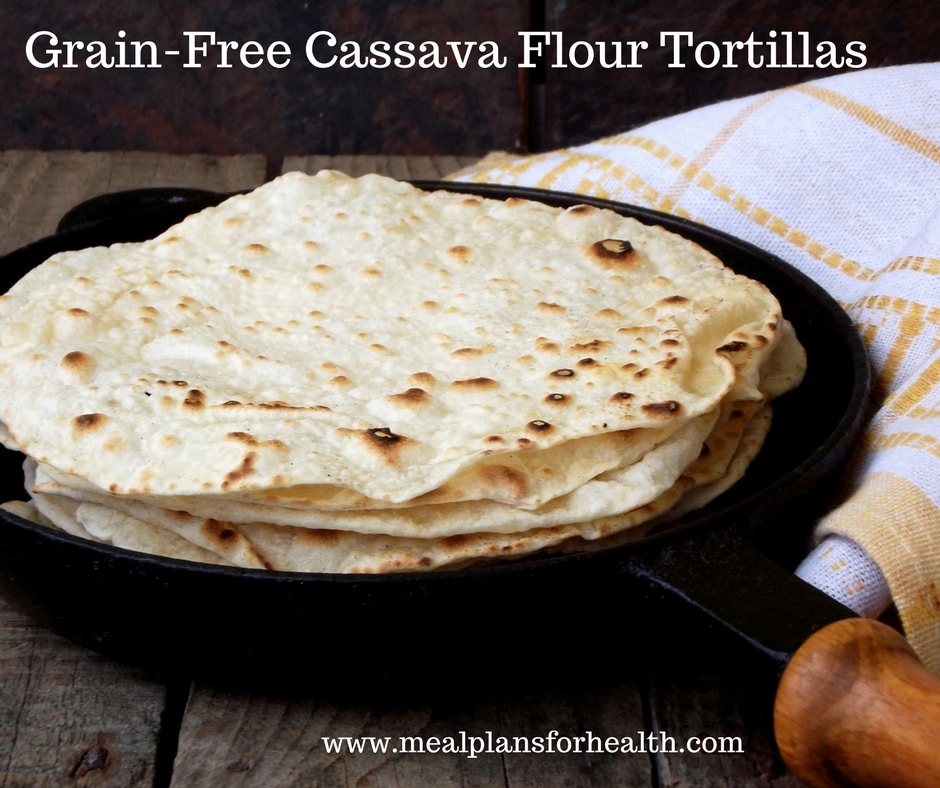
Gluten free. Grain Free. Dairy Free. Egg Free. Soy Free. AIP. Paleo. These tortillas really have a nice flavor and texture and are fairly easy to master. You can use them in tacos, wraps, or cut into wedges and make pita chips. The secret is to keep your ghee (or grass-fed butter cold).
Try these with our Fish Tacos with Mango Salsa or our Crockpot Brisket Tacos or even our Chicken & Walnut Wraps. These are super versatile and you will be surprised just how much these satisfy a craving for regular tortillas. These are AIP and paleo approved but most of all family approved from my kitchen to yours! Grain-Free Cassava Flour Tortillas: (PRINT RECIPE) Serves 4 (Makes 8 smaller taco size tortillas or 4 larger ones) Ingredients: ¾ cup cassava flour ¼ cup arrowroot flour/powder ¼ teaspoon salt ¼ teaspoon baking soda 3 heaping tablespoons ghee, cold + 2 tablespoons (alternatively you could use grass-fed butter) ¼ - ½ cup slightly warm filtered water Directions:
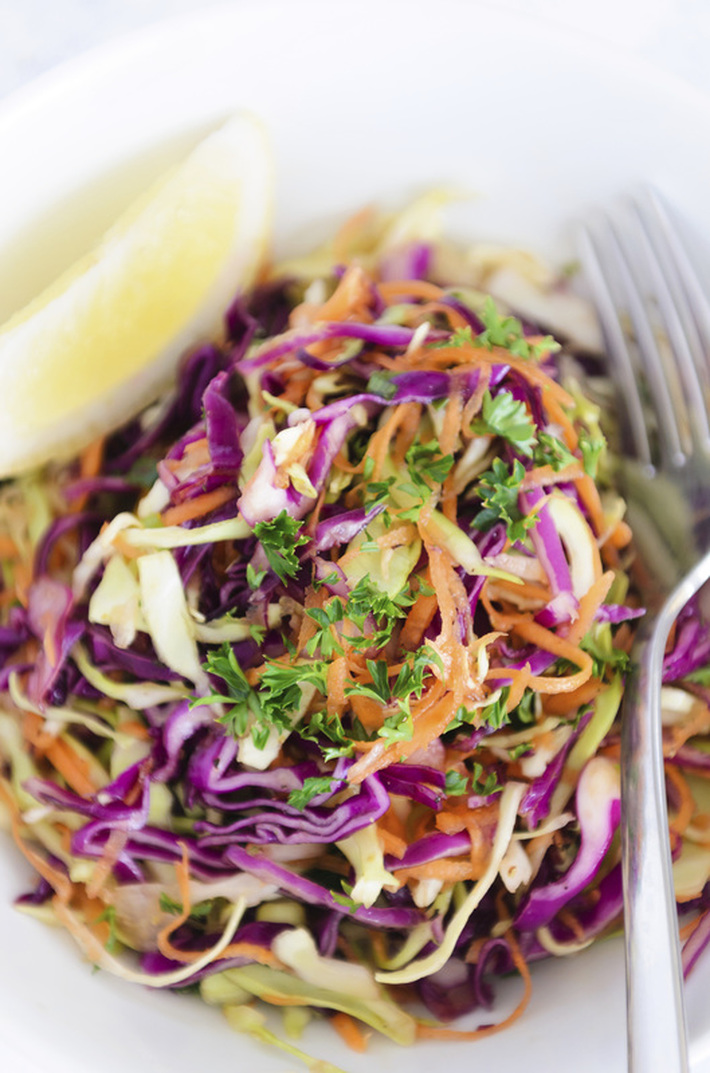
I hope you enjoy these as much as we do! Happy Cooking! ~Billie Gluten free. Dairy free. Soy free. Low carb. Coleslaw is such a versatile side dish - it goes well with tacos and other Hispanic and Asian inspired dishes and works well with BBQ'ed or braised meats and even seafood.
We like to keep our coleslaw simple and clean and this recipe is a perfect balance of crunchy, creamy, and zesty. We are giving you three versions here to work with as well to please your palette and compliment a variety of meals. Simple Coleslaw: (PRINT RECIPE) Serves 4 Ingredients: Base 4-6 cups shredded coleslaw mix or 1/2 small cabbage shredded and 2 carrots, shredded ¼ cup organic mayo made from cage free eggs and olive oil or avocado oil*** 2 tablespoons non-dairy milk of choice Original Slaw: 2 tablespoons fresh lemon juice 1/4 teaspoon mustard powder 2-4 tablespoons chopped parsley Cumin-Lime Slaw: 2-3 tablespoons lime juice 1 teaspoon ground cumin 4 tablespoons chopped cilantro Asian-Sesame Slaw: Use 3 tablespoons extra virgin olive or avocado oil INSTEAD of mayo and milk 2 tablespoons sesame oil 2 tablespoons lime juice 2 tablespoons sesame seeds 2 tablespoons coconut aminos or gluten free soy sauce 4 tablespoons chopped cilantro 1/2 a small red bell pepper, sliced ***If you are sensitive to eggs, drop the mayo and use 1/4 cup olive oil or avocado oil instead.*** Directions:
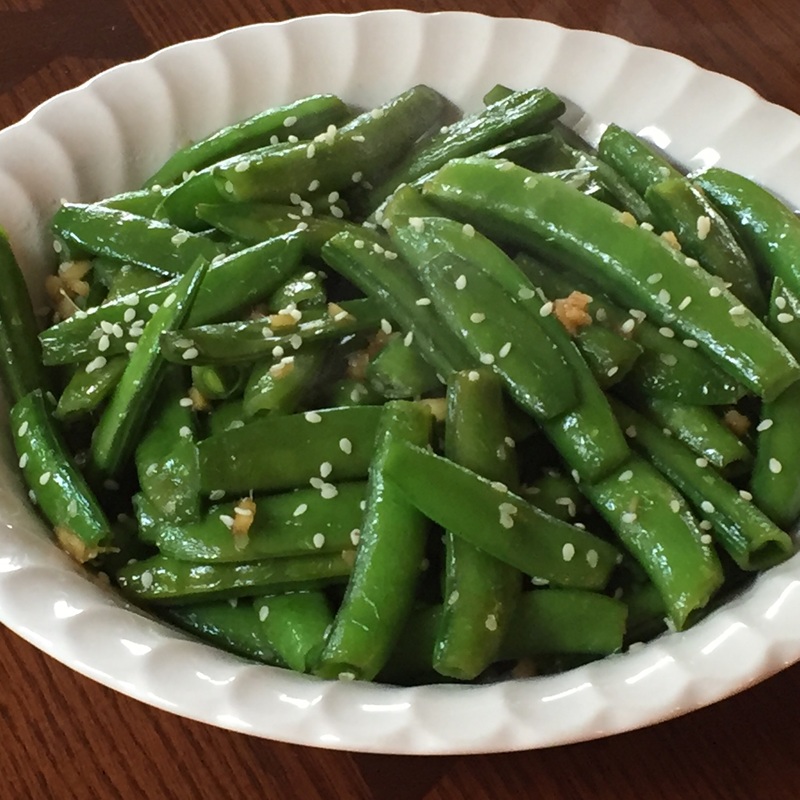
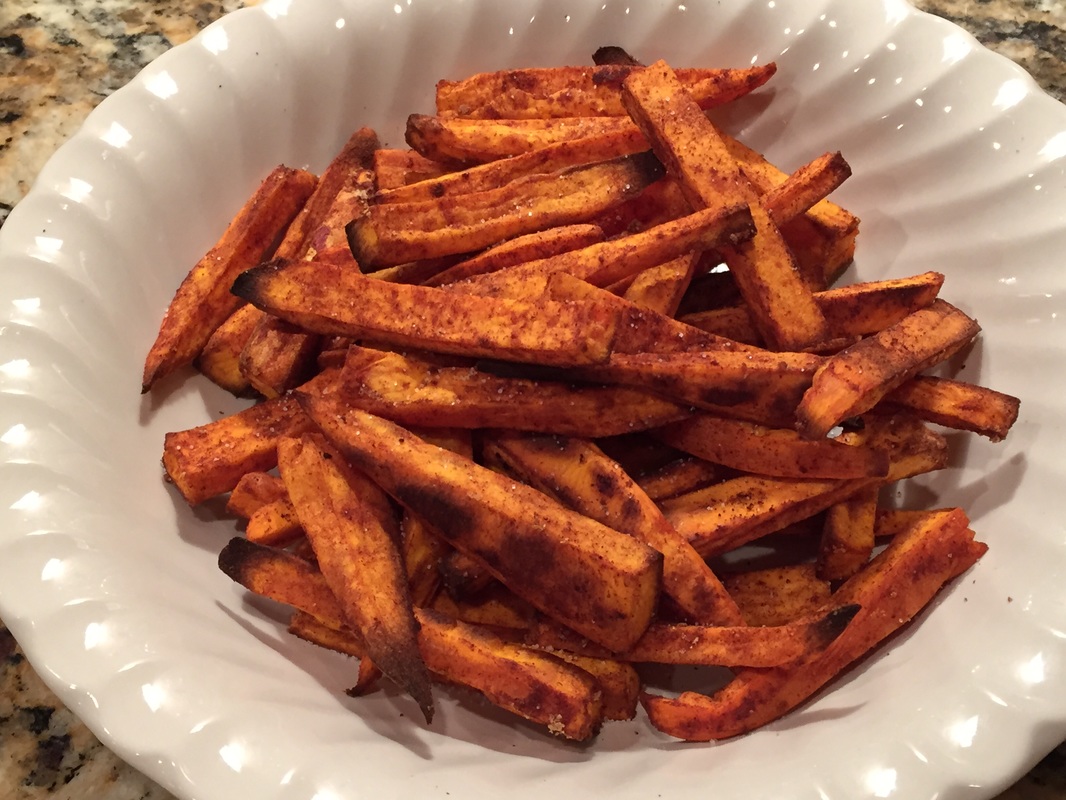
Let us know what you think and share any other versions you come up with! ~Billie & Jen Gluten, Dairy, & Soy Free These snap peas are a lovely Spring and Summer side dish to round out your meal. They are super simple, but loaded with flavor and healing foods like ginger which is very helpful for digestion and reducing gut inflammation. Try this dish paired with my Crockpot Roasted Turmeric Chicken and Salty, Cinnamon Sweet Potato Fries for a perfectly balanced anti-inflammatory meal! You can use sugar snap peas, snow peas or even green beans in this recipe - which ever you prefer:)
Ginger Sugar Snap Peas: (PRINT RECIPE) Serves 4 Ingredients: 1 teaspoon coconut oil, melted 1 teaspoon sesame oil 4 cups snow peas or sugar snap peas, trimmed (or even green beans) 1-3 teaspoons fresh ginger, minced (depending on how "gingery" you like it) 1 tablespoon coconut aminos (a gluten & soy free soy sauce substitute) Salt and pepper to taste Directions:
Yum, yum, yum!! Enjoy.... ~Billie Gluten, Dairy, & Soy Free Sweet potatoes are a great source of antioxidants, beta-carotene, and Vitamins A & C to support a healthy immune system. Because they are more fibrous than white potatoes, they have a lower glycemic response and fall into the “good carb” category! Cinnamon can also help to reduce sweet cravings –an awesome bonus! Plus these sort of taste like you are having a dessert:) This is just one of over 30, clean food dishes in our 10 Day Sugar Detox eBook, a 10 day clean eating guide to help you ditch processed foods, beat cravings, and boost your nutrition!
Salty, Cinnamon Sweet Potato Fries: (PRINT RECIPE) Serves 4 Ingredients: 2 medium sweet potatoes, sliced into fries* 1 ½ tablespoons coconut oil, melted 1 teaspoon ground cinnamon 1 teaspoon sea salt Directions:
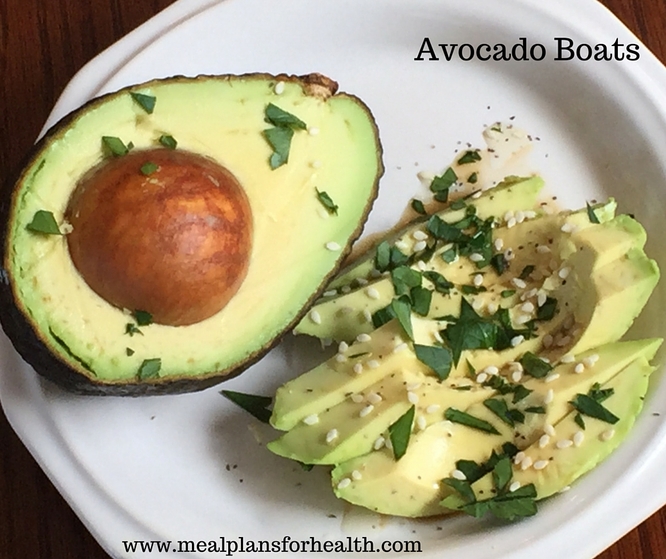
*You can peel your potatoes, but we leave the peel on for the extra vitamins. You can also chop these into small cubes if you prefer instead of fries- either way they are delicious! Enjoy friends! ~Billie Anti-Inflammatory. Heart Healthy. Gluten, Dairy, & Soy Free. Low Carb I eat one of these avocado boats everyday, sometimes two of them a day:) Avocados are an amazing medicinal fruit loaded with heart healthy, monounsaturated fats and fiber. In fact this fruit has 7 grams of fiber per serving which is about 25% of your recommended daily intake. Fiber helps steady blood sugar, decrease cravings for carbs and sugar, and improve digestive function.
This is a great snack all by itself or a perfect side dish to round out a meal, especially when you load it with additional anti-inflammatory oils, seeds, and herbs. Scroll down to see suggestions on how to incorporate these beautiful boats into your eating plan... Avocado Boats (PRINT RECIPE): Serves 2 (1/2 an avocado = 1 "avocado boat") Ingredients: 2 ripe avocados 1 tablespoon sesame oil or olive oil 1 tablespoon coconut aminos, gluten free soy sauce, or tamari (optional) 1 tablespoon of sesame seeds or hemp seeds Dash of salt, pepper, and/or garlic granules 2 tablespoons minced cilantro, basil, or parsley Directions:
"Dress up" your avocado boat with the toppings of your choice, here are some of my favorite anti-inflammatory meal combinations and ways to use these delicious boats: Breakfast: 1 slice Sausage & Sage Quiche with Sweet Potato Crust 1 avocado boat with olive oil, garlic granules, salt, & parsley 1 cup sauteed greens (kale, spinach, chard, dandelion) Lunch: 1 serving Crockpot Turmeric Chicken Stew 1 avocado boat with sesame oil, sesame seeds, & cilantro 2 cups mixed greens salad Dinner: 1 serving Sesame-Ginger Salmon 1/2 cup black rice 1 avocado boat with sesame oil, sesame seeds & basil 1-2 cups steamed vegetables like broccoli, green beans, or asparagus Let me know what your favorite combinations are. Enjoy friends! ~Billie p.s. - If you like meals like these, check out our Anti-Inflammatory Meal Plans It's fall, and while I have to admit that I'm mourning the end of sundress season, I'm very much looking forward to some cooler weather and the ability to live in yoga pants for the next six months or so.
My neighbor has been my best friend since the sixth grade, and when she moved in two years ago we took down the fence between our back yards so that we essentially have one HUGE yard, and at the beginning of the summer we planted a pumpkin patch that is now filled with pie pumpkins. We did this for one reason only: the pumpkin creations that come from real, fresh pumpkins are AMAZING. My neighbor was never a fan of pumpkin pie, but last fall when we made one from the pumpkin her son had been lovingly watering all summer long she was hooked. She said it was the best pie she had ever eaten, and I have to agree that the flavor and texture was a thousand percent better than any pie made from canned pumpkin. It's SUPER easy to make your own pumpkin puree and use it an anything from Pumpkin Spice Lattes, to pie, breads, muffins, or cookies --just use the same amount of the fresh that is listed in the recipe and you're good to go. And the puree from one pumpkin will last you for most of the season if you're not too gung-ho. How to Make Your Own Pumpkin Puree: Ingredients: 1 Pie Pumpkin (or more--go nuts here if you want!) Directions:
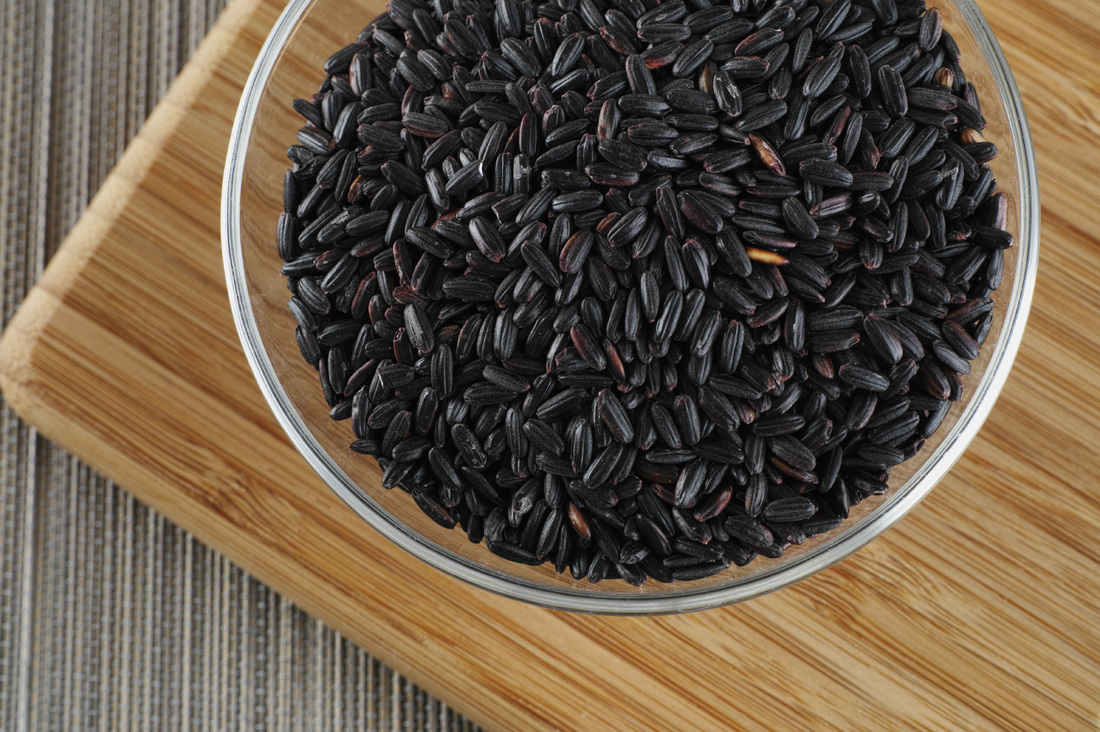
Enjoy! ~Jen Why not introduce a new super food to your table this week?! Black rice is a naturally gluten free, heirloom plant grown mostly in Asia. It is soft in texture and has a mild, nutty flavor. It used to be called "forbidden rice" because for quite some time, it was reserved for only royalty and was said to bring them "a long life of good health".
In Chinese medicine, black rice is praised for its health benefits for the stomach, liver, and kidneys and in this week's What's That?! Wednesday post, we discuss several of these health benefits as well as how to cook it and where to find it so you can reap those benefits! Health Benefits of Black Rice:
(PRINT RECIPE)
Black rice is a great substitute for most things you would use brown rice for- try pairing it with a stir fry or other Asian inspired dish. I also love to add a small serving to my salads for lunch-time for a little "good carbs" to stabilize the blood sugar and keep my energy up through the day. You can also cook it longer and with more liquid to make it into a "pudding" or porridge of sorts -add your favorite spices like cinnamon and ginger and some chopped walnuts and you have an easy fiber-based treat. While black rice can be difficult to find in a regular supermarket, you can find it in most health food stores as well as several online retailers. Happy Cooking & Eating! ~Billie & Jen *Resources: http://www.ncbi.nlm.nih.gov/pubmed/9989685 http://www.ncbi.nlm.nih.gov/pubmed/11340093 http://www.ncbi.nlm.nih.gov/pubmed/23930929 http://www.ncbi.nlm.nih.gov/pubmed/11340093 Vegan. Gluten Free. Grain Free. Soy Free. Low Sugar. I think salad dressing is one of the big pitfalls of many diets. Many folks think that if they are eating a salad, they have a made a healthy choice. But what ingredients are lurking in most salad dressings? Bottled and restaurant dressings are often filled with GMO ingredients, extra sugars or fake sugars that increase cravings and signal your body to store fat instead of burn it, and tons of extra calories. Not a great combination when you are trying to lose weight or maintain a healthy weight.
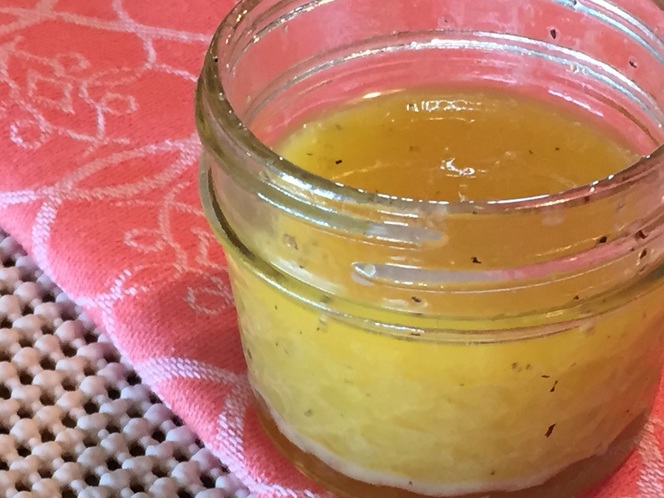
For this reason we suggest making your own salad dressings and the good news is that it's easy to do. Head on over to our blog, Fast & Healthy Homemade Salad Dressings, to learn more about the basics of making your own dressings, plus get 3 easy go to recipes. We are excited to share this apple cider vinaigrette recipe-it is one that I make every week because it's very versatile and goes well with many types of salad ingredients. I make a double batch at the beginning of the week and use it on my lunch and dinner salad greens most days. Raw apple cider vinegar has many health benefits and tons of uses outside consumption. Click here to learn our favorite 5 Ways to Use Apple Cider Vinegar. Apple Cider Vinaigrette (PRINT RECIPE) Makes about 4 servings Ingredients: 4 tablespoons olive oil or flax seed oil 2 tablespoons raw apple cider vinegar (I like Bragg's brand) 1/2 tablespoon Dijon mustard 1/2 tablespoon pure maple syrup/honey/agave ½ teaspoon sea salt 1/4 to 1/2 teaspoon ground pepper (optional) Directions:
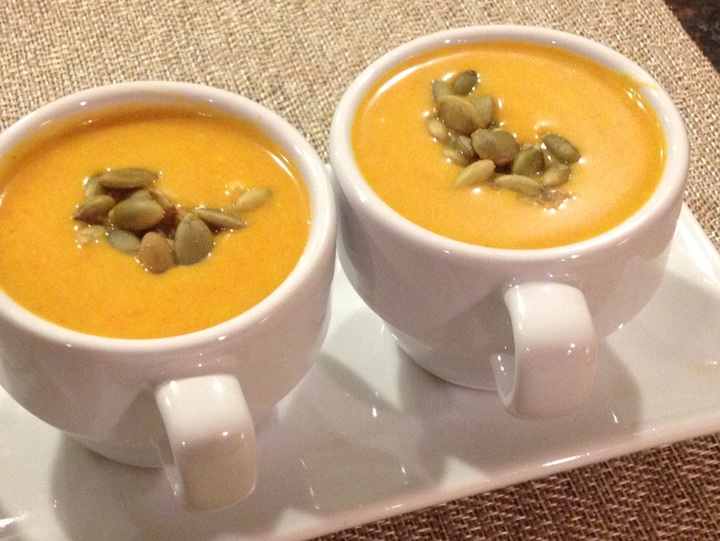
Enjoy! ~Billie & Jen Another blog you might like... Grain Free. Gluten Free. Anti-Inflammatory. Low Carb. Vegan. Amazing. This soup is my new fall food addiction!! Seriously...I'm not kidding, I've made it three times in four weeks if that tells you anything:) With ingredients like ginger, garlic, curry, and carrots this soup boasts some highly anti-inflammatory properites and super soothing and calming to the tummy. Not to mention it really warms you up on a cold fall or winter day. I highly recommend adding some raw or roasted peptias on top for some extra protein, healthy fats, and energy boosting properties to keep you feeling fuller longer.
You can pair this soup with a nice raw salad for lunch or try it with our Kale with Caramelized Shallots for dinner. This would also make an awesome appetizer or starter course for your upcoming holiday meal or dinner party. I like to serve soups like this in small tea or espresso cups when I'm having a fun, festive dinner party. Whether you consume this soup straight out of the pot or from a cute espresso cup, I know you will love it! Curried Sweet Potato & Carrot Soup (PRINT RECIPE) Serves 4 Ingredients: 1 tablespoon coconut oil 1 onion, peeled and roughly chopped 1 clove garlic, minced 4 large carrots, unpeeled, roughly chopped (about ½ inch pieces) 1 small-medium sweet potato, peeled and roughly chopped (about ½ inch cubes) 3 cups vegetable broth 1 (15-ounce) can full-fat coconut milk 1 tablespoon freshly chopped ginger root 2 teaspoons mild curry powder (optional) (Substitute ground turmeric for an anti-inflammatory boost) ½ teaspoon salt ½ teaspoon pepper Garnish: Fresh herbs, pepitas, sunflower seeds, and/or chili flakes Directions:
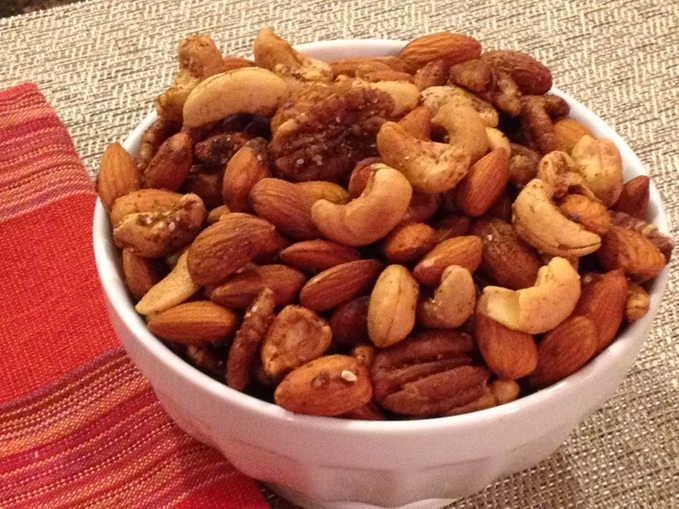
Enjoy Friends! ~Billie Grain Free. Paleo. Vegan. Perfect Holiday Snack. Let's be honest, the holiday season can fill you with lots of empty calories really quickly. Everywhere you turn someone is offering you baked goods, candy, decadent snacks, and more. That's why we wanted to give you a nutrient dense, protein packed holiday snack that you can carry with you or serve at your next holiday gathering. This snack will fill you up and keep you satisfied so you are less temped to munch, munch, munch away at other holiday snacks and treats.
Save your calories for the main meal and try this is a super simple recipe that takes no time at all. Use your favorite combination of nuts and alter the spices to suit your tastes. You can keep these in an airtight container or baggie in your purse or bag for a great on-the-go snack. Store nuts in an airtight container for up to 2 weeks on the counter top. Looking for more clean, delicious holiday recipe ideas? Check out our Holiday Anti-Inflammatory Diet Cookbook, over 24 amazing holiday recipes plus a "Holiday Meal Game Plan". Holiday Spiced Slow Roasted Nuts (PRINT RECIPE) Makes 3 cups/12 servings Ingredients: 1 large egg white, whisked until foamy* 2 tablespoons coconut palm sugar 1 teaspoon salt ½ teaspoon chili powder ¼ teaspoon all spice ½ teaspoon ground cumin 1/8 teaspoon cayenne 3 cups raw nuts of choice like: almonds, cashews, pecans, walnuts, or Brazil nuts Directions:
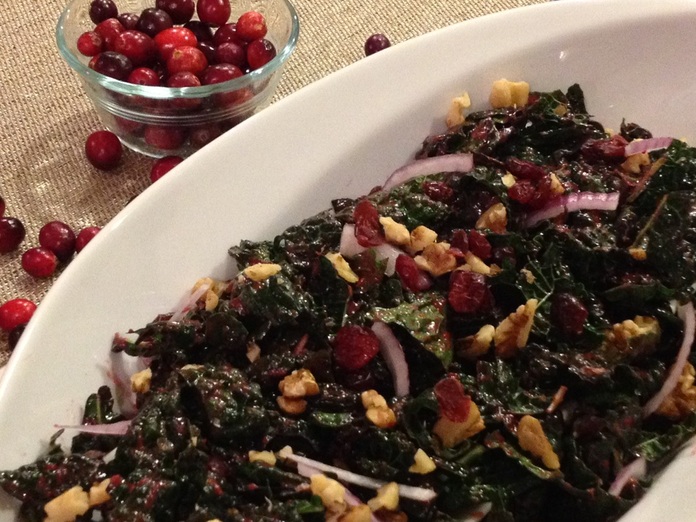
*You can substitute oil instead of egg white here if you are sensitive to eggs: red palm oil or coconut oil would both work well. GO NUTS!!! ~Billie & Jen Grain Free. Paleo. Vegan & Vegetarian Versions. Brighten up your holiday celebration with this beautiful, antioxidant packed side dish! Remember, color equals antioxidants and this salad is packed full of color, flavor, and nutritional goodness. A great recipe to infuse into your holiday spread, this salad is actually best made in advance because the longer you marinate the salad the better it tastes. We recommend an overnight marinating time for best results.
Need a great seasonal weeknight dinner? You can also make this into an entree salad by adding some Crispy Roasted Chickpeas (see recipe) or even some diced roasted sweet potatoes. Or for you meat eaters out there, a nice piece of broiled or roasted salmon or organic grilled chicken breast on top of this salad makes it into a very filling meal. Either way...you can't go wrong...check it out... Marinated Cranberry Kale Salad (PRINT RECIPE) Serves 4-6 Ingredients: 4 oz fresh cranberries 1/3 cup water 2 tablespoons maple syrup 2 tablespoons apple cider vinegar 1 teaspoon Dijon mustard 1/2 teaspoon lemon juice 1/2 teaspoon salt 1/8 teaspoon freshly ground black pepper 1/4-1/2 cup walnut oil or extra virgin olive oil 8 oz fresh kale (Tuscan/Lacinato works best in this recipe) 1/4 cup dried cranberries/craisins (leave out if following an anti-inflammatory or low sugar diet) 1 cup walnuts, coarsely chopped 1/4 cup thinly sliced red onion Soft goat cheese or feta crumbles (optional) Directions:
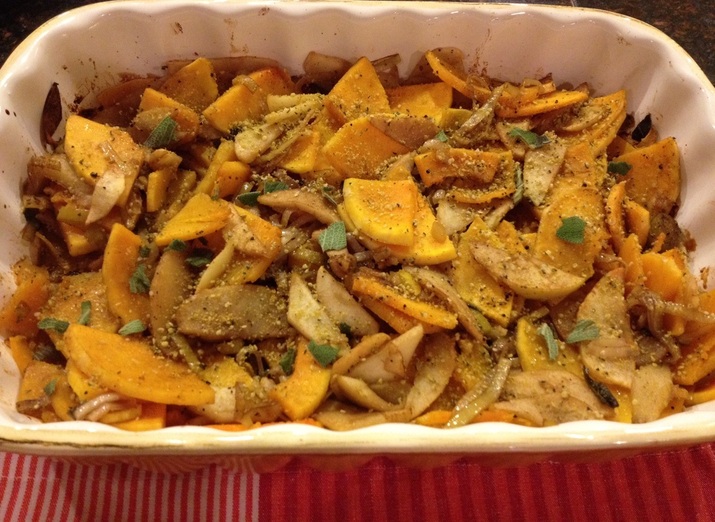
Happy Holidays! ~Billie & Jennifer Grain Free. Soy Free. Paleo. Vegetarian & Vegan Versions. With Thanksgiving just around the corner, we thought we'd give you some great holiday planning recipes and side dishes the whole family will love. This is a new recipe of ours that is full of both sweet and savory flavors. If your family typically does candied yams or a sweet potato souffle or casserole, this dish would run in the same category but uses organic apples to sweeten the dish instead of brown sugar, marshmallows, or other processed sugars that are usually a part of sweet potato casserole. I personally like to eat my sugar in the form of dessert and not a side dish, so this is a great dish to help me not overdo the sugar intake during dinner and save some room for dessert!
If you are dairy free, no worries, use our fabulous Hemp Parmesan (as pictured above) instead of regular Parmesan to add some healthy fats and clean protein. This is a flavor combo you will not want to miss! Apple, Squash, Leek Gratin (PRINT VEGETARIAN RECIPE) (PRINT VEGAN/PALEO RECIPE) Serves 6 Ingredients: 3 tablespoons grapeseed oil 2 leeks, white part only, thinly sliced crosswise, washed well and drained 2 tablespoons water ½ teaspoon coarse salt ¼ teaspoon freshly ground pepper ½ cup dry cooking sherry 1 tablespoon chopped fresh sage leaves, plus whole leaves for garnish 1 pound butternut squash, peeled, seeded, and cut into 1/8-inch-thick slices 1 pound organic apples, such as Gala or your favorite, cored and thinly sliced ½ cup grated Parmesan (2 ounces) OR 1/2 cup Dairy Free Hemp Parmesan (PRINT RECIPE) Directions:
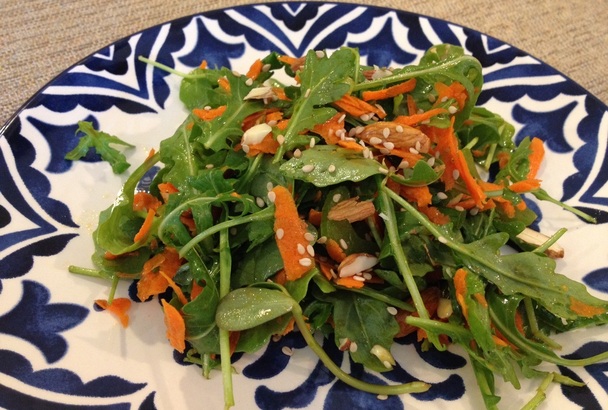
Happy November Friends! Enjoy! ~Billie & Jennifer Vegan. Grain Free. Anti-inflammatory. Super Detoxifying. This salad's ingredients make for a super detoxifying and cleansing side dish. We love to use raw arugula as the base for some our salads because its packed with many more nutrients than iceberg or even romaine, and it gives off a more distinct flavor profile than spinach.
Arugula is in season in early summer and in early fall and this week we've paired it with a fall flavors that are full of anti-inflammatory ingredients like carrots, sesame oil, ginger, and almonds. This dish is packed with vitamins A, C, and K and provides a rich source of calcium and healthy fats. The sweetness of the carrots balances the peppery-like flavors of arugula and then we've added some simple healthy fats to round out the taste and make this a super satisfying side dish. Arugula & Carrot Salad with Sesame-Ginger Dressing (PRINT RECIPE) Serves 4 Salad Ingredients: 4 packed cups baby arugula (4-6 ounces) 2 medium carrots, grated 1 rib celery, thinly sliced 1/3 cup almonds, slivered Dressing Ingredients: 2 1/2 tablespoons olive or flax oil 1/2 tablespoon sesame oil 2 tablespoons rice wine vinegar 1 tablespoon sesame seeds 1 teaspoon soy sauce, tamari, or coconut aminos (or gluten free soy sauce) 1 teaspoon honey or agave 1/2 teaspoon grated ginger Directions:
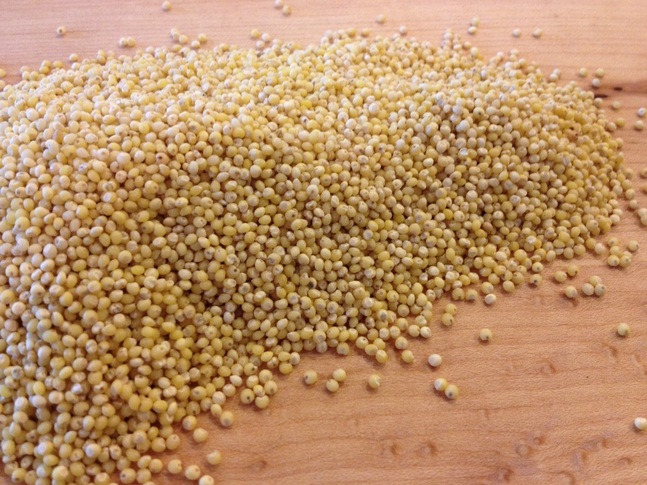
Happy Detoxifying! ~Jennifer & Billie If you've ever had a bird as a pet, you probably know what millet is. It has historically been used in bird seed mixes for many years, but this ancient grain isn't just for the birds! In fact it's one of the healthiest and most versatile grains out there and since we are all about food as medicine here at Meal Plans for Health, we've dedicated this week's What's That?! Wednesday post to millet, it's health benefits, and how to cook with it.
This soothing and savory grain originated in the dry climates of Africa, but is now grown worldwide and can be used just like rice for stir fries, pilafs, vegetarian patties or burgers, and other grain based dishes. Or you can cook it longer and with a little more liquid to make it into 'mashed potatoes' or a lovely breakfast porridge. Health Benefits of Millet:
How to Buy Millet: Store bought millet is usually hulled millet and resembles quinoa in size and texture. It kinda looks like a small version of couscous. You can buy it in the bulk section of all health food stores and many regular grocery stores are now starting to carry a packaged bag of it along side their other grains or in their gluten free section. How to Cook Millet:
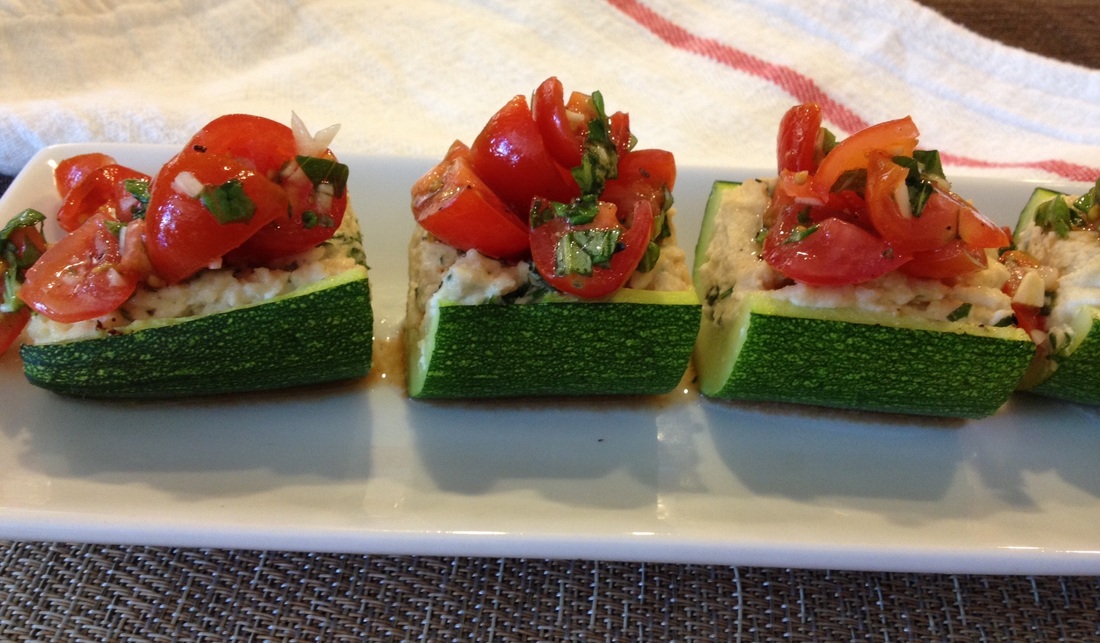
Check out our Balsamic Roasted Kabocha Squash & Kale with Pan Roasted Millet recipe. Have fun experimenting with this ancient grain and keep us posted with questions or comments. ~Jennifer & Billie Grain Free. Vegetarian & Vegan Versions. Low Carb. Super Good. This recipe was created out of desperation to use up all my garden zucchini and to take advantage of the amazing fresh tomatoes that are available right now. One of my favorite all time appetizers is fresh bruschetta and after going gluten free a few years ago, I would still make this favorite with gluten free bread to get my fix. But this year I've been eating a mostly grain free diet as I go through treatment for Lyme disease and am always looking for ways to eat my old favorites without the grains.
I love making my zucchinis into noodles as a substitute for pasta, so I thought, why not try zucchini as a substitute for bread?! I also added a touch of creaminess that helps the fresh flavors of the tomato, basil, and garlic topping really stand out. Check it out for yourself - you will not be disappointed! Creamy Zucchini Boat Bruschetta (PRINT RECIPE) Serves 4-8* Ingredients: 4 medium zucchini Cooking spray 3 large basil leaves, minced ¼ cup parsley, minced 1 cup fresh ricotta cheese (Substitute 1 cup Cashew Cheese for Vegan Version) ¼ teaspoon salt ¼ teaspoon pepper 1 tablespoon lemon juice Topping: 1 pint cherry tomatoes, diced 5 cloves garlic, minced 6 large basil leaves, minced Juice of ½ of a lemon 2 tablespoons olive oil Pinch of salt and pepper Directions:
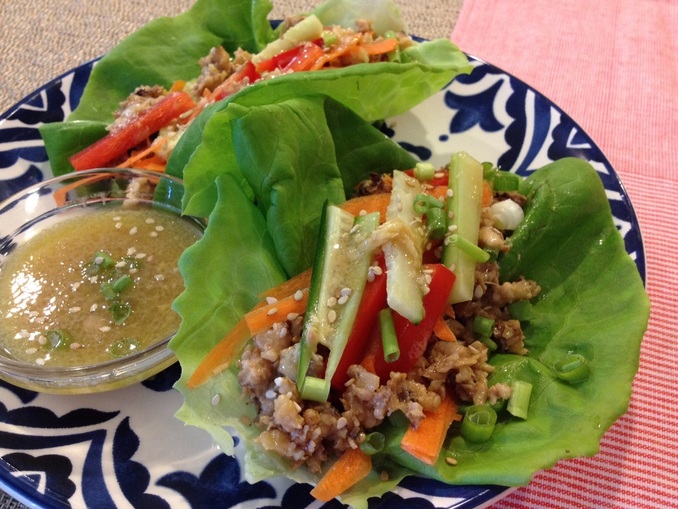
*Two zucchini boat halves make a great light meal paired with a side mixed green salad or one zucchini boat half per person makes for a nice appetizer. Happy Eating! ~Billie Raw. Vegan. Grain Free. Gluten Free. Soy Free Version. Incredible. To me these lettuce wraps are reminiscent of the infamous PF Chang's chicken lettuce wraps...seriously...they surprisingly carry most of the same delicious flavors and textures and really hit the spot! I had tried walnut-lentil tacos before and LOVED them, but I was skeptical about just using walnut meat alone...enter this delicious recipe introduced to me by my lovely business partner and co-author, Jennifer Brown. Another plus, they come together in under 30 minutes with no oven necessary and the leftovers taste great for a few days to follow.
I made this batch with carrots, bell peppers, and cucumbers as my veggies, but you could add or substitute celery, bean sprouts, zucchini, or avocado here just as easily. We've also added our Miso-Ginger Dressing that is a must have pairing to this satisfying dish. While this meal might look light, it is packed with nutrient dense foods rich in healthy fats that will keep you feeling fuller longer. You can learn all about the health benefits of walnuts on our blog, Health Benefits of Walnuts. Asian Walnut Lettuce Wraps with Miso-Ginger Dressing (PRINT RECIPE) Serves 4; Serving Size 2-3 lettuce wraps Ingredients: 2 cups raw walnuts 4 teaspoons soy sauce or tamari (gluten free soy sauce or tamari if needed)* 1 inch fresh ginger root, peeled and minced or grated 2 tablespoons olive oil 2 cloves garlic, minced 1 tablespoon sriracha or chili garlic sauce 2 tablespoons maple syrup ½ teaspoon sesame seeds 1 head Boston or Bibb lettuce (sub iceberg/chard if you can’t find) 3 carrots, shredded ½ red bell pepper, thinly sliced 2 scallions, chopped Sesame seeds for garnish Directions:
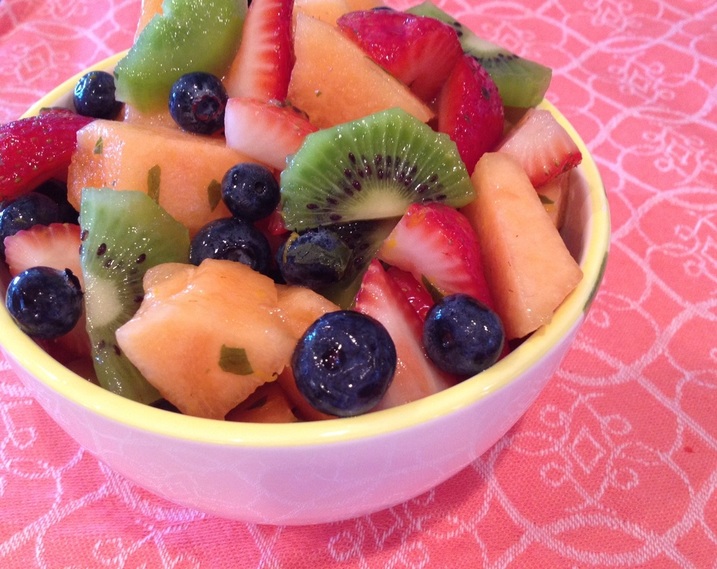
We hope you enjoy these as much as we do! Happy eating! ~Billie & Jen *For soy-free version substitute coconut aminos for soy sauce or tamari and use Sesame-Ginger Dressing (Click here for recipe). This lovely and lightweight fruit salad takes advantage of all the colors and flavors of summer. Just grab your favorite melon(s), fruits and berries and toss them in this simple citrus-mint dressing for a light dessert, snack, or side dish for breakfast or brunch.
Colorful Fruit Salad with Citrus-Mint Dressing (PRINT RECIPE) Serves 4 Ingredients: 1 medium organic cantaloupe, cut into 1-inch cubes 3 kiwi fruit, peeled and sliced into half moon shapes 1 pint organic strawberries, stems removed and quartered 6 ounces organic blueberries 1 tablespoon honey or agave 2 tablespoons fresh mint, minced 2 tablespoons orange juice 1 teaspoon orange zest 1 teaspoon fresh lime juice Directions:
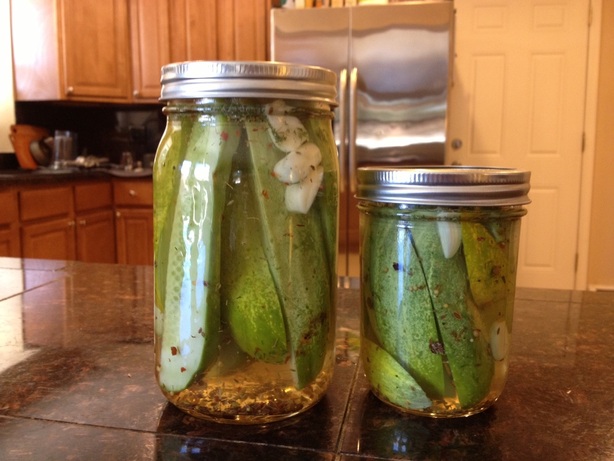
If you are making this ahead of time, reserve the dressing and then toss it on to coat 1 hour prior to serving. Pretty simple, lots of flavors, nice and light...you really cannot go wrong with this salad! Enjoy! ~Jennifer & Billie If you are looking for an easy way to use up those cucumbers (and fresh dill) coming out of your garden, try this simple recipe for Sweet & Spicy Refrigerator Dill Pickles.
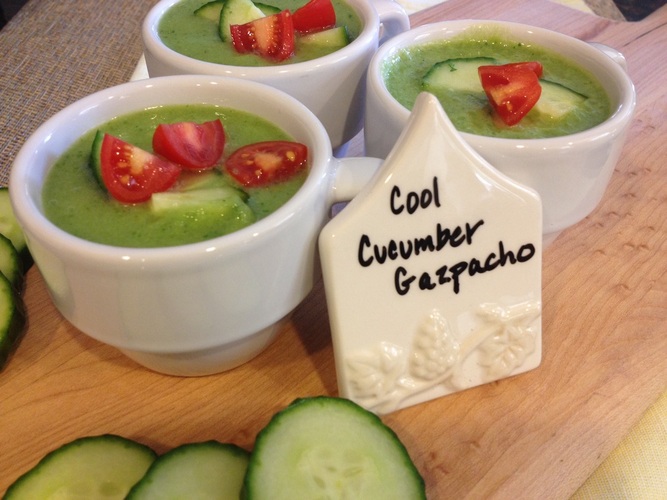
Ingredients: 6 pickling cucumbers 2 cups water 1 3/4 cups distilled white vinegar 1 cup packed, coarsely chopped fresh dill 1/2 cup sugar 8 cloves garlic, halved 1 1/2 tablespoons coarse salt 2 tablespoons pickling spice mix* 1/2 teaspoon dried red pepper flakes (more or less depending on your desired spiciness level) *Some grocery stores do not carry pickling spice, so if you cannot find it, substitute for 1 tablespoon plus 1 teaspoon dill seeds, 1 teaspoon whole black pepper corns, and 1 teaspoon caraway seeds. Directions: 1. Combine all ingredients, except dill, in a large bowl. Let stand at room temperature for about 2 hours or until the sugar and salt dissolve. 2. Quarter each cucumber into spears and then place in wide-mouth jars. You will need about 3 jars depending on the size of your cucumbers and the sizes of your jars. 3. Pour vinegar/spice pickling mixture evenly into each jar. 4. Cover jars with lids and close tightly. Refrigerate for 2 weeks. These will stay fresh for 1 additional month following the 2 week 'pickling time'. Keep refrigerated and enjoy! ~Billie Grain Free. Vegan & Vegetarian Versions This light and refreshing summertime soup makes for a great appetizer or side dish and comes together in under 15 minutes. The flavors stand on their own and you can't help but be quenched and cooled down a bit when you take a sip of this gazpacho. You can even embrace the rock-star entertainer you are by serving it in small shot glasses or espresso cups for a beautiful presentation and that extra touch of sophistication!
Or simply pair it with your favorite salad or sandwich for a lightweight lunch or dinner. Try it with our Adzuki Bean & Quinoa Tossed Salad. This soup is under 100 calories per serving since cucumbers are 95% water based, but don't let that fool ya into thinking you are not getting enough nutritional value. While low in calories, cucumbers are high in both B & C vitamins as well as potassium and vitamin K and offer detoxifying and anti-inflammatory properties. Having one bowl of this soup will help to re-hydrate your body, increase your energy, and improve your body's ability to cleanse and detoxify. Plus it tastes AMAZING! To learn more, check out our blog, Health Benefits of Cucumbers. Cool Cucumber Gazpacho (PRINT RECIPE) Serves 4 Ingredients: 3 cups chopped English/hot house cucumbers (about 2 large cucumbers) ½ cup low sodium vegetable broth 1 cup full fat organic coconut milk from a can ¼ cup chopped white onion 2 tablespoons fresh lime juice (about 1 large lime) 1 clove garlic ½ teaspoon salt ¼ teaspoon ground black pepper Dash of cumin Dash of ground red pepper 1 cup grape or cherry tomatoes, quartered Directions:
I really like this soup chilled, so I recommend putting it in the fridge for at least 15 minutes before serving it. You can make this soup into a heartier snack or light meal by adding some pepitas, hemp seeds, and/or avocado slices as a garnish as well. This soup will stay fresh in the fridge in an airtight container for up to 3 days. Enjoy! ~Billie |
Billie Shellist, FDN-P
I practice functional nutrition, an approach that allows me to look at your entire health history and help you find the "root causes" of your chronic health complaints. This cuts out the trial and error process and helps you get real symptom relief and resolution! Food is medicine and knowledge is power -I hope you enjoy my anti-inflammatory recipes which are gluten, dairy, and soy free as well as very low grain and sugar. If you'd like to heal from the root cause(s) of your chronic symptoms, try starting with a complimentary 15-minute consultation. Click here to request your free session. |

