
 In functional medicine, we always want to be looking upstream and trying to gather as many clues and evidence through testing and intake to determine what is at the root cause of the chronic symptoms in question. We then work to treat and resolve the underlying problem(s) and this helps to reduce symptoms and restore health long term. But what happens when someone is reacting to or not tolerating the treatment needed to resolve their root cause problems? This is the biggest challenge I see for those who have MCAS and histamine intolerance. Their immune systems are so hyper-reactive and overly sensitive that they will often have trouble tolerating the treatment needed to resolve the root cause issues like parasites, lyme, SIBO, retroviruses, or mold. I experienced this personally when I was being treated for Lyme disease and mold illness aggressively for 2 years before knowing that MCAS was playing a role in my symptoms. My MCAS manifested as extreme body pain, even after 2 years of Lyme disease treatment my pain wasn't getting any better, in fact, it was getting worse!! I also found myself becoming very sensitive and reactive to foods, smells, chemicals, EMF's, and even most of the medications and supplements that were treating my illness. I could not tolerate treatment and was just getting sicker and feeling worse. Figuring out I had MCAS and adding in both pharmaceutical and natural anti-histamines and mast cell stabilizers was a game changer for me. My pain levels dropped slowly, my energy improved, my rashes disappeared and my food reactions lessened. Overtime I finally started to be able to tolerate the treatment I needed to resolve my root causes. After my personal experience and professionally working with lots of mast cell clients, I now understand that its imperative to get the immune system to calm down and be less reactive before you will be able to tolerate treatment for and resolve what's at the root cause of your MCAS. My practice is now 90% MCAS patients and every client is unique in what combination of anti-histamines and mast cell stabilizers work to calm down the immune response and be less reactive. I use special lab testing to help give me clues about each clients bio-individual triggers, metabolism, and root cause issues. This helps me make educated recommendations in the area of natural anti-histamines and mast cell stabilizers that will work for each personal individually. There are some nuances to choosing the right combination of supplements and it often takes some trail and error. This is why I highly recommend working with a practitioner who knows and understands this well to help guide your choices. You will want to choose clean formulations with minimal or no fillers. I suggest single active ingredient items so that you know what is helping or hurting you. If you are someone who has food reactions, you will want to time these items to be taken 15-30 minutes prior to meals. This timing can help to reduce post meal time mast cell reactions. Lastly, never try more than one of these at the same time. Always try anything that is new to you alone with no other changes or adjustments in food or medications, titrate up to the recommended dose (or your tolerated dose) slowly and then add the next item. I typically recommend a 3 day trial before increasing the dose or adding the next supplement. Here are the natural options that I use most in my practice... 15 Natural Anti-Histamines & Mast Cell Stabilizers:
These go-to, natural mast cell stabilizers can be used in combination with pharmaceuticals like ketotifen, cromolyn, singular, and over the counter anti-histamines like Benadryl if needed. I highly recommend working with an experienced practitioner who can help you choose the products that meet your needs best. Always keep in mind these anti-histamines and mast cell stabilizers are not going to fix the underlying, or root problem(s) that are causing the MCA symptoms. They will simply help to lower reactions and calm the immune response down so that you can start to treat the underlying reasons your mast cells are over-stimulated in the first place. If you want to learn more about my approach for reducing MC reactions and improving root cause treatment tolerance and effectiveness, check out my free online webinar. References:
50 Comments
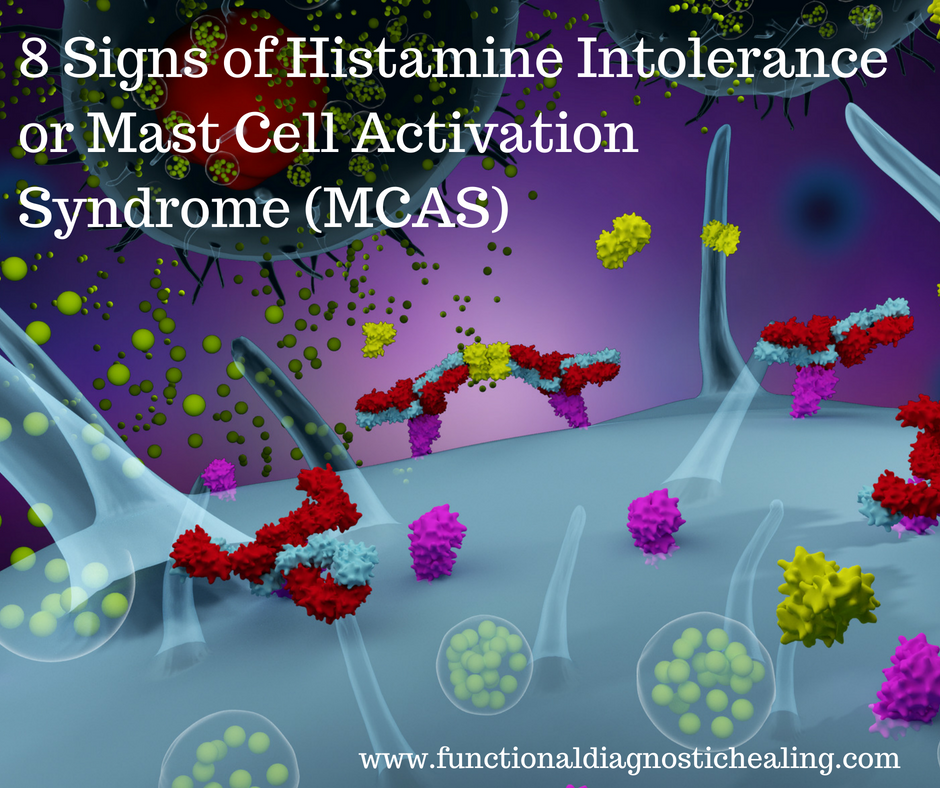 It's been almost 10 years since the onset of the my chronic Lyme disease symptoms following a car accident in 2008 and I can't believe the roller coaster this journey has taken me on! Looking back, there were a few key discoveries and turning points that really shifted my healing into the next level and allowed me to make significantly more progress. One of those things was figuring out that I was suffering from Mast Cell Activation Syndrome (MCAS). Mast cells are a type of immune cell that are present in almost all tissues in the human body but especially in the gut lining, connective tissue, cardiovascular system, respiratory system, and nervous system. They are part of an allergic response used to protect us from injury or threat. When mast cells encounter a "threat or perceived threat" they release chemical mediators like histamine, leukotrienes, interleukins, prostaglandins, and cytokines. These mediators are like signals to the immune system - you can think of them like a fire alarm, letting the fireman know its time to fight a fire. The mediators are a signal to the immune system that there is threat or injury that needs healing or addressing. We all need mast cells in times of allergic response or injury to heal, however in MCAS, your mast cells are hyper-stimulated and over-activated, releasing large amounts of mediators and setting the stage for chronic immune activation and autoimmunity along with a host of pretty serious multi-systemic symptoms. My MCAS manifested as extreme body pain, even after 3 years of Lyme disease treatment my pain wasn't getting any better, in fact, it was getting worse!! I also found myself becoming very sensitive and reactive to foods, smells, chemicals, EMF's, and even most of the medications and supplements that were supposed to be helping me feel better. I would have constant migraine headaches, my heart would race and my body would feel hot and in terrible pain after I would eat a meal. I was down to like 5 or 6 foods that I could eat without having a reaction. It was incredibly frustrating and I felt so stuck!! When I started to get rashes all over my body (which I had never had prior), my new functional doctor at the time suspected MCAS and we added some anti-histamine and mast cell stabilizers into my protocol. Her suspicion was confirmed when after a month or so, I slowly started to stabilize, my pain dropped a noticeable amount, and I was having less migraines. This is when I took a deep dive into researching and understanding not only the manifestations of MCAS and how to get the immune system to calm down and act normally but also identifying the root causes behind this type of immune activation. The protocols I've implemented based on my research have helped me to accelerate my recovery and live a much more functional life while I continue to heal from chronic Lyme disease. I find that MCAS is a very common condition in the chronically ill and especially so for patients who have not responded to standard treatment protocols well. I've now worked with dozens and dozens of people who suffer from this type of immune dysfunction and I want to help you as well! So how do you know if MCAS might be playing a role in your illness? Here are some clear symptoms to look for... 9 Signs You May Be Dealing with MCAS or Histamine Intolerance:
How Does MCAS Differ from Histamine Intolerance? Histamine intolerance is a term that you may have heard more commonly than MCAS and is typically categorized as someone who is histamine sensitive specifically due to a genetic mutation in which they have a deficiency in the enzyme (DAO) needed to break down histamine in the gut. This causes histamine levels build up and people start reacting to high histamine foods or to environmental stimulus easily. Excess histamine is the main problem here. In MCAS, the mast cells are being over activated which is causing the release of more than just histamine but other mediators as well like cytokines, leukotrienes, interleukins, and prostaglandins. Testing & Treatment to Consider for MCAS: Standard testing includes serum and urine analysis inlcuding: Serum Tryptase, Serum ChromograninA, Whole Blood Histamine (chilled plasma) Heparin (chilled plasma), N-Methylhistamine (24hr urine), and Prostaglandin F2alpha (24hr urine). But again, these tests are not very accurate and will often give a false negative picture. That's why its a clinical diagnosis based on the presence of the symptoms above in at least two body systems and a positive response or symptom reduction with anti-histamines and/or mast cell stabilizers. Next week's blog post will be spent discussing the anti-histamine and mast cell stabilizer options along with tips on how to find the right combination of medications/supplements to help reduce over-active mast cells and get symptom relief. I will also share important steps to take, outside of medications and supplements, that will help to reduce your mast cell reactions and help you get your life back! I look forward to catching you all next week! Thanks for tuning in! Billie P.S. - You may also be interested in my Free, Live Webinar, Mast Cell Activation Solutions, which is scheduled for Saturday, 9/29 at 10:30am MT. Click the image below to learn more or sign up. 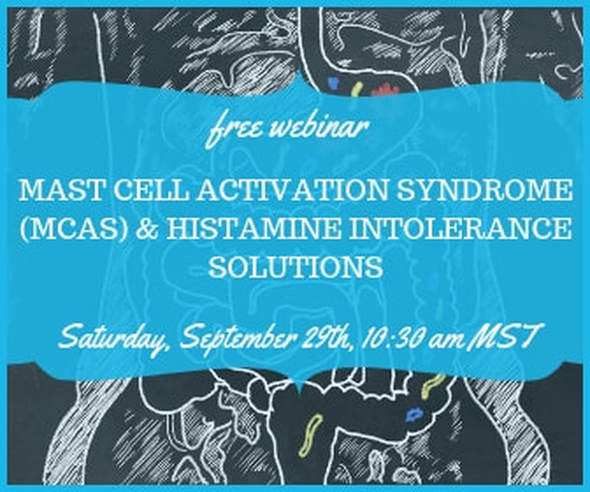  Hippocrates was quoted saying, " All disease begins in the gut" and today we have mounting evidence showing that many of our modern diseases are in fact rooted in the gut, especially autoimmune diseases, which are affecting more and more people each year. A vast array of chronic inflammatory symptoms ranging from digestive distress, to chronic fatigue, to hormonal imbalances, to joint pain, depression, anxiety, headaches, skin rashes and more are all rooted in the gut. Studies actually show that over 70% of our immune system resides in the gut and it's also where 80% of our serotonin (the primary neurotransmitter that regulates mood) is manufactured as well. In fact, I've personally experienced how treating the root cause of my leaky gut significantly lowered my depression and balanced my mood! What is Leaky Gut or Intestinal Permeability? The single layer of cells that lines your intestinal track creates a physical barrier between your bloodstream and the outside world. As foods come into your body, they may contain bacteria, viruses, and parasites as well as pesticides. Your gut lining is your first line of defense against these pathogens and toxins. But the lining of your gut can get damaged by inflammatory foods like gluten, toxins like heavy metals and pesticides, pharmaceuticals like antibiotics and NSAID's, as well as pathogenic infections, bacterial imbalances, and stress. A damaged gut lining gets holes in it, for lack of a better term, and you develop what's medically named, intestinal permeability, or "leaky gut". This means that pathogens, toxins, and food proteins can now pass through those "leaks" and into your bloodstream where they interact with your immune cells. The immune system "tags" these food proteins and toxins as "dangerous intruders or pathogens" because they are not supposed to be in the bloodstream and begins to attack them. This immune response leads to the symptoms listed below which is why if you have any of these symptoms, its likely that you have leaky gut. Some experts have estimated that intestinal permeability affects over 70% of our modern population. 9 Signs You Have Leaky Gut:
Leaky Gut - Autoimmunity Connection: When your gut is leaky and more and more particles are able to escape into your bloodstream, your immune system begins to get into a pattern of high alert which causes it to become overstressed and fire less accurately, sometimes leading to an attack on your own body's tissues or an autoimmune attack. Eventually, this will develop into full-blown autoimmunity if your gut is not repaired. In addition, your immune system starts making antibodies against the substances that have escaped into your bloodstream. Many of these foreign invaders, especially gluten and dairy, in particular–look very similar to your own body’s cells, causing your immune system to get confused and accidentally attack your tissues. This process of mistaken identity is called molecular mimicry, and is another way that leaky gut can trigger autoimmune disease. Healing Leaky Gut: If you want to reverse autoimmunity and heal your gut, I suggest working with a skilled functional medicine practitioner who can help you identify all the root causes of your symptoms and take you step by step through a personalized gut healing protocol. You and your practitioner will need to identify and remove all the inflammatory dietary and lifestyle items that are contributing to your intestinal permeability like food sensitivities, toxic exposures, and stress. You will also need to identify and treat pathogenic infections in the gut, reinoculate your immune system with beneficial bacteria, and lastly provide your gut with the key nutrients it needs to repair the "leaks and holes" in the lining. In my practice, I find that 80% or more of my clients have leaky gut at the root of their chronic symptoms. When we focus our approach towards healing the gut by eliminating inflammatory triggers, rebalancing the gut microbiome, and repairing the intestinal lining, people begin to heal, get rid of chronic symptoms, and get their life back! Are you ready to get rid of your chronic symptoms? If so, I'd love to help you! If you want to learn more about what to expect when working with me- you can schedule a complimentary 15 minute new client session to understand how my root cause approach can help you reclaim your health! Or check out the gut healing programs I offer on my Work with Me page and read testimonials of others who have worked with me. In good health, Billie
 Did you know that unlike food allergies, which tend to be very obvious, food sensitivities can go unnoticed and unidentified while silently wrecking havoc on your health?
Food allergies are typically quite obvious with symptoms occurring immediately or within a short period of time after exposure. This would represent an IgE reaction of your immune system. For example, someone who is allergic to peanuts may have their tongue or throat swell up with exposure and need immediate care. Food sensitivities on the other hand, are often dose dependent and include delayed reactions, occurring anywhere from 1 to 72 hours post exposure. They include IgG reactions as well as mediator release from white blood cells including: histamine, leukotrienes, cytokines, prostaglandins, and interleukins just to name a few. In fact mediator release is the key event that increases systemic inflammation and leads to chronic symptoms like: brain fog, pain, fatigue, digestive distress, headaches, rashes, anxiety, depression, insomnia, weight gain, and more. Even so called "healthy" foods like broccoli, avocado, garlic, or blueberries, for example, can become triggers that lead to unwanted and chronic symptoms. This truely brings to light the saying that "one woman's food is another woman's poison." Theses inflammatory reactions to foods create a viscous cycle in that they contribute to increased intestinal permeability (or leaky gut) while also being a direct root cause of the symptoms of inflammation. When your gut is permeable, it has small holes or "leaks" where food proteins that are normally kept inside the gut can now enter the bloodstream. This activates the white blood cells in your immune system to release mediators which lead to the chronic and unwanted symptoms of systemic inflammation listed above. Removing foods that you are reacting to is the first and most important step in healing the gut, reducing intestinal permeability, and decreasing those chronic symptoms. You will not be successful healing the gut without removing these foods because of the fact that mediator release makes the gut more permeable, continuing this viscous cycle. How to Identify Food Sensitivities: So what can you do about it? In my practice, I almost exclusively use the MRT (mediator release test) which is a blood test that measures volumetric changes in mediator release to help us identify which foods that you are specifically reacting to and which foods are the safest for you. I find that this test is the most clinically effective because it is measuring the same mediators that raise systemic inflammation. Once we identify the foods causing you the most inflammation, we remove those foods from your diet for at least 90 days. I find that almost all of my patients experience a significant reduction or elimination in their chronic symptoms when we do this. I have personally had huge success using this test to identity my own sensitivities and it was one of the key pieces that has allowed me to start to heal my gut and reverse my crippling, reactive symptoms. You can learn more about the MRT Test on their website by clicking here. If you want to know which foods could be contributing to your chronic symptoms and are looking to heal your gut and reverse your autoimmunity, I'd love to help you! You can learn more about working with me here. And you can read some testimonials from others who have worked with me here. I hope you have found this information to be helpful. Feel free to post questions below or contact me directly here. In Good Health, Billie 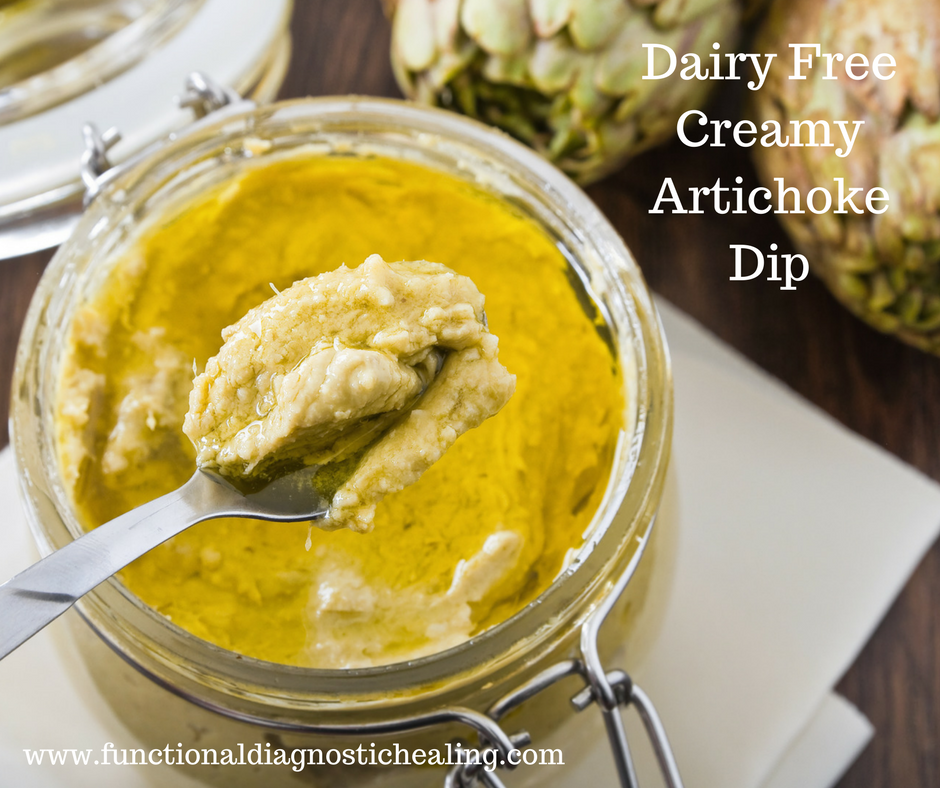 Artichoke dip is one of the most well loved appetizers out there but is often off limits for those of us who eat a dairy free diet. Well, not any longer my friends...
This delicious dip will blow your mind with its rich, creamy texture and flavor that comes from a combination of white beans and organic mayonnaise made from cage free eggs. It's the perfect addition to your upcoming Easter or Mother's Day brunch celebrations or makes an excellent snack to have on hand for some quick protein and fiber! Plus it comes together in less than 15 minutes. Sometimes for variety, I'll stir in 1 tablespoon homemade pesto as well. Dairy Free Creamy Artichoke Dip: (PRINT RECIPE) Ingredients: 2 cloves garlic, peeled 1 shallot, diced 2 tablespoons lemon juice ½ cup mayonnaise made from cage free eggs and olive oil 1 tablespoon extra virgin olive oil 1 tablespoon apple cider vinegar 1 (15-ounce) can great northern beans/cannellini beans, drained ½ teaspoon salt ½ teaspoon mustard powder ¼ teaspoon pepper 1 (4-ounce) can chopped green chilis, undrained 2 ½ cups canned artichoke hearts, drained (About 1 ½ cans) Serve with your choice of: Raw veggies Gluten free seed crackers Directions:
You can find this recipe and others like it in my Anti-Inflammatory Diet Spring eBook. YUM, YUM, and YUM!! Enjoy! Billie  Did you know there are 70-80 million people in the U.S. alone that are suffering with an autoimmune disease and up to 150 million people worldwide? These numbers have increased threefold over the last 50 years and are continuing to rise.
What is Autoimmunity? Autoimmune disease is a whole spectrum of illnesses that all have common root causes, even when they show up in different parts of the body. The commonality among these illnesses is that the body is attacking its own tissues. This can happen when our immune system no longer recognizes our own cells as safe, it identifies them as harmful intruders and launches an attack against them. There are many things that can change the shape and appearance of your cells which is what's at the root cause of these chronic illnesses. The traditional western medicine approach to these illnesses to prescribe steroids and other immunosuppressant drugs to reduce the immune system's response. They are focused on "diagnosing" your illness and then "treating" you with pharmaceuticals to reduce symptoms. These drugs to do not to anything to cure or reverse your illness or help you heal, they are simply "masking" the symptoms of your illness at best. And they come with horrible side affects like a insomnia, depression, and immune deficiency making you more likely to get infections that will only make you sicker. As someone who was diagnosed with 3 different autoimmune conditions by 3 different specialists, I understand just how frustrating and hopeless it is be given a diagnosis(s) without any answers as to the known cause. That's why I became a Functional Diagnostic Nutrition Practitioner so that I could figure out my own answers, reverse my illness, and help others do the same. In Functional Medicine, our approach is to ask the questions, "why are you sick?", "why did you develop this set of symptoms or this illness?", "what is at the root cause of this illness?". What we find when we ask these questions is that regardless of the type of symptoms that are being expressed or the type of autoimmune disease that has been diagnosed, there are common things that we find at the root cause of every autoimmune condition. 5 Root Causes of Autoimmunity:
The good news is that once you know the underlying cause(s) of your condition, you can truly support your immune's system ability to heal itself. In my practice I use special functional lab work to identify what's at the root cause of your autoimmune condition and then design a personalized dietary, nutrient replenishment, and lifestyle protocol to help lower inflammation and slow or reverse autoimmunity. So if you are sick of being sick and tired of not having answers as to the development of your condition, check out my approach and read about what it's like to work with me,. If you like what you see, consider a 15 minute free consultation to learn how to identify the underlying causes of your autoimmune condition and get rid of chronic symptoms that dominate your daily life! Paleo. AIP. Gluten Free. Dairy Free. Soy Free. Grain Free. Delicous!  If you are looking for a super easy dish that is packed with flavor this holiday weekend...look no further. This chimichurri marinated steak recipe will blow you away and is just one of the delicious dishes in our Spring Anti-Inflammatory Eating Plan eBook.
Spring and summer are bursting with fresh, anti-inflammatory herbs and this dish is the perfect vessel for them to shine! This recipe works for any cut of steak, so feel free to substitute your favorite. I like to double or triple the chimichurri sauce recipe and freeze it in 1 cup increments for easy defrosting later down the line. Just defrost in the fridge overnight. This chimichurri can be used with any other cut of meat of fish and tastes divine on grilled, steamed, or roasted vegetables so experiment and have some fun with it! Chimichurri Marinated Steak (PRINT RECIPE) Serves 4 Ingredients: 1 ½ lbs grass-fed steak (skirt, flat iron, flank) 1 teaspoon salt 1 teaspoon pepper Chimichurri: ¼ cup chopped fresh oregano leaves ¼ cup chopped fresh cilantro 2 tablespoons chopped fresh parsley 1 tablespoon fresh thyme ¼ cup finely minced shallots 5 cloves garlic, chopped ½ teaspoon red pepper flakes ¼ cup red wine vinegar 1 cup olive oil Directions:
I like to pair this dish with some roasted potatoes or celery root fries (recipe included in our Spring Anti-Inflammatory eBook) and some steamed or grilled asparagus. But you can also go more traditional and serve this with rice, beans and a veggie of choice. Either way this dish is a winner! Enjoy & Happy Memorial Day Everyone! ~Billie Gluten free. Grain Free. Dairy Free. Egg Free. Soy Free. AIP. Paleo. 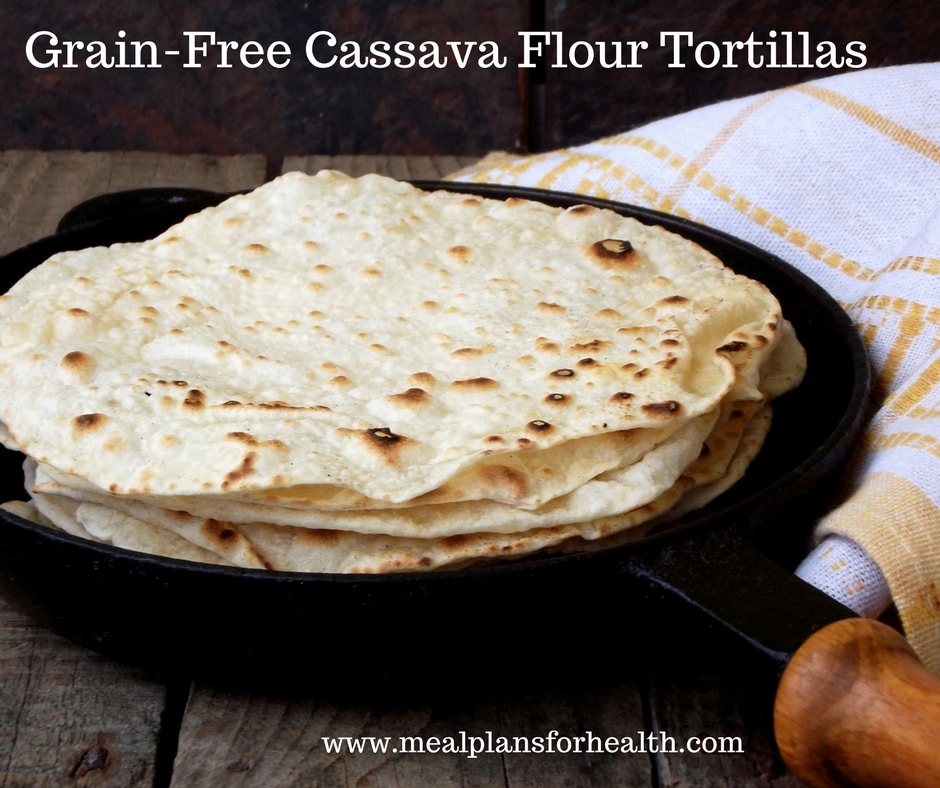 These tortillas really have a nice flavor and texture and are fairly easy to master. You can use them in tacos, wraps, or cut into wedges and make pita chips. The secret is to keep your ghee (or grass-fed butter cold).
Try these with our Fish Tacos with Mango Salsa or our Crockpot Brisket Tacos or even our Chicken & Walnut Wraps. These are super versatile and you will be surprised just how much these satisfy a craving for regular tortillas. These are AIP and paleo approved but most of all family approved from my kitchen to yours! Grain-Free Cassava Flour Tortillas: (PRINT RECIPE) Serves 4 (Makes 8 smaller taco size tortillas or 4 larger ones) Ingredients: ¾ cup cassava flour ¼ cup arrowroot flour/powder ¼ teaspoon salt ¼ teaspoon baking soda 3 heaping tablespoons ghee, cold + 2 tablespoons (alternatively you could use grass-fed butter) ¼ - ½ cup slightly warm filtered water Directions:
I hope you enjoy these as much as we do! Happy Cooking! ~Billie Gluten, Grain, Dairy, and Soy Free  If you are a fan of fish tacos, this recipe is right up your alley and perfect for your upcoming Cinco De Mayo Celebrations! You can do these in lettuce wraps, store bought grain free tortillas, or Homemade Grain-Free Tortillas - whichever you prefer.
I also love to double this salsa recipe and use it a second night over some grilled chicken. In fact these recipes are part of my new, Spring Anti-Inflammatory eBooks. These one week meal plans come complete with recipes, a menu with preparation tips, and a shopping list to save you time at the store. So if you like meals like these, check out my downloadable Anti-Inflammatory Meal Plans. Grain-Free Fish Tacos with Mango Salsa: (PRINT RECIPE) Serves 4 Ingredients: 4 wild caught cod filets (about 6 ounces each) 1 tablespoon avocado or coconut oil 2 teaspoons paprika 1 teaspoon garlic powder 1/2 teaspoon salt 1/4 teaspoon black pepper ½ teaspoon cumin 1/8 teaspoon cayenne ½ teaspoon chili powder 1 avocado, sliced (optional)* Large leaf lettuce for lettuce wraps or Grain-Free Cassava Tortillas Mango Salsa: 1/4 cup sweet onion 2 ripe mangos, peeled and chopped ¼ cup chopped red bell pepper 3 tablespoons cilantro, chopped 1/2 tablespoon olive oil 1 1/2 tablespoons fresh-squeezed lime juice Pinch of salt Directions:
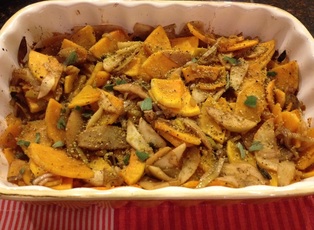
Enjoy and let me know what you think! ~Billie Grain Free. Gluten Free. Dairy Free. Paleo. AIP. 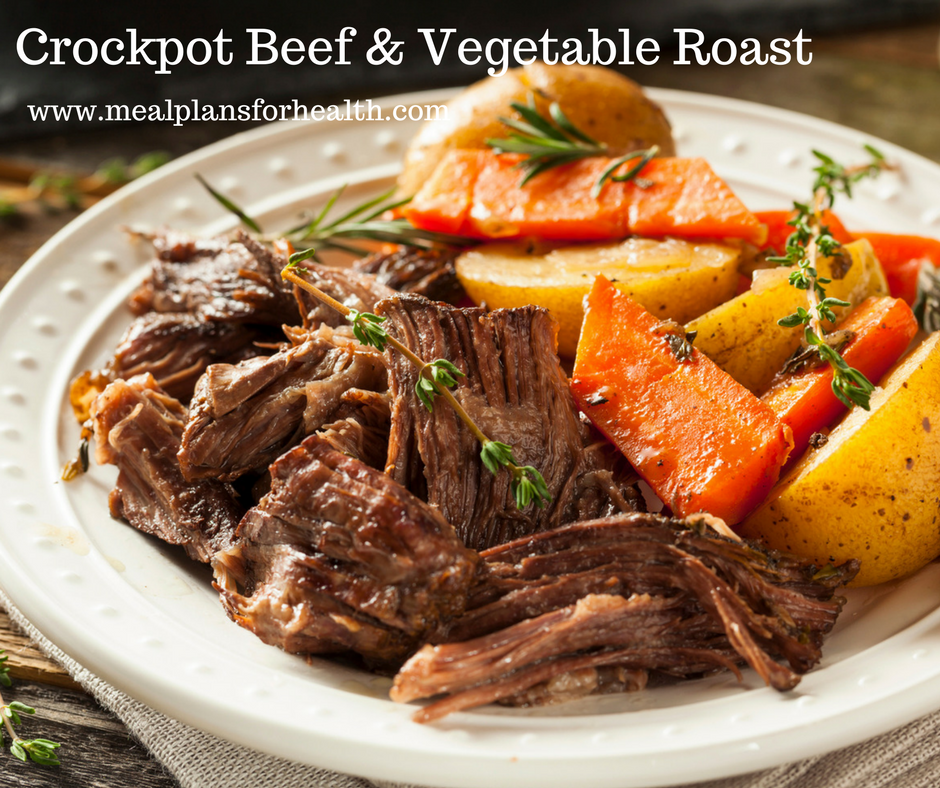 I love this meal because when its done it tastes like a "restaurant quality" dish BUT it only requires 15 minutes of hands-on time. So you can put the items into your Crockpot or Slow-cooker, go about your busy day, and then come to home to an amazing meal! This meat just falls apart in your mouth...its amazing!
In fact, my husband and I don't ever go out for Valentines Day ever since the food is way overpriced and the atmosphere is too loud and crowded. Instead, we enjoy a home-cooked meal...this year, this dish is on the menu along with my favorite Grain-Free Ginger Cookies for a sweet treat. If you don't eat potatoes, substitute your favorite root vegetable instead like parsnips, turnips, celery root, or yucca. In our house, I like to use the leftovers the following day to make "Paleo Bowls" which is basically the leftover meat on a bed of seated kale or chard with the roasted veggies on top. If I'm out of the veggies from the crockpot, I will often roast a squash to accompany the dish. You can get the details of this recipe plus others like it in our Anti-Inflammatory Winter Meal Plan: Week 1. Packed with super simple and delicious meals your whole family will love! Check out the recipe below and enjoy... Crockpot Grass-Fed Beef & Vegetable Roast (PRINT RECIPE) Serves 4-6 Ingredients: 2-4 pound organic, grass-fed beef chuck roast 1 teaspoon dried herbs like thyme or rosemary 1 teaspoon ground turmeric 1 teaspoon salt ½ teaspoon pepper (optional) 1 teaspoon onion powder ½ teaspoon garlic powder/granules 1 cup organic beef broth 2 large carrots, chopped into 2 inch pieces 1 stalk celery, chopped into ½ inch pieces 3 red or white potatoes OR 1 sweet potato, chopped into bigger chunks ½ a large onion, quartered 2-4 springs fresh herbs like rosemary, thyme, or sage Directions:
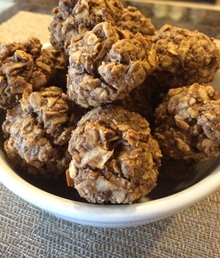
Let me know what you think by leaving me some feedback below... ~Billie Gluten free. Grain free. Vegan. Nut-free version.  I usually make ginger cookies during the holiday season, but this week I was inspired by our upcoming Valentine's Day to make a slightly different version and would like to share it with you today.
Even when I eat sweet treats like these, I'm careful to choose ingredients that help reduce inflammation in the body...the star in this recipe of course is GINGER! Ginger is one of the most powerful medicinal foods available and has been used for centuries to help support digestion, reduce inflammation, aid in healing, and increase circulation. In fact, because it can helps to increase circulation, ginger has been touted as a powerful aphrodisiac...making it perfect for a Valentine's Day celebration with your significant other or friends! Check out this simple recipe... Grain-Free Heart Shaped Ginger Cookies (PRINT RECIPE) Makes about 16 cookies Ingredients: 1 1/2 cups blanched almond flour/almond meal (substitute cassava or tiger nut flour for nut free version) 2-3 tablespoons coconut oil, melted (sub avocado oil or organic ghee) 1/4 cup 100% pure maple syrup or organic cassava syrup 1 tablespoon blackstrap molasses 2 teaspoons ground ginger 1/8 teaspoon fine sea salt 1/4 teaspoon baking soda Directions:
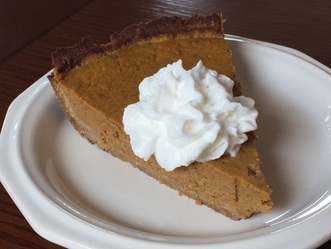
I hope you enjoy these cookies as much as my family and I do. Happy Valentine's Day! Let me know what you think by commenting below - I'd love to hear your feedback! ~Billie 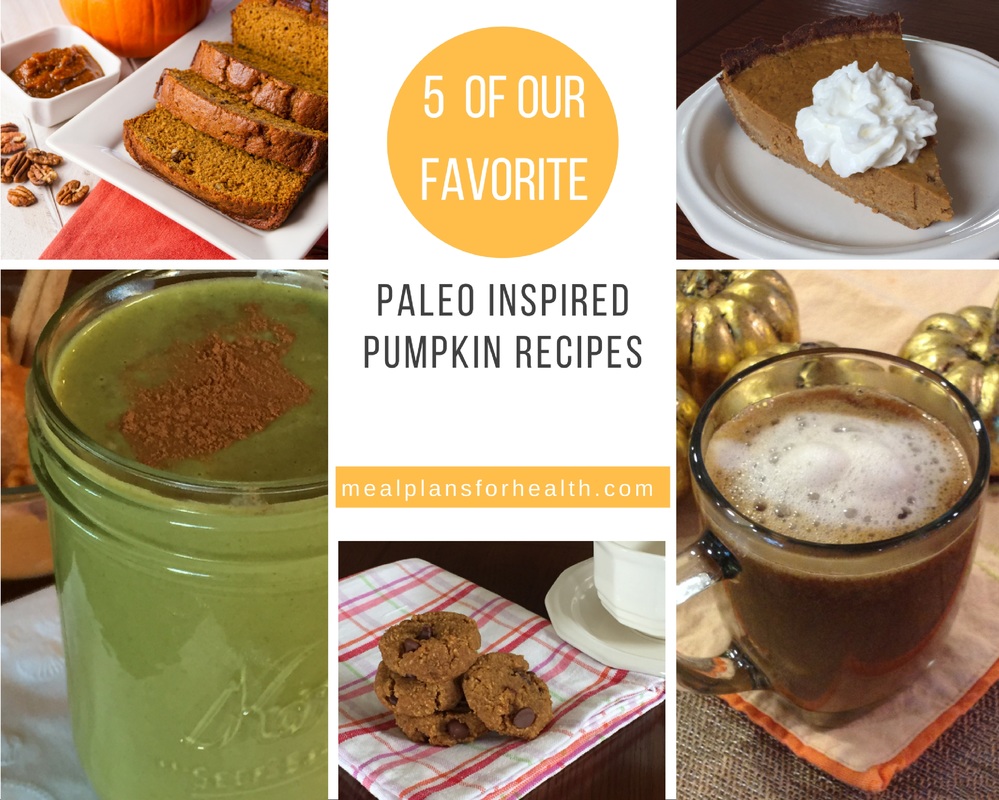 Real pumpkin puree is one of my favorite health foods and something I like to enjoy year round, but especially during the Fall and holiday season. Jen and I like to make our own pumpkin puree since one "pie pumpkin" yields quite a good bit of pumpkin and it is easy to make. Check out out blog to learn how to make your own Homemade Pumpkin Puree. But you can also find pumpkin puree in cans year-round at the store. Make sure to choose 100% pure pumpkin puree in these recipes and not canned pumpkin pie mix. So....if you love pumpkin as much as we do, check out some of our favorite recipes and let us know what you think....  Grain free. Gluten free. Soy free. Dairy free. Low Carb. Low Sugar. 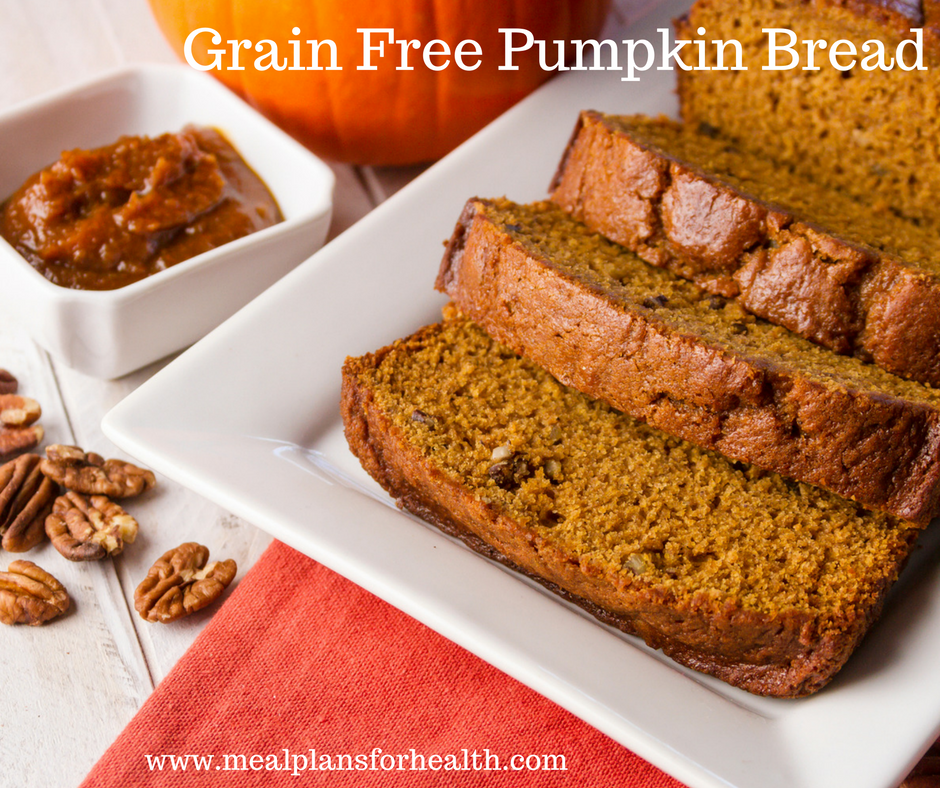 This delightful bread is low in sugar but high in flavor and deliciousness and highlights one of my favorite seasonal foods - pumpkin!! Pumpkin used to be a year round food for me until I learned I had a histamine intolerance which made me sensitive to foods like pumpkin and cinnamon. So this whole year I've excluded these items from my diet, which has been challenging for me but has paid off. And now that Fall has arrived, I'm treating myself to some of my favorite pumpkin recipes in small amounts and wanted to share some with you:)
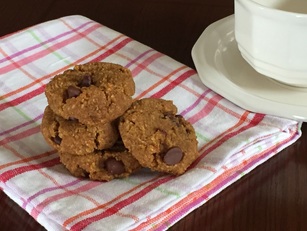
This bread is super versatile and can be made into a dozen muffins if you prefer. I recommend adding your favorite "crunch" to this bread –I love walnuts because they are a healthy source of omega-6 fats and have been shown to be neuro-protective for the brain, but pecans or hazelnuts could also work well in this recipe. Or for a special treat every once in awhile, add 1/3 cup dark or vegan chocolate chips or even some craisins or raisins. For more recipes like these, check out our Anti-Inflammatory Holiday Cookbook with over 20 holiday recipes, plus a holiday meal plan that can save you time and stress! ON SALE NOW -- MONDAY 10/31. Grain Free Pumpkin Muffins: (PRINT RECIPE) Serves 12 Ingredients: Heaping ½ cup 100% pure pumpkin puree ¼ cup coconut flour* 1 ½ cups blanched almond flour or almond meal 1 teaspoon baking powder ½ teaspoon baking soda ½ teaspoon salt ½ teaspoon ground cinnamon ½ teaspoon ground ginger 1 teaspoon pumpkin pie spice 3 large organic, pastured eggs 3 tablespoons coconut palm sugar* 2 tablespoons maple syrup 1/3 cup coconut oil, melted (can sub melted ghee or avocado oil here instead) 1 teaspoon pure vanilla extract *If you are sensitive to coconut, try using 1/3 cup tiger nut flour or quinoa here instead and swap the coconut sugar for additional maple syrup.* Optional Ingredients: (Choose one) 1/4 cup chopped nuts (walnuts, pecans, or hazelnuts work well) 1/3 cup dark or vegan chocolate chips Directions:
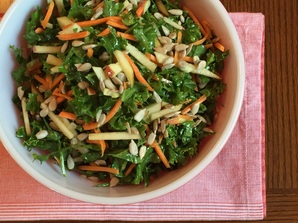
p.s. - if you decide to make 12 muffins instead of bread, bake for 18-25 minutes or until a toothpick inserted in the center of the muffin comes out clean. Remove muffins from the tin but leave the muffin paper/wrapper on until completely cool. If you try to peel it too early, lots of the muffin will stick to the paper and it will be a mess! Enjoy! Billie  Fall is here and it's my favorite season of the year by far! The warm sun, mixed with the cool air and a colorful, fall landscape to look over - you just can't beat it. But fall certainly wouldn't be complete without APPLES for me!
After living in a home with an enormous apple tree for several years that gave us boat loads of apples every fall, I had to get really creative with how many ways I could use up my harvest. These six recipes are just some of my favorites and I wanted to share them with you today. Each of these are low in sugar and carbs, gluten, dairy, and soy free, super simple to make, and amazingly tasty for your belly! I hope you and your family enjoy them as much as my family and I do. Gluten Free. Grain Free. Paleo. Dairy Free. Soy Free. Nut Free  If you are looking for the ultra healthy sweet snack, try slowly baking sliced apples sprinkled with cinnamon to make apple chips. This recipe doesn't require a dehydrator, only an oven. These apple chips are the perfect snack on the go, ideal for kids lunches, and contain no added sugar - AWESOME SAUCE!
It's as simple as that! If you are ready to try some, follow the easy steps below and consider doubling the recipe since these may disappear very quickly:) Baked Cinnamon-Apple Chips (PRINT RECIPE): Serves 4 Ingredients: 2 large, organic apples of choice Ground cinnamon to taste Directions:
Let me know what you think friends! ~Billie  Resistant fiber or resistant starch is the new kid on the block when it comes to healthy sources of dietary fiber.
This special type of fiber cannot be digested by the human body and passes through the small intestine mostly intact. When it reaches the large intestine or colon, it becomes food for the good bacteria making it a "pre-biotic". Pre-biotics are foods that feed the many strains of beneficial flora in our gut that comprise over 60% of immune system! Over the past several years there has been a surge of information about the importance of the gut microbiome and its connection to many of today's chronic illnesses like Alzheimers, MS, Fibromyalgia, Diabetes, Obesity, Depression, Anxiety, and digestive diseases like IBS, colitis, and Crohn's. When the good bacteria feed on the resistant fiber, they produce short chain fatty acids like butyrate which helps to reduce inflammation, boost metabolism, and improve stress resistance. This is just one example of the important role these good bacteria have and why it is so important to take care of our gut microbiome by avoiding foods that harm it and eating foods that nourish it. Health Benefits of Resistant Starch:
Best Forms of Resistant Starch for Your Diet:
If you've never tried resistant fiber before, start slow - maybe 1 tablespoon of flour in a smoothie or soup and work up to 3-4 tablespoons or to your tolerance. Or 1/2 cup of beans or cooled potatoes with lunch and 3/4 cup with dinner. Your tolerance is the level at which you can eat it and you don't experience bloating, gas, or stomach pain. You may experience this a little at first, but if it persists with even the small amounts of resistant fiber, you could have SIBO, or a more severe dysbiosis problem. If this is the case, I'd recommend working with a qualified functional medicine practitioner to do some testing and reestablish a more balanced gut flora. Check out our Gut Cleanse & Revive Program if you need some additional help in this area. One of our providers will work one on one with you to identify the root causes of your symptoms through functional nutrition labs and help you heal naturally. ~Billie References: 1. https://www.ncbi.nlm.nih.gov/pubmed/16644623 2. http://drchristianson.com/ 3. https://www.ncbi.nlm.nih.gov/pubmed/24499148 4. https://www.ncbi.nlm.nih.gov/pubmed/10535469 Grain Free, Nut Free Paleo Inspired Flour... 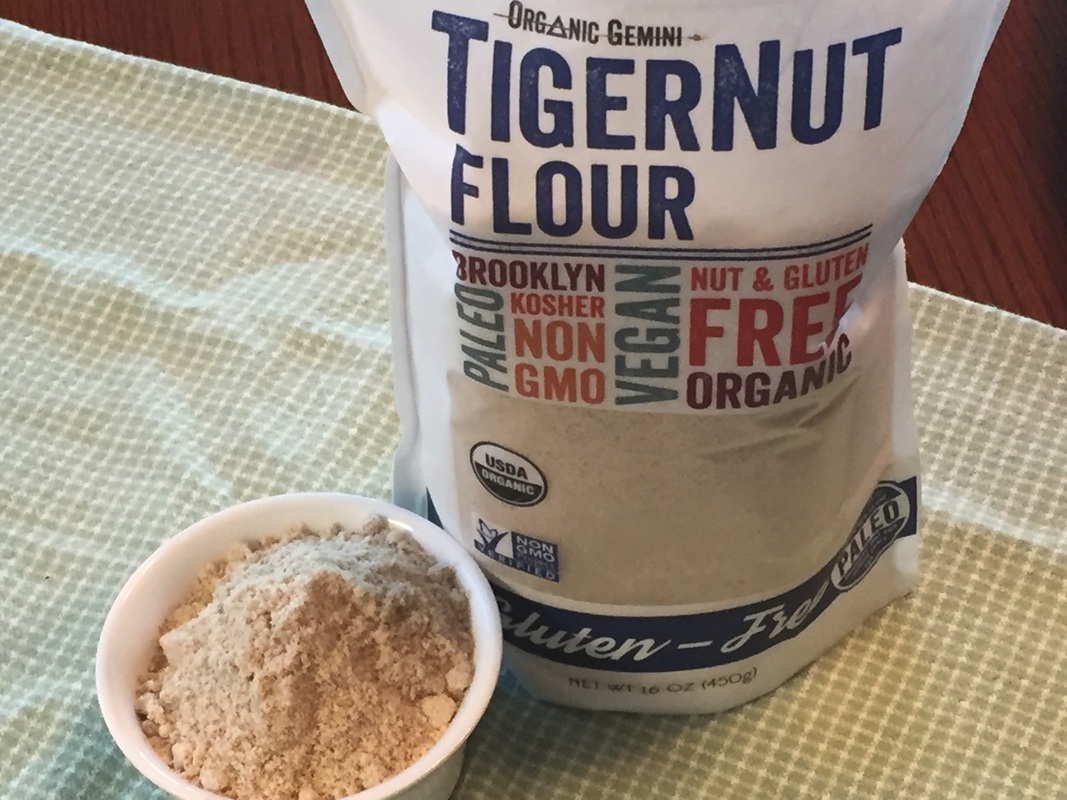 Tiger Nut flour is my new obsession and the subject of today's What's That?! Wednesday post! Tiger nuts have a name that is very deceptive because they are actually not a nut at all - they are from the tuber family so they are a naturally grain-free, gluten-free, and nut-free food. Perfect for those sensitive to nuts and eating a grain-free diet!!
Tiger nuts are grown in Africa and are the underpart of a stem, similar to a root, that grows underground. Potatoes, tapioca, yuca, and cassava are also from the tuber family for example. In a recent Oxford study, tiger nuts were shown to have fueled up to 80% of our paleolithic ancestors diet. Here are some of the reasons why I love Tiger Nuts and Tiger Nut Flour:
Check out my new Tiger Nut Flour Zucchini Muffins for a fabulous recipe the whole family will love. It's perfect for a breakfast or snack on the go ! I'll be posted more tiger nut flour recipes soon...stay tuned and let me know what you think as you experiment on your own. ~Billie **IMPORTANT NOTE: I would not advise that you any forms of resistant starch if you have SIBO as it can feed the bacteria. For everyone else, resistant starch is a fabulous way to make your meals more hearty and reduce your snacking between meals. Grain free. Nut free. Soy free. Dairy free. Gluten free. Low carb. 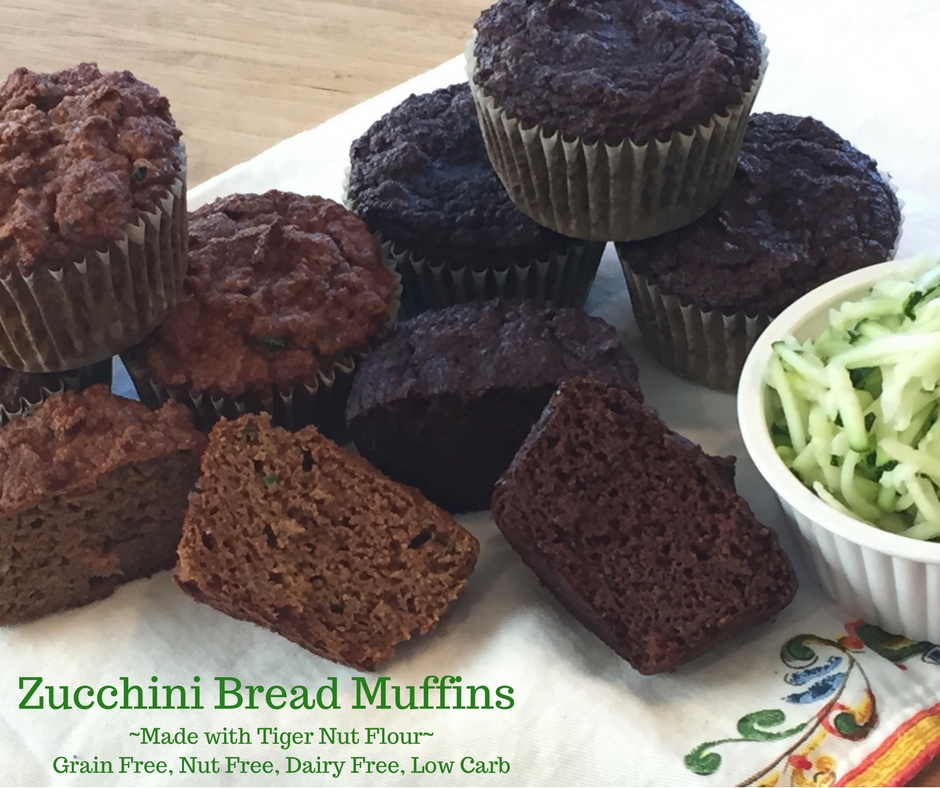 These muffins are a creative way to use up the endless amount of summer zucchini coming out of your garden or being dropped off by your neighbor from their garden. I don't have a garden currently but am lucky enough to have a neighbor who does:)
Last week our neighbor dropped off a big harvest and after making lots of zucchini pasta, I had to think of something else. And that is how this muffin recipe was born. You can make a regular or chocolate version of these muffins that are both super moist, fluffy, delicious, and filling! These are incredible and packed with vegetables and fiber to keep your blood sugar stabilized. A MUST TRY!! I like to pre-shred the zucchini onto some tea towels or paper towels and let it sweat out some moisture. Then blot with the towels to get rid of more moisture before using in the recipe. Store leftover shredded zucchini in 1 cup serving sizes in a freezer safe zip lock. This will allow you to defrost it at a later date for another batch of these fabulous muffins when a craving strikes! And it will...these are addictive! You can also stir shredded zucchini into a pasta sauce or casserole or lasagna for some added veggies:) Lately, I've been experimenting with nut free flours and avoiding coconut specifically and was really surprised to find Tiger Nut Flour which I absolutely LOVE! It has both sweet and nutty notes and nice light texture. Despite its deceptive name, Tiger Nuts are not nuts are all, they are actually from the tuber family. So they are perfect for those who want grain free and nut free flour options. You can read more about tiger nuts and tiger nut flour on my post: What is Tiger Nut Flour? In the meantime, check out this recipe...you will not be disappointed! Zucchini Bread Muffins (PRINT RECIPE) Makes 12 muffins Ingredients: 1 ¾ cup tiger nut flour** 1 ½ teaspoons ground cinnamon ½ teaspoon nutmeg 1 teaspoon baking soda ½ teaspoon salt 3 organic, pastured eggs ¼ cup honey, agave, or coconut nectar ½ cup applesauce 1 heaping cup shredded zucchini (with green peel on) For the Chocolate-Zucchini Muffins: (use same recipe above with adjustments listed below)
Directions:
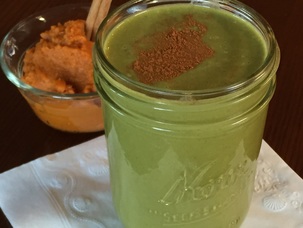
*Each muffin has a total of 10 grams of sugar, but keep in mind that 5.8g of these come from the tiger nuts naturally. The remaining amount is the honey. You can ditch the sweetener completely and increase the apple sauce by 3 tablespoons if you are watching your sugar intake closely. I did this on one of my batches and the muffins still had a good amount of sweetness to them. **You can find Tiger Nut Flour online on Amazon or Thrive Market and it is also making its way onto shelves at some Whole Foods and other natural grocery stores. If you can’t find it, you can substitute almond flour here in the same amount if you’d like. Let me know what you think! Enjoy... ~Billie Gluten Free. Dairy Free. Soy Free. Grain Free. Low Sugar. Low Carb.  If you've never tried chia seed pudding, you are missing out! This recipe is a highly nutritious and energizing way to start the day or get through an afternoon slump. Chia seeds are a low calorie, nutrient dense superfood that offer a great source of fiber, heart healthy omega-3 fats, and protein. Omega-3 fats are super important to get in each day in some way to help reduce inflammation and protect your heart and brain. You can learn more on my blog: Health Benefits of Omega-3 Fats.
This pudding takes 5 minutes to make and will set overnight. The chia seeds will absorb the liquid and expand into a pudding-like consistency. And because chia seeds are so high in fiber and protein, just one serving will really work to stabilize your blood sugar levels, reduce sugar cravings, and keep you feeling fuller longer. Chia seeds can be very energizing, so I like this as a snack in the afternoon when I'm feeling fatigued and craving something sweet:) The flavors and texture are very close to real chocolate pudding so you really feel like you are eating a sweet treat when this hits your mouth! Creamy Chocolate Chia Pudding (PRINT RECIPE): Makes 4 small servings Ingredients: 1 3/4 cups unsweetened non-dairy milk of choice Heaping 1/3 cup chia seeds 2 tablespoons organic unsweetened cocoa powder or cacao nibs ½ teaspoon ground cinnamon ½ teaspoon 100% pure vanilla extract 2 tablespoons raw honey, maple syrup, or coconut sugar/nectar Pinch of salt Optional Toppings: (choose one) ¼ cup shredded unsweetened coconut ¼ cup raw walnuts, almonds, or macadamia nuts 2-3 strawberries, 6 raspberries or 9 blueberries** Directions:
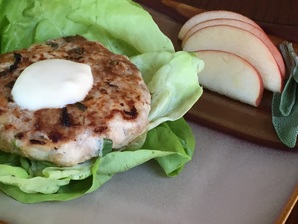
This keeps well in the fridge for about 3-4 days. So I like to make a batch at the beginning of the week and scoop out a snack in the afternoon! If you like simple, anti-inflammatory recipes like this one, check out our Anti-Inflammatory Meal Plans for a wide variety of easy meals and "make ahead" preparation plans. Let me know what you think about the pudding. What other types of chia pudding do you like? ~Billie Anti-Inflammatory, Gluten Free, Dairy Free, Low carb, Super Delicious 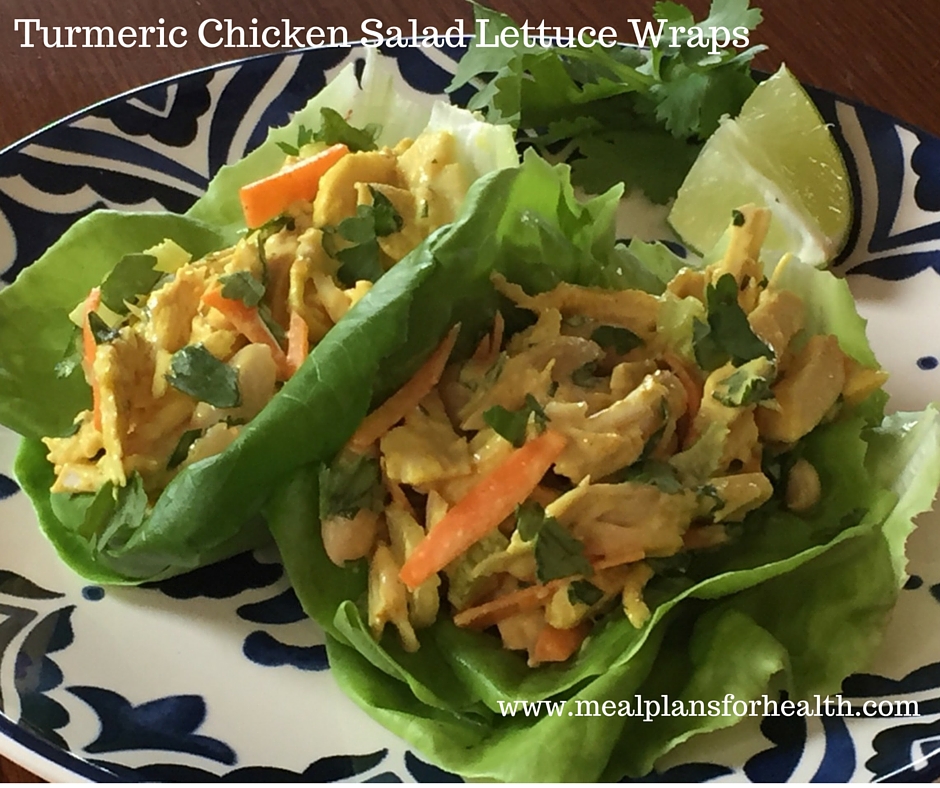 This nutrient dense, anti-inflammatory recipe will awaken your taste buds and keep you feeling satisfied long after your meal. Chicken salad lettuce wraps are a popular meal in our house, especially since most weeks I make a a big Crockpot Roasted Turmeric Chicken.
Then I simply use leftover chicken to make chicken salad;this gives me two simple, healthy meals to start the week off. I'm all about making bigger batches of things and then working leftovers in new ways. This method saves some of my precious energy and makes eating clean much easier! Check it out... Turmeric Chicken Salad Lettuce Wraps: (PRINT RECIPE) Serves 4 Ingredients: 1 teaspoon coconut oil 1 ¼ pounds organic, free range chicken breast, chopped or shredded ** 3 tablespoons organic mayonnaise made from cage free eggs & olive oil ½ teaspoon ground turmeric ½ teaspoon salt ½ teaspoon pepper 1 carrot, peeled and julienne sliced or minced 1 rib celery, minced 3 tablespoons fresh cilantro, minced Juice of ½ a lime 1 cup organic cannellini or great white northern beans, rinsed 8 large organic leaf lettuce leaves (Romaine, Butter, Bibb, Boston, etc) **Or use leftover, pre-cooked chicken to save time. Directions:
I hope you enjoy these as much as I do! Let me know what you think. ~Billie |

Billie Shellist, FDN-P
I practice functional nutrition, an approach that allows me to look at your entire health history and help you find the "root causes" of your chronic health complaints. This cuts out the trial and error process and helps you get real symptom relief and resolution! Food is medicine and knowledge is power -I hope you enjoy my anti-inflammatory recipes which are gluten, dairy, and soy free as well as very low grain and sugar. If you'd like to heal from the root cause(s) of your chronic symptoms, try starting with a complimentary 15-minute consultation. Click here to request your free session. |


|
Copyright 2024 Functional Diagnostic Healing. All rights reserved. Professional photography by Priscilla Durkin- www.priscilladurkin.com Privacy Policy - Legal Notice |